Results 1 to 25 of 89

Thread: Loading Bench Plans

Hybrid View

Previous Post Previous Post   Next Post Next Post
  1. #1
    New Member scrooster's Avatar
    Join Date
    Sep 2014
    Posts
    7
    My reloading room is a work in progress, but it is getting there ...

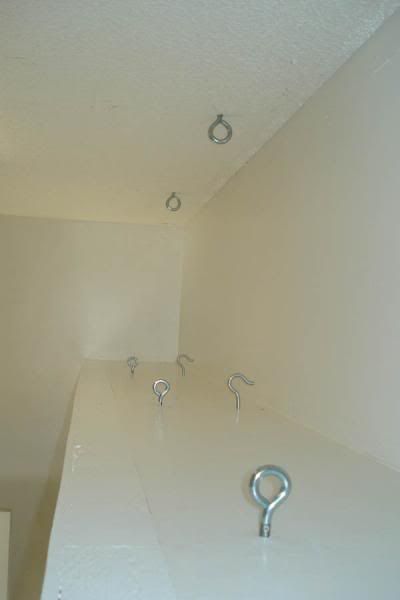
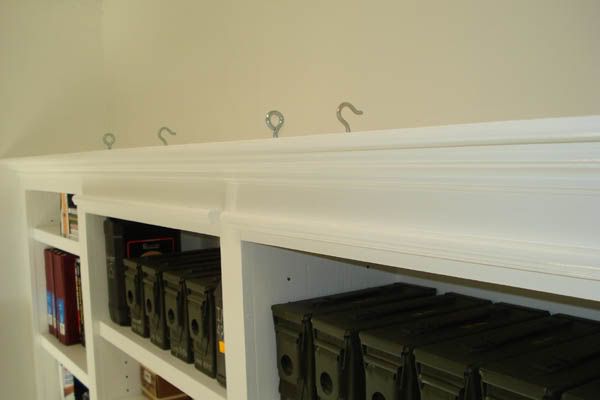
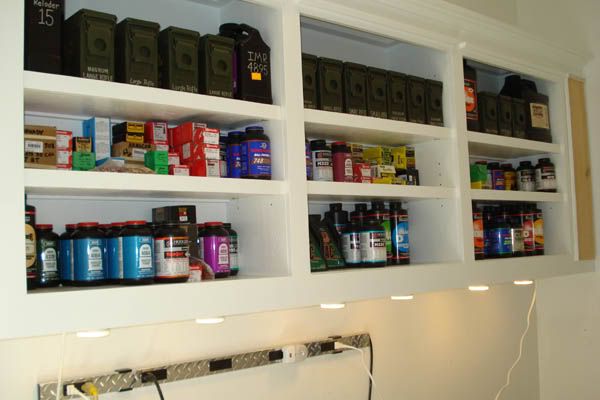
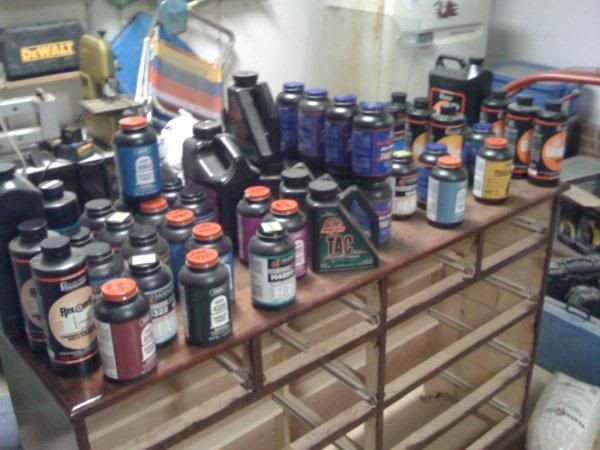
    After I built the custom cabinets, and I built them stout and tied them into studs with 4# heaving stainless screws and synthetic glue ... I still wasn't satisfied that they would hold the weight so I am rigging a cable hung system connected to the rafters and I'm going to enclose this area atop the cabinets for more storage space. When completed the 400# rated cables with be tightened with turn buckles.


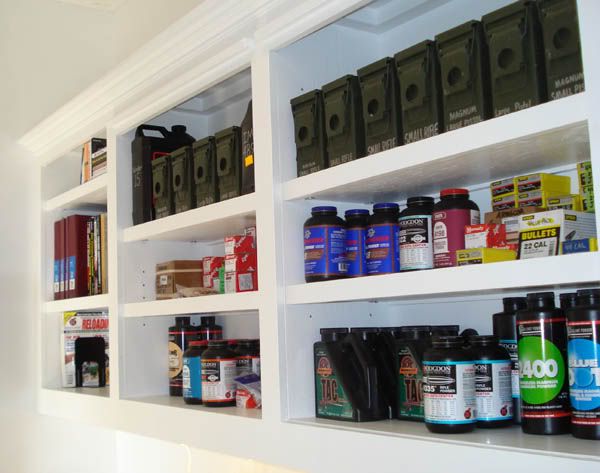
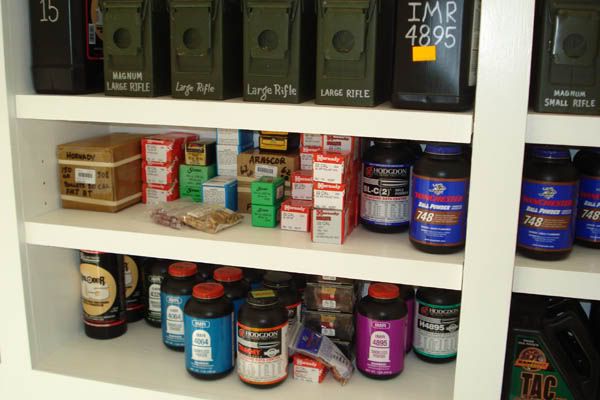
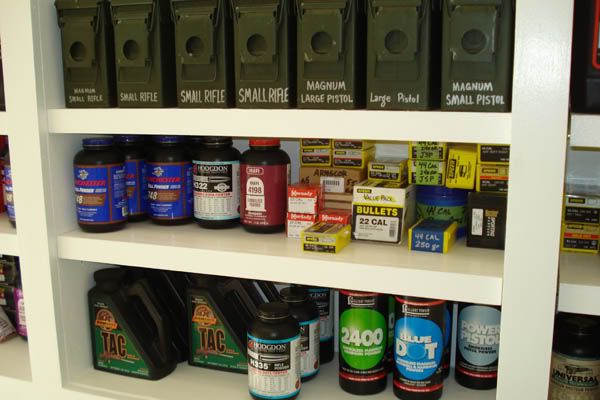
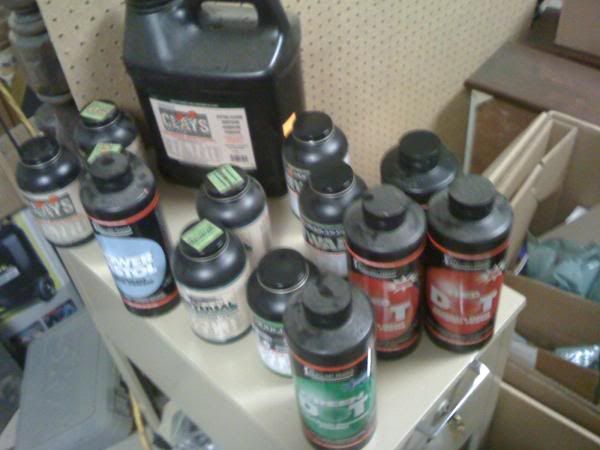
    I fit what I could in there, and even in some cases doubled-up on the contents of my powder jars if space allowed and they were from the same batch/lot number. So almost all of the jars showing have more than one pound of powder in them.


    And, as everyone does, I've arranged my powders that I was able to fit in there according to burn rate.


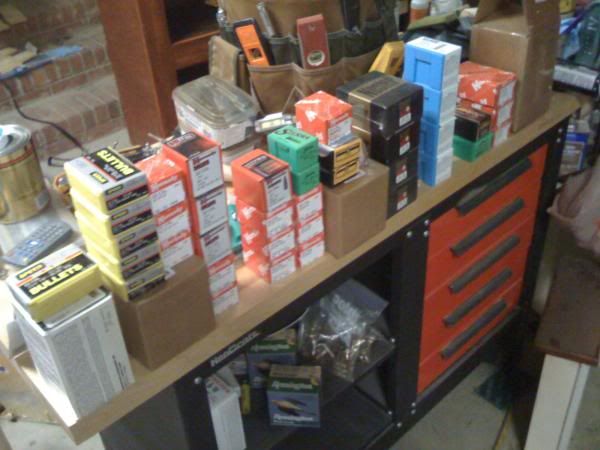
    ... but I still have a lot more to put somewhere so I am refinishing a dresser that I can keep in another part of the shop to hold the overflow:


    ... and this storebought reloading bench now sits in the far end of my reloading room. I mount a press to this ...


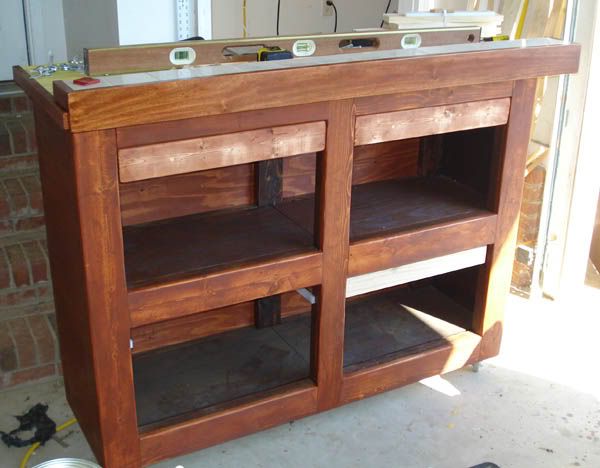
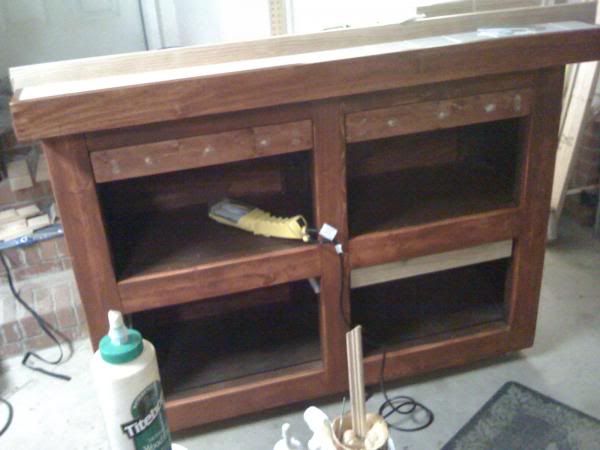
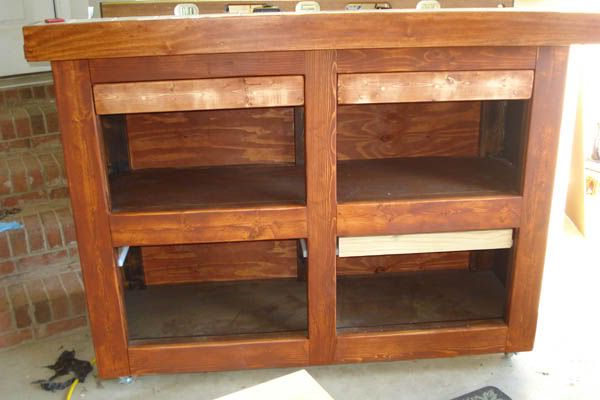
    ... but I am also building this custom bench from which I can sit-up on a stool and work from a standing position as well.


    It has a tile backsplash, which you can see detached sitting on the from edge, that I was refinishing when I took this picture. It has lots of drawer space plus I built it specifically to hold large ammo cans. I'm building the bifold doors for it now. These pictures were taken when I was building and installing the draws which are built on custom teflon grooves in order to hold extra weight but still remain slick.


  2. #2
    New Member JCinPA's Avatar
    Join Date
    Mar 2015
    Location
    Eastern PA
    Age
    67
    Posts
    10
    My son and I got tired of reloading in the garage and sweating to death in summer, freezing in winter. After looking at a lot of bench plans that usually went along a wall and were pretty long and narrow, I started to think about a square bench. In the basement we can walk all around it, and I thought it would be easier for the two of us to work on it at the same time if it was square rather than long/narrow. I figured it would also be a bit more stable than a narrow bench. And here it is!


    I decided to go with the Simpson Strong-Tie bench kit shown here.


    The kit contains the 8 corner angles, special screws for use with them, and an instruction booklet, and is available for about $40 USD at your big-box hardware stores. Yes, yes, I know it is not terribly hard to do your own legs without the braces, but I don't have a lot of tools and like I said, I wanted this to be fast. So, I did my planning went to a big box store and had them cut all the parts (with the exception of the lower shelf) so that basically I had a kit to work from once I got home. To see basic assembly techniques, see this video by the Simpson Strong-Tie manufacturer.


    Basic Design

    The benchtop is three layers of 3/4 inch birch plywood, glued and screwed together, and is approximately 49 inches (125 cm) square. Are three layers of plywood necessary? No, I suppose not, but it does make this bench very hefty (it's about 210 pounds {95 kg}), give or take, (and that's without the presses). The bottom sheet is a single layer of plywood, and the base frame is entirely built from 2x4 framing lumber. I edged the top edges with 1x3 poplar edging strips to give it a more finished appearance and for durability of the plywood edges.

    My benchtop height is 38 inches (96.5 cm) high, but you can vary that to suit your preferred working height. I did not make a cut list, but my measurements are below. It takes two full sheets of plywood, and I had them cut it to 47 5/8 inches wide on the store panel saw, then reverse it and trim the cut edge of the second half to 47 5/8. this was to account for the width of the saw blade, and I could have had them cut closer to square, but this worked. Each piece then has 3 factory and one cut edge, making it easier to align the laminations. I had them cut all the 2x4 pieces and left the store with 4 plywood panels and 12 lengths of 2x4.


    This shows how I placed the top so as to leave bolting space for my two presses. I left about a 1/4 inch overhang along the flush edges, they were not completely flush.


    Tools I used for this project:

    • Cordless drill/driver
    • framing square
    • combination square
    • speed square
    • molding saw and miter box
    • block plane
    • decking screws (1 1/4 inch and 2 inch)
    • wood glue
    • router (for T-Track - optional)
    • sandpaper
    • polyurethane stain/finish
    • cheap paint brushes
    • Kreg mini pocket hole jig system


    I did not take a lot of photos of the build process as it is so simple (I'm not a "woodworker" by any stretch of the imagination) it really is not necessary. The nice thing about the Simpson Strong-Tie kit, if you use it, is if you accidentally put a bracket on facing the wrong way, when you reverse it, the screws do not line up in the same holes, so it is pretty much idiot proof. I'm the proof.

    Process:

    I use a 1/2 inch plywood sheet on a couple of folding sawhorses in the garage for gun cleaning and this became my workbench for this project. First assemble the 2x4 leg structure according to the video. The only thing I did that might not be familiar to some of you is use of a pocket hole jig system so I did not have to drill screws into the benchtop when I was finished. Because I don't do a lot of woodworking, I got the least expensive tool Kreg offers. If you like to do home handyman or furniture projects I highly recommend this, but go with a more comprehensive tool. If you use the mini, as I did, pay attention to measuring where to place the jig based on the thickness of material you are using. I used 2 1/2 inch screws. Here is a shot of me using it. I used the combination square to draw the pencil line for placing the jig, used the speed square to line it up and then clamped it securely for drilling.

    I used this inexpensive one. https://www.kregtool.com/store/c13/k...g-jigreg-mini/


    If you are working outdoors or in the garage, like I did, make two frames and then move to the final location before attaching the stretchers. I did that in my basement.

    Next, I glued up the top layers. Place cardboard down on the garage floor to protect the working top, spread plenty of glue, align the first two sheets, then I had my son stand on it to provide pressure while I screwed 1 1/2 inch decking screws into the top. You want to ensure the pieces are in tight contact or else the screw will actually hold them apart, not draw them together, that's why I had him stand near where I was screwing. So I would avoid hitting any screws when drilling the press mounting holes or routing the T-Track slot, for the middle and top layer, I measured in about 7 inches from each edge and put a 7x7 inch grid of screws down. I also put one screw about 2 inches in from each corner. For the bottom-to-middle layer, I measured in about 8 inches and put down an 8x8 inch grid of screws, placing one screw about 3 inches in from each corner.

    Just because of weight, we did the first two layers in the garage, then put the third layer on in the basement. Yeah, we're not weak, but we're lazy. So, now I had the top glued up and the frame in the basement. We laid a generous glue line on top of the frame, my son helped me place the top, then I got underneath to drive the screws up through the pocket holes to attach the top from underneath.

    Once you have the top in place, use your presses to lay out and drill your bolt holes. You will need to mount them against the plywood to get bolt clearance and work around them when you do the edging later. Don't tighten them down yet, just leave them there with the bolts dropped in to keep them from slipping off while you do the edging.

    You could let the bottom shelf overhang the frame, but I did not like that, so I used a wood fence and sawed the fourth piece of plywood off with a jigsaw to fit the base, then notched the corners for the legs. Because this is not a fine furniture build, I cut the corners generously so I did not have to work to fit them in. Then I edged the top with the 1x3 edging. Be careful to measure twice and cut once and watch the direction of the 45-degree bevel at the corners. I violated the measure twice cut once rule and ended up with having to make a filler piece. You can also leave the ends square if you like. I drilled a starter hole through the edging for decking screws every 7-8 inches then we glued up the edging and screwed it in place, wiping up any squeeze out. I got a little practice with the block plane I haven't used in years to trim the edges to the plywood top (leave the edging just a bit proud of the top for this). But it is like riding a bicycle and it came back pretty quickly. I did go against the grain once and got a bit of chipping, but soon it was smooth planing!


    Use the block plane to chamfer the top and bottom outside edges of the edging a bit, too, to prevent splintering. Next step was to use a little wood putty in the corners, sand and you are ready to finish. I used Varathane brand mahogany stain and polyurethane finish (water based) with some cheap brushes for speed. Again, this is a working tool, not furniture. But I did sand the top and apply a second coat when it was done, the bottom only got one coat.

    If you are going to use the T-Track, rout the channel for it before finishing (I did mine later, but it's safer to do it before finishing). Remove the presses for finishing and let dry a good 24 yours. Then mount the presses and install your T-Track. Here is a detail of a press mounting. You can see the break in the edging to allow the press to butt up against the plywood edge.


    Here is a detail of the (optional) Rockler Universal T-Track. I installed 24 inches of this because for the powder measure, case trimmer, primer pocket swager, etcetera, I like to mount them on boards and clamp them down when I use them, and this system keeps the top uncluttered, since you just use one at a time. I forgot to leave space at the end of the track to remove the T-bolts, so my clamps are always there, but I can chisel that in later if it bothers me. If you use this option, leave some space at one end so you can slide the T-bolt out so you can have a flat surface, if needed. Mount the T-track just below flush, using the router.


    I mounted a heavy-duty outlet strip on an upper frame side ...


    ... and put some shop lights overhead. I will move the cord for the shop light I installed above the bench to a ceiling outlet soon. You can see it dangling in the finished photo at the start of this thread. We're loving reloading life right now!


    P.S. @Maztech89, I just saw your square bench with another bench kit (Post #75). Nice! I love being able to fully walk around mine. I have since put shelving underneath. I am surprised we do not see more square reloading benches. Two thumbs up on your bench!
    Last edited by JCinPA; 03-22-2015 at 03:24 PM. Reason: Addition

Similar Threads

  1. Change of plans for my 110 short action
    By Muddly in forum 110-Series Rifles
    Replies: 5
    Last Post: 10-23-2017, 03:38 PM
  2. Portable loading bench
    By Luke45 in forum Ammunition & Reloading
    Replies: 9
    Last Post: 04-22-2014, 08:07 PM
  3. My Plans for Converting Old-Style DBM to Blind Mag
    By Chrazy-Chris in forum 110-Series Rifles
    Replies: 6
    Last Post: 08-10-2013, 11:08 PM
  4. New to the Savage family via Stevens 200... Build plans??
    By timtiminy in forum 110-Series Rifles
    Replies: 2
    Last Post: 07-31-2013, 02:04 PM
  5. please double check my plans
    By squirrel_slayer in forum 110-Series Rifles
    Replies: 2
    Last Post: 05-01-2013, 10:33 PM

Bookmarks

Posting Permissions

  • You may not post new threads
  • You may not post replies
  • You may not post attachments
  • You may not edit your posts
  •