Results 1 to 9 of 9

Thread: Savage Frankenstein - 10BA Stealth Action into a 12VLP Stock Using a 110 Tactical DBM AICS Bottom

  1. #1
    New Member Stilgar308's Avatar
    Join Date
    Oct 2018
    Location
    East Valley Phoenix, AZ
    Posts
    12

    Savage Frankenstein - 10BA Stealth Action into a 12VLP Stock Using a 110 Tactical DBM AICS Bottom


    So I picked up a 10BA Stealth last December for a really good price. Its a right hand chambered in 6.5Creedmoor. I've always loved the 6.5x55 Swede and when Hornady came out with the 6.5CM for a short action I thought that was the ticket. I got the Stealth and than quickly found out I prefer the classic wood look and shape/handling over the MDT Chassis. I also picked up a Vortex Viper PST 6-24x50 ERB-2C MOA scope. I shot it a few times and just found the scope to be too much and I never warmed up to thew chassis, either on the bench or prone it just never felt right. If a firearm dont feel right for you it wont shoot for you.

    I was looking at replacing it with a B&C M-40 Medalist with a CDI bottom metal. While looking on Ebay for a more affordable bottom metal option I came across an auction on a factory Savage DBM package from a 110 Tactical 308. I emailed him and soon was on the phone talking with him and after an hour BS and getting details on Savage rifles in general I find out he has a new unmounted 12VLP stock with an open bottom. He checked and the 110 DBM metal fit right in but the trigger guard area on the stock needed a bit of opening up to fit the new trigger guard. The plan was to get the DBM metal fitted and then bed the action and then have fun. After selling the Vortex which I lost veyr littl eon I decided to go with a 12x42 SWFA SS scope with MOA quad reticle.


    After coming to a deal he sent me the DBM metal and stock. The Bottom metal did fit but it turned out there was a shelf design for the internal drop magazine that was not allowing the DBM AICS metal to sit all the up where it needed to. Int he pics below you will see the red highlighted areas I am talking about that need to be removed. I measure everything I could, the shelf that needed to be removed, how far away the metal was form the pillars and how low the magazine sat from where it should and how high the metal protruded out of the bottom of the stock. They were all around .175" to .190" good enough.

    I HAVE A DREMEL AND IM NOT AFRAID TO USE IT! I also have a lot of sandpaper!


    The rifle all the DBM bottom metal came from


    Ignore the Typos in the next two shots. I obviously meant "DBM" and "level"


  2. #2
    New Member Stilgar308's Avatar
    Join Date
    Oct 2018
    Location
    East Valley Phoenix, AZ
    Posts
    12
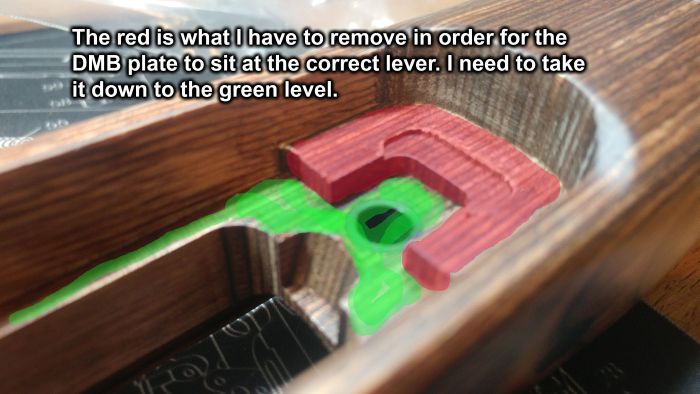
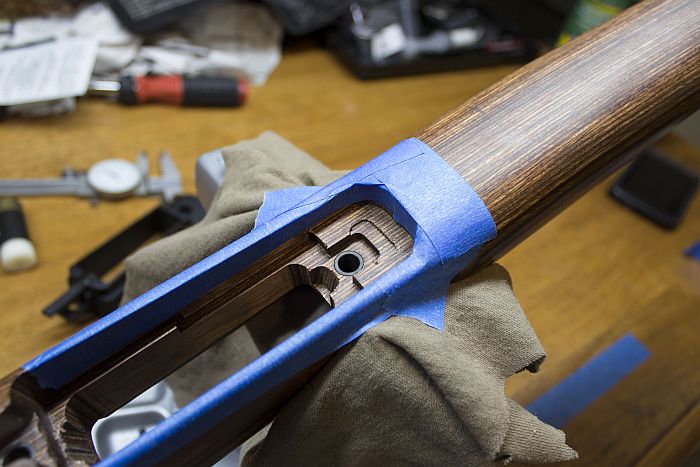
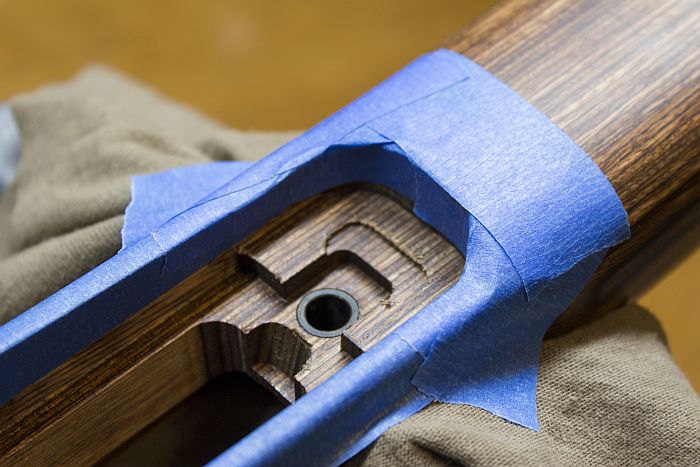
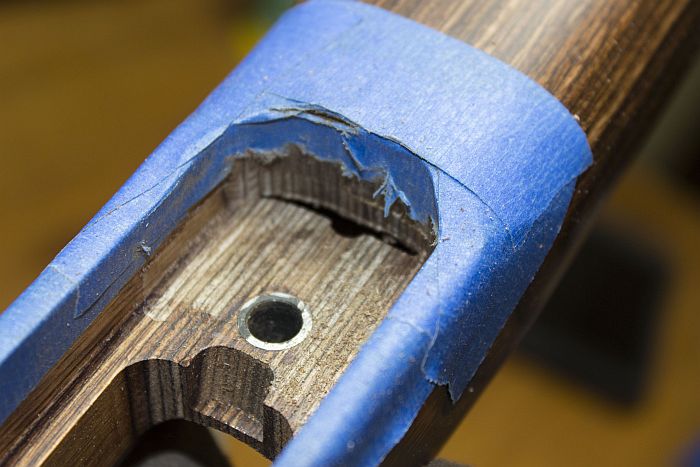
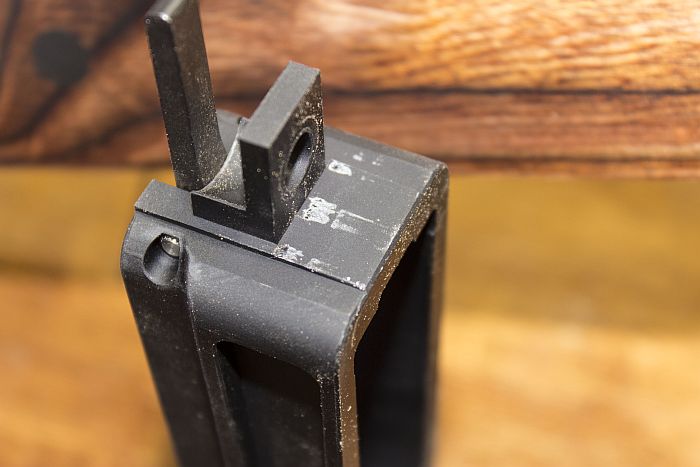
    Time to remove the shelf. Because it was at an angle it was a bit tricky but I used some old calipers to measure and scribe the woof on the narrow shelves up front. I tape off the stock as to hopefully not nick it.


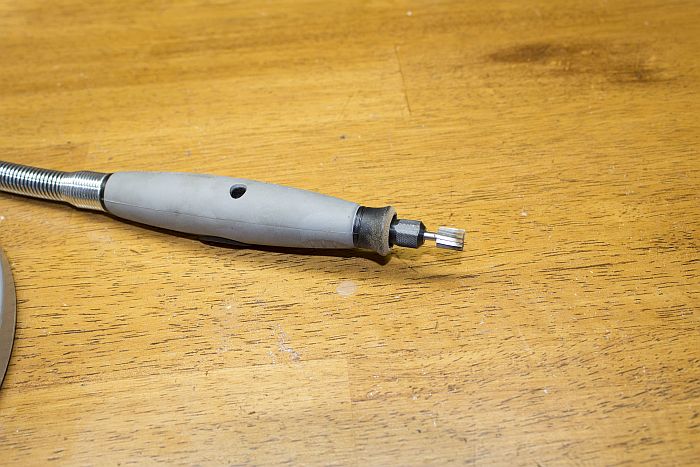
    I used a dremel Flex Shaft for better hand control. One wrong move and the stock is shot. You can find the flex shaft here.


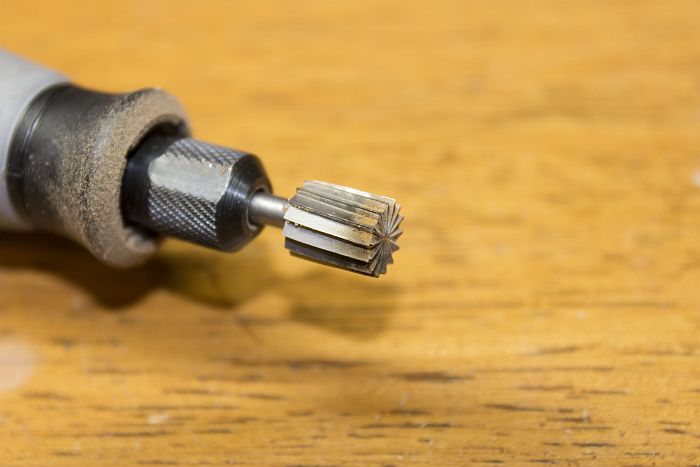
    I used a Dremel 5/16" carbide bit at max speed. This made for smooth cutting with little effort. The bit never caught and jerked out fo my hand it was very controllable. Carbide bit can be found here.


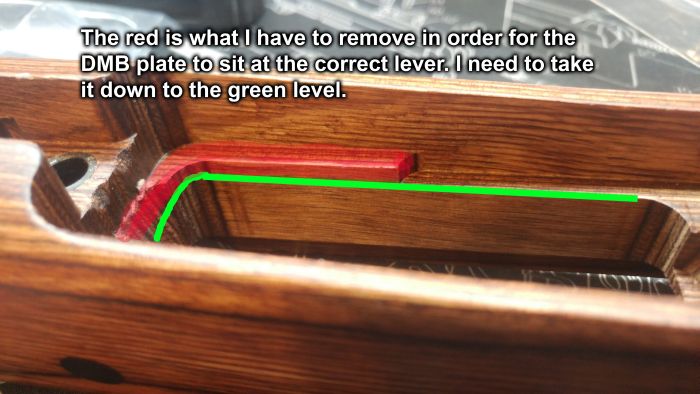
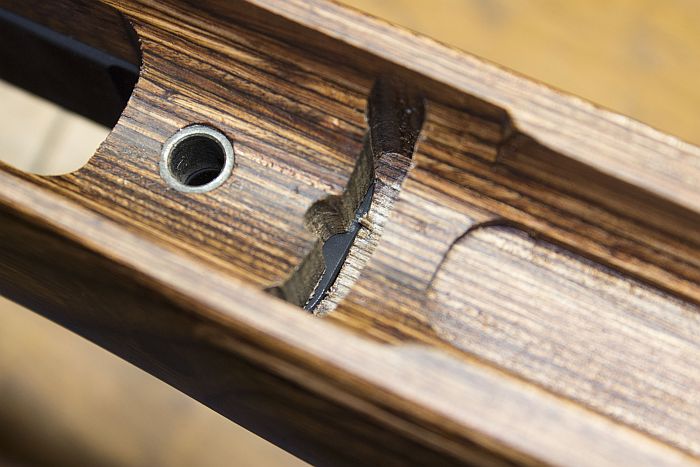
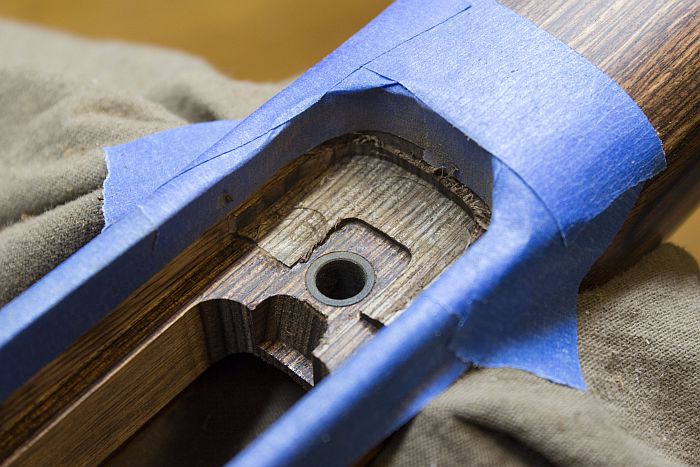
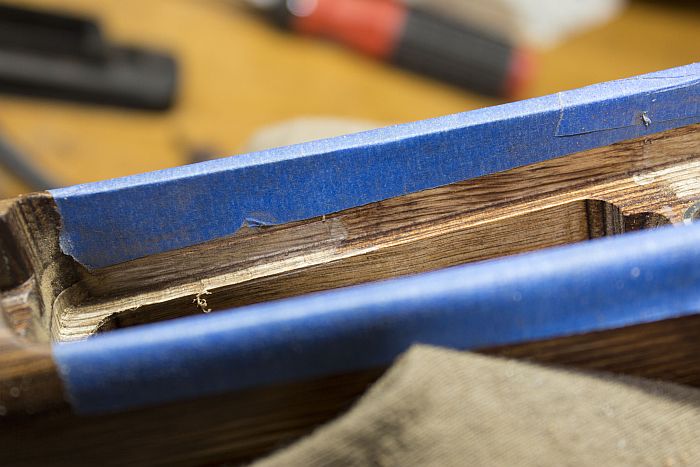
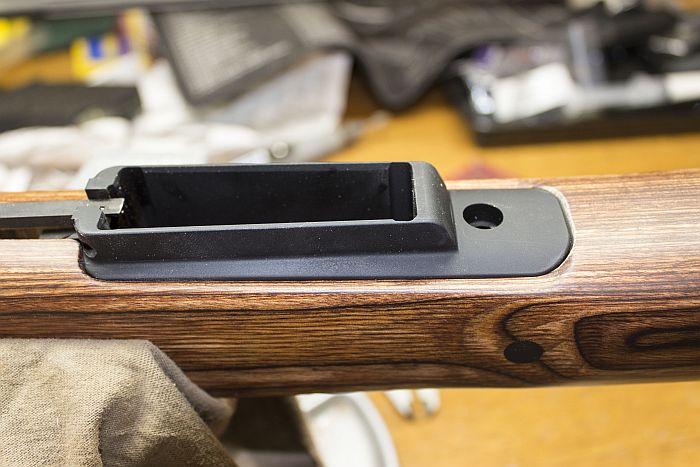
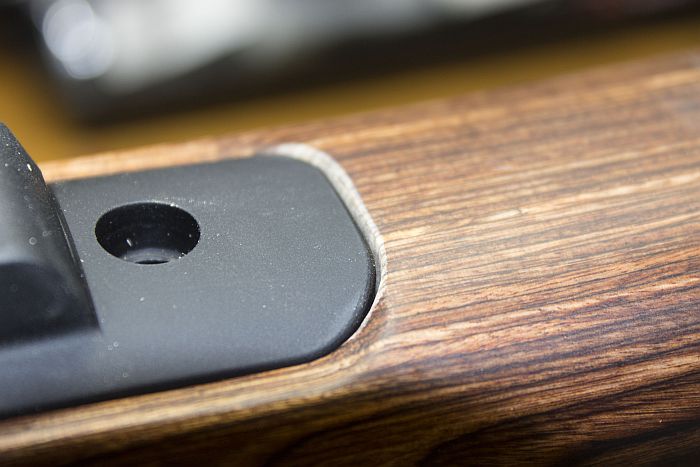
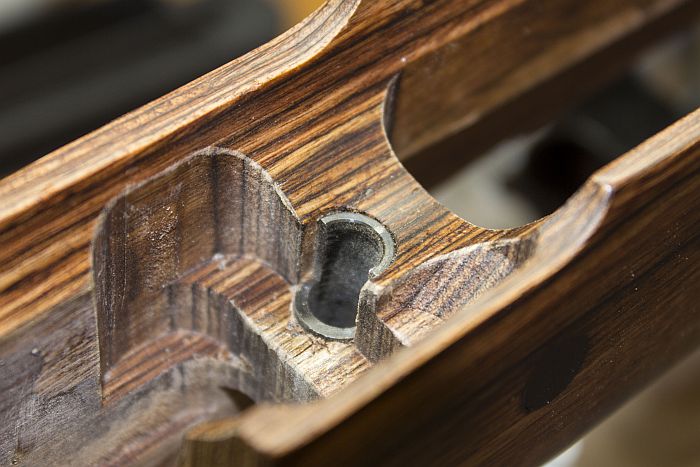
    Not sure if its a screw up but either way I had to cut the shelf down to make it level which just broke through into the recoil lug channel. It was literally paper thin cutting in. Plan will be to bed the bottom metal which will cover that back up then I can bed the action as normal.


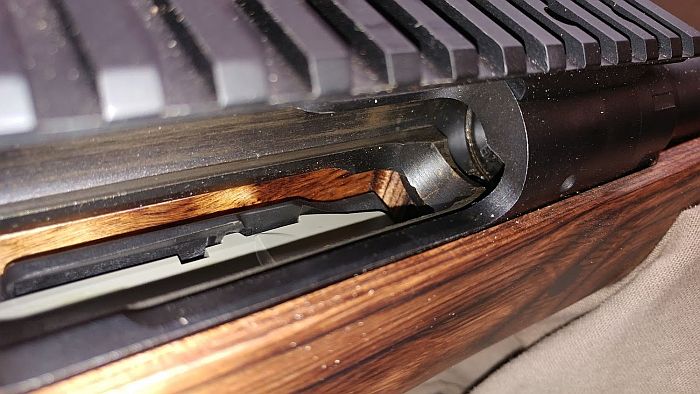
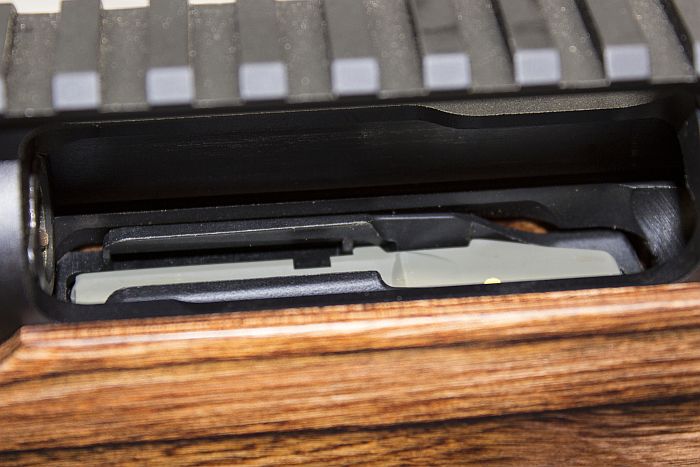
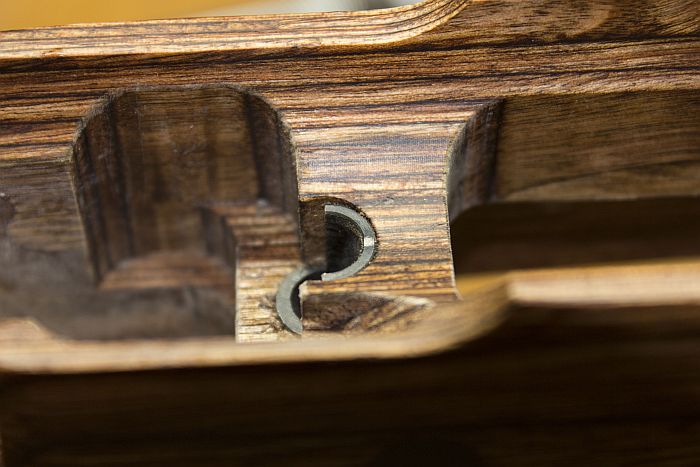
    Even after just the initial cutting out the majority of those areas has already made it possible to assemble the rifle and have it function as it should.
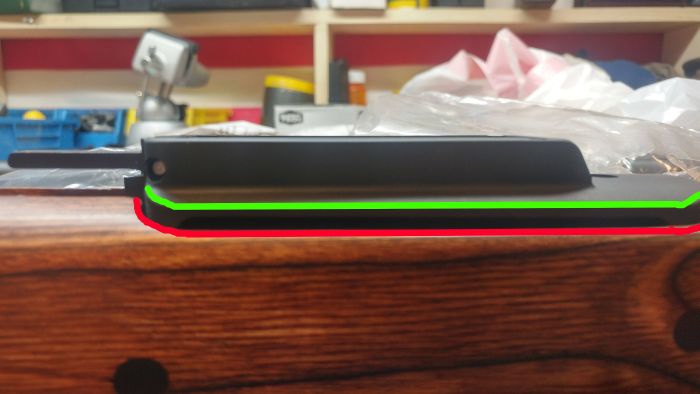
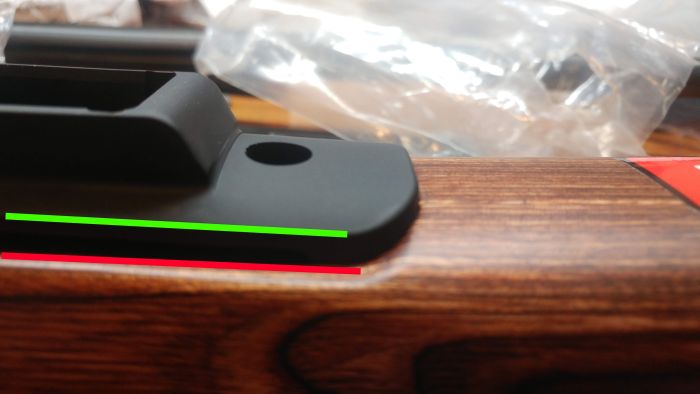
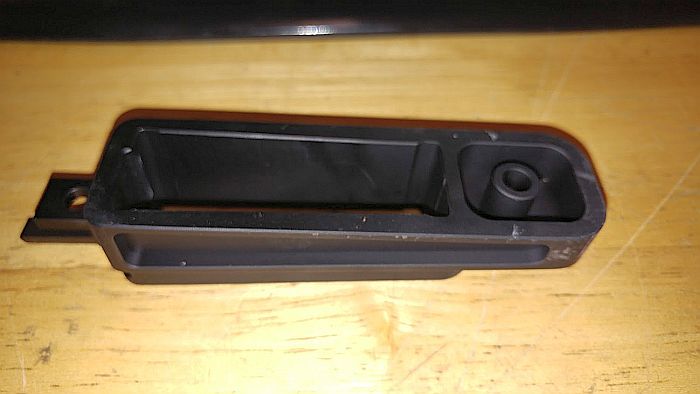
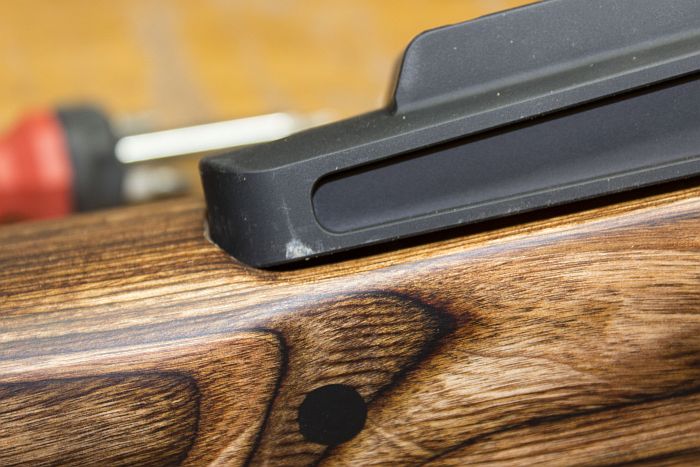


    Before


    After


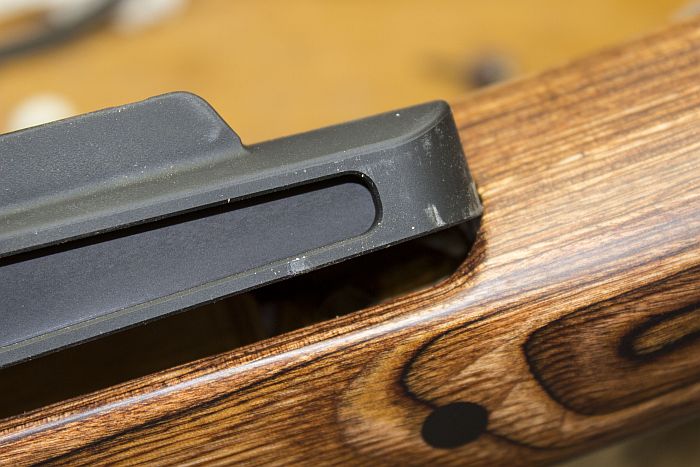
    You can see the edge of the bottom metal showing through the Recoil lug channel


  3. #3
    New Member Stilgar308's Avatar
    Join Date
    Oct 2018
    Location
    East Valley Phoenix, AZ
    Posts
    12
    The bottom metal still had some resistance. You can see the spots where material still needs to be removed.


  4. #4
    Administrator J.Baker's Avatar
    Join Date
    Dec 2006
    Location
    NW Ohio
    Age
    49
    Posts
    6,468
    Now you know why Savage is only using the new AICS bottom metal on rifles that are fitted with an AccuStock and thus have the shorter recoil lug that's used with it.
    "Life' is tough. It's even tougher if you're stupid." ~ John Wayne
    “Under certain circumstances, 
urgent circumstances, desperate circumstances, profanity provides a relief denied even to prayer.” —Mark Twain

  5. #5
    New Member Stilgar308's Avatar
    Join Date
    Oct 2018
    Location
    East Valley Phoenix, AZ
    Posts
    12
    Quote Originally Posted by J.Baker View Post
    Now you know why Savage is only using the new AICS bottom metal on rifles that are fitted with an AccuStock and thus have the shorter recoil lug that's used with it.
    Did not know that. but that does make sense. Yeah Im going to bed in the bottom metal then will bed the action so that will be solid again.

  6. #6
    Basic Member
    Join Date
    Dec 2006
    Posts
    3,360
    That was normal on the first version of the DBM's until they changed the casting of the mag frame slightly on the front. Once they did that, they modified the inlet to not break through. That little break through won't hurt anything, but its a pain to bed. I usually tape up the hole from the bottom when I bed the action so the bedding compound doesn't run out.
    "As long as there's lead in the air....there's still hope.."

  7. #7
    New Member Stilgar308's Avatar
    Join Date
    Oct 2018
    Location
    East Valley Phoenix, AZ
    Posts
    12
    Well its all seem to be coming together.


    Going thru and smoothing some of the corners on this leftover from manufacturing.


  8. #8
    New Member Stilgar308's Avatar
    Join Date
    Oct 2018
    Location
    East Valley Phoenix, AZ
    Posts
    12
    Just ordered some more items for the project

    I decided to go with the factory type Savage tactical handle. I just wanted the larger knob but without the extended length that you find with a lot of the aftermarket knobs.

    You can find it at MidwayUSA. Savage #108188
    https://www.midwayusa.com/product/67...ob-steel-matte


    Best price I found so far for the Devcon was here. https://amzn.to/2ALnsKR


    After reading enough reviews and bedding project from others I decided to go with the Kiwi Shoe Polish for the release agent. Best price I found was Amazon https://amzn.to/2OpB2HI


    Others have gone with Play-Doh but I have preferred using Clay. I find it a bit more stiff, stays in place and in shape much better. Yes it is a bit more to clean up but it also doesn't have the salt content to attack steel. Just a preference. Only $4.36 https://amzn.to/2qsqBcA

  9. #9
    Basic Member big honkin jeep's Avatar
    Join Date
    Mar 2007
    Location
    Metro Atlanta Georgia.
    Posts
    2,549
    That link is for the tactical style which is a pretty long unit and much longer than the varmint style. It looks exactly like the one of the rifle in the first pic in this thread and may be the same one you already have? The varmint style is the large ball round one. I'm pretty sure it's the one you're thinking of.
    Here's a link in case you didn't see it. https://www.midwayusa.com/product/1778193602/savage-arms-1-piece-bolt-handle-assembly-savage-10-110-large-knob
    Good luck and have fun with your project.
    A good wife and a steady job has ruined many a great hunter.

Similar Threads

  1. Replies: 5
    Last Post: 11-01-2018, 02:35 PM
  2. Savage 10ba stealth
    By LEJ76 in forum 110-Series Rifles
    Replies: 21
    Last Post: 04-10-2017, 10:18 PM
  3. Choate tactical stock and AICS bottom metal
    By Sodoc388 in forum 110-Series Rifles
    Replies: 6
    Last Post: 01-30-2017, 09:20 AM

Bookmarks

Posting Permissions

  • You may not post new threads
  • You may not post replies
  • You may not post attachments
  • You may not edit your posts
  •