


 Reply With Quote
Any ideas for the little nubbin that locates the recoil lug to the action? What should I use there on the PTG one?
Thanks


First things first, thanks CAPTBEACH for the inspiration (and subsequent depression) from your Wood is Good
build thread. I truely hope you have another stock in your hands by now, and the time to invest in the inletting and finishing of a nice piece of wood.
So, I picked up a couple $30 lefty 110 LA walnut stocks from Numrich's and began the adventure of wrapping my barreled action in decent hardwood, rather than the stained birch.
Action is left handed LA 30-06 110E serial starts with an A, and old enough that I had to get a different trigger pivot (e-clip style) to swap in place of my set screw retained version. Here
Original purchase here.
Anyway, here are some photos of the process. I bought a 3/8 gouge and sharpened it and also sharpened one of my narrow straight chisels, and got going.
Couple hours of making little wood out of big wood and here we are...
I also want to rebarrel to .243 and add this little gem...
As things are finished I will definitely be updating, I am going to attempt this type of finish.
https://www.youtube.com/watch?v=m9LZsZMmXpE
Brandon
Any ideas for the little nubbin that locates the recoil lug to the action? What should I use there on the PTG one?
Thanks

Drill rod, roll pin, tape the hole install a set screw?
Just ideas
Few more photos, first few are of the second stock I purchased from Numrich's, to show the originalshape and condition of the semi-inlet stock blank.
forend
Barrel channel
And a few updates,
I know, the cheek riser area looks a little weird with the transition being a little jagged. I was taking some influence from the Weatherby Mark V stocks and got a little carried away, plan to smooth that transtion and keep it a little more traditional/organic.
Bedding, should it be done before I finish the stock, or finish it and then bed the action?
Thanks,
Brandon
Thank you Drybean for the tension pin idea for the recoil lug. Drilled it out to 1/8" and inserted the pin, now to trim it to fit the index notch on the action.
Stainless barrel nut should be here Saturday and my go gauge should be here middle of next week. Think I will space the head with an empty case and install the nut loosely and get the stock let in for the notched nut this weekend. Oh and replace the valve cover gasket on my Tacoma....
I can't wait to shoot this thing.
Go ahead and bed the action prior to finishing the stock. That way any bled over bedding can be easily cleaned up w/o having to worry about messing up stock finish. Your doing some fine work on that stock, looking forward to see the finished product.
I like the idea of using a roll pin on the recoil lug. I gotta remember that for future builds.
Yeah, I think I saw that on one of Larry Potterfield's videos, bedding prior to finishing.
Refining the shape of the cheekpiece will go a long way to cleaning up the look of the stock, but you've done a great job so far. Once the finish is on it, I bet that will be a thing of beauty.
Received the barrel nut finally and my go gauge, so I threw it together this weekend and got the final inletting done. Time to bed the action and then start teh finish, once the weather warms. I don't think my wife is interested in having me in the house with a stinky chemically rifle.
So it's getting close, not fast enough though.
I can say that it does cycle the SA rounds just fine. I stripped the bolt and cleaned it and now that is a little clunky. I used a little Rem Oil, I know,I know, on the bolt while it was apart. Can't find 90 gr accubond bullets anywhere. Nosler doesn't even have them currently. I like the way those expand at the velocities I will be shooting. Picked up some ballistic tips in the meantime and will reload those into some of the lubalox nickel cases from some Winchesters I bought at the gun show today. Apparently everyone bought .243 yesterday and no one had any today.
I also trimmed an inch and a half or so off the butt of the stock to get my LOP a little more comfy. The 14" just want gonna do.
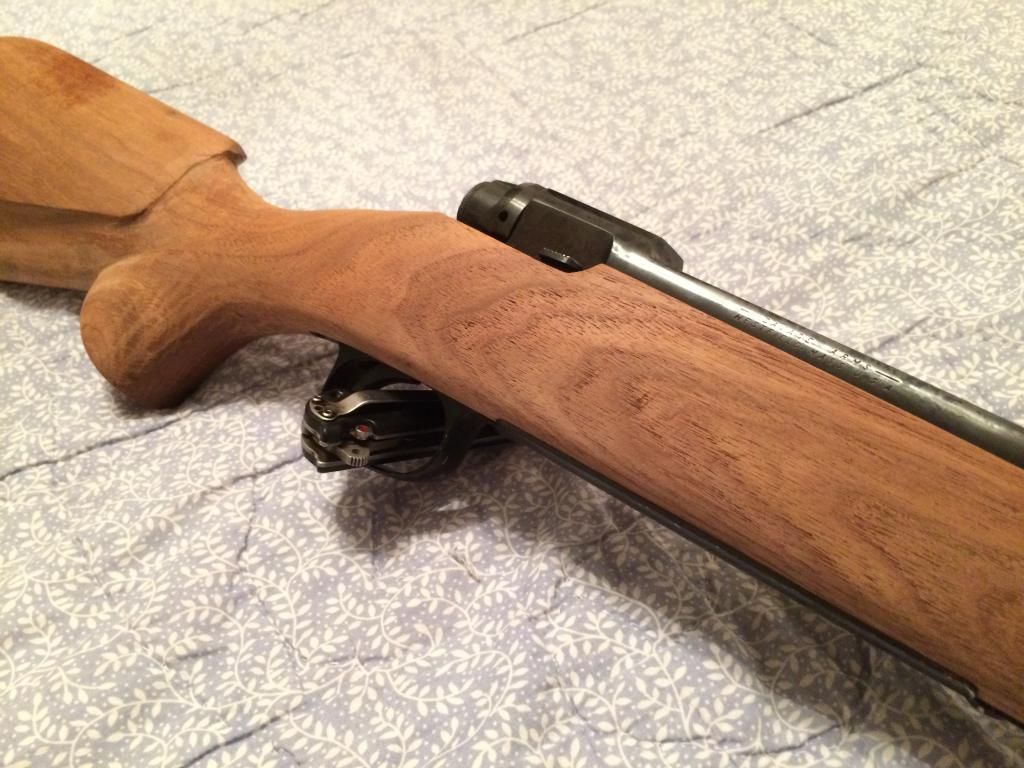
Little more work showing the butt trim and a bit of reshaping around the cheek riser and flute area. I will be rounding a bit more of this and using mainly sandpaper, maybe a spot of round filing, but I should be done with the chisels and gouges now.
I found a recipe for the 95gr Nos BT on Hodgdon's site using H414 that I already have and my Father in law handed me a set of dies the other day. May just do a simple sanded in BLO finish after the bedding to get this thing to the range sooner rather than later. How much of a smell does BLO have?
Brandon
BLO hardly smells at all. It has a nutty and slightly metallic smell, but compared to some of the sharper, more acrid smells of the carriers in film finishes, it's practically odorless. If you thin it out with odorless mineral spirits, you're more likely to smell the mineral spirits than the oil.
Do you suggest thinning the first coat?
I typically thin all the applications when I'm finishing, but I wet sand them in too. For touch-ups, I will apply the oil unthinned, but for the business of turning unfinished wood into finished wood I cut it by 1/3 to 1/2 for each application.
Okay cool, thanks for the tip.
Nice stock work. That'll be one fine piece when all finished.
I like it. In fact, I have the right hand version of that stock. Could you pist pics of the bottom metal so I may see how it is supposed to be inletted? Keep up the good work!
The bottom metal on mine isn't "inlet". I just contoured the bottom of the stock to accept the metal.
Can't wait to see how it turns out!
Does the rear action screw go through the bottom metal and trigger guard or is there a wood screw to attach the rear of the floor plate?
There is a wood scre that goes at the rear of the trigger guard. The other two screws are machine type and run through to the action. Countersunk heads that are received by a sort of countersunk hole in the floor plate. If that makes sense.
So yes, the rear action screw goes through both the bottom metal and the front of the trigger guard.
 Posting Permissions


Bookmarks