


 Reply With Quote
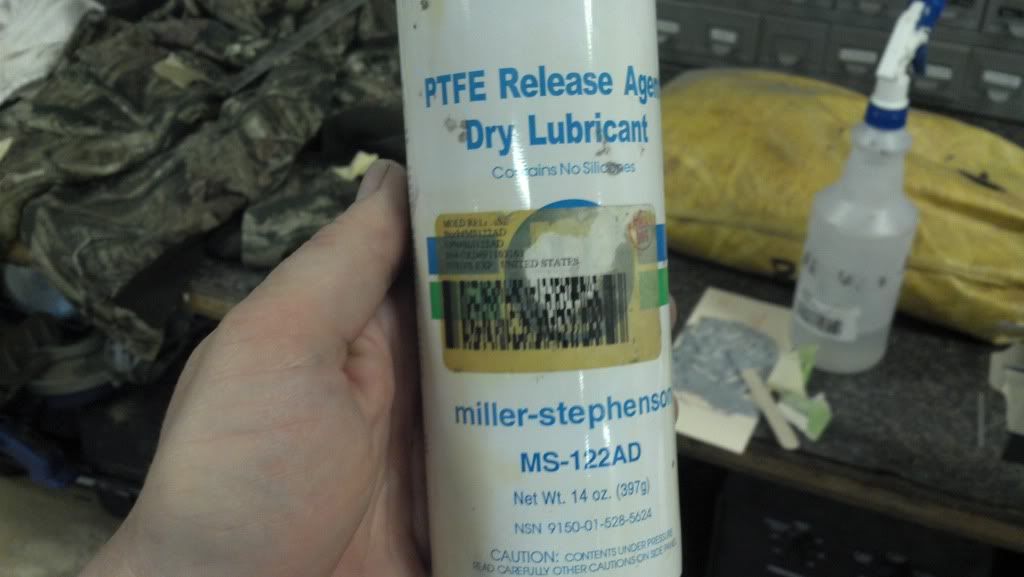
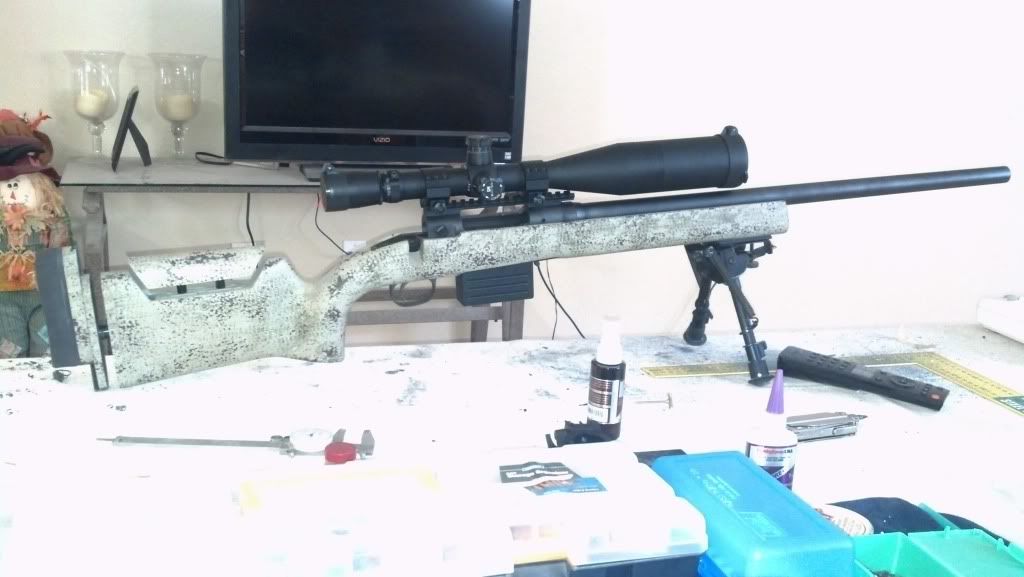
Now for a little dry run test fit. Note the little pieces of aluminum taped to the sides. These will help keep the cheek from sliding side to side. I also sprayed them with release agent:


Ive done a little searching here and on Google, and have seen some nice installs by the likes of Stockdoc and others, with adjustable cheek pieces installed on composite stocks. But the only "how to's" I've seen are with wooden stocks, and the install is a little different.
I'm no proffessional. This is a hobby for me. How I did it may not be how the pro's do it, but it worked for me. I 'got my skills' from growing up in a garage and working on various things and building model aircraft for over 20 years. My aviation maintenance/sheetmetal background probably helped a bit, too! But anyone with the desire, a dremel, and some basic 'bodywork' skills can do this, IMO.
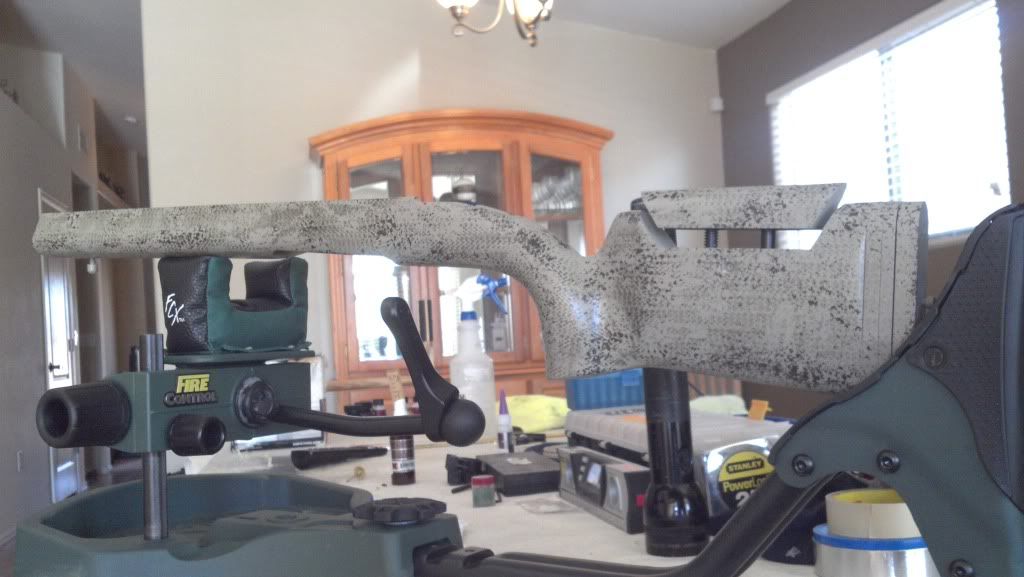
I started off, after a little measuring for fitment/functionality(clearing the bolt and adjustable butt-piece I also installed), drawing out the shape I wanted on my HS Precision tactical stock. You can see holes in the stock in this pic. They were from my Karsten cheek piece that I did not care for - the will get filled in later:
Once drawn out, I took a dremel with a cutoff wheel and cut it out. Do your best to keep the shape of the cheek piece when cutting and don't worry too much about how the stock gets a little over-cut during this process. The HS is laid up with a variance of fiberglass, kevlar, and carbon layers wrapped around a hard, foam-like core. So all you really need to do is cut through those layers and you can get the rest with a razor knife:
Now that the cheek piece is out, I want to fill those holes before I proceed. I just covered the holes with masking tape and filled the [now exposed] openings with some epoxy:
Once cured, remove tape. Done with that:
With that done, I cleaned up the cheek piece with a sanding block to square everything up, starting off with 80 grit, then 180, then 220. after I got the shape where I wanted, I went over the edges of the fiberglass that I sanded with a thin layer of superglue to seal up the exposed fibers, then finished off with 400 grit. Don't worry if you change the shape a little or shorten it up a little in this process, just get it looking clean:
Now it's time to go back to the stock. just take some 60-80 grit and scuff everything up real good, clean it up with alcohol, then tape off around the edges with masking tape:
Back to the cheek piece, I need to prepare it so it will 'release' once Ive used it for the mold work coming up. I simply put a single layer of boxing tape over the entire bottom, including the fore and aft sides, then trimmed the edges along the outline of the cheek piece with an xacto blade. I do this for a smooth surface, but I still want to rely on a release agent. I used the spray release pictured below, but any release agent you've used before will work(like kiwi shoe polish):
Now wrap the outside with tape and trim to the edge as cleanly as possible. I just do this so I don't have to sand off a bunch of epoxy later. In this pic you will also see a flat piece of metal taped to the top of the cheek piece. This was also wrapped in boxing tape and a release agent applied, and it will serve as a 'hanger' so the cheek rests level with the stock:

Now for a little dry run test fit. Note the little pieces of aluminum taped to the sides. These will help keep the cheek from sliding side to side. I also sprayed them with release agent:
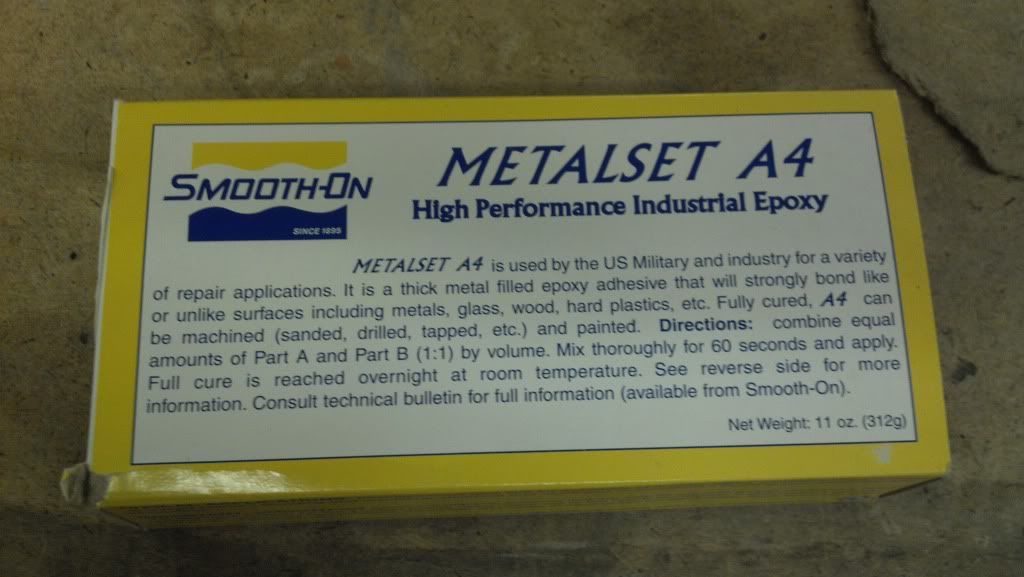
It's time to get dirty! I decided to try this stuff - Smooth on Metalset. It is paste-like, aluminum filled, negligible shrinkage, and was readily available to me. I would almost consider using it for a bedding project. But any epoxy you use for bedding, such as devcon 10110, will work:
I didn't get pics of the process of applying the epoxy, but it's pretty straight forward. Basically, you almost can't apply too much. In fact, I didn't apply quite enough and ended up with a few voids, as you will see in later pics. Once you get the cheek piece on top of the epoxy and in place, roughly, take a scraper and get rid of the epoxy that has squished out. Once you get it roughly cleaned up, tape the cheek in its final resting placed and continue by doing a final scraping off of excess epoxy. Keep an eye on it here and there and just make sure it doesn't do anything funny:
Once the epoxy has basically set up you can remove the tape:
I waited until the next day to start sanding. Since I will be painting this stock I wasn't too worried about the current finish. I just took a block sander to it to remove the epoxy 'flashing' and to make it appear seamless:
Once that's done, you can smack the side of the cheek a couple of times with your palm and the cheek should pop right off. I cheated a little and already sanded off the excess on the inside, but this is what you should have:

I'm using the KMW loggerhead hardware. It's quality stuff, easy to install, and is only about $50 from Terry Cross. Coincidentally, the receiver just so happens to fit fairly snug in the stock. I just had to notch the front sides with a dremel to relieve the tangs. I kept it snug enough, though, to where it will hold itself in place while the epoxy sets:
Once i got it trimmed to fit in place snug and got the holes drilled in the sides, it was ready for glue. I took a piece of balsa wood wrapped in boxing tape and sprayed with release agent, cut it down so it was a snug fit and used it as a "wall" to hold back the epoxy while it cured. Once cured, I popped the piece of balsa off and done:
I got a little excited and didn't take as many pics from here, but the stock is basically done and the cheekpiece is pretty straight forward. All I did was slip the cheek hardware into the base all the way down and determined where it needed to go in the cheek, then used a rotary file to hack away at the under side until I got the fit I wanted. It's OK, in fact desireable to oversize slightly here:
Then I put a small bead of epoxy around the inside edge of the cheek, slipped it onto the cheek hardware while it remained installed in the stock, and taped the cheek in place while it set up:
At this point, you could use the supplied screws I suppose, but I don't trust that core material of the stock to hold threads very well, so I just put another bead of epoxy around the gapped perimeter of the plate to glue it in place. Clean excess off with alcohol as needed:

Done deal! and the fit is near perfect...

Nice work. Thanks for the write up.
Some may also notice that the but piece isn't stock. It's just a choate 3 way adjustable unit that i purchased from tactical works.com for around $80. I wanted a Dave tubbs setup but they are nowhere to be found in stock and are a little more expensive. It's by no means a bolt on fit but I made it work. I measured and hacked off the back of the stock so that the lop would remain the same once installed. Then I drilled where the two mounting screws go and installed threaded inserts. I still don't trust that foam to hold, so once i got it sanded to fit, i glued it in place with epoxy (only a small amount and only around the mounting holes-the sides need to be able to float slightly for the clamping mechanism for the lop adjustment).
It want hard to install, but without special tools readily available, a belt/disk sander had to do. Took me a good two hours of sanding, quenching in water every 15 second to keep the heat down. Not many pics, but this pic shows the measure mark, which is what i had to sand it down to:

Very cool!
I may give that a shot. Have a stock laying here that would be perfect to use.
Thanks for the detailed write up.


Very nice work. Thanks for sharing
volt
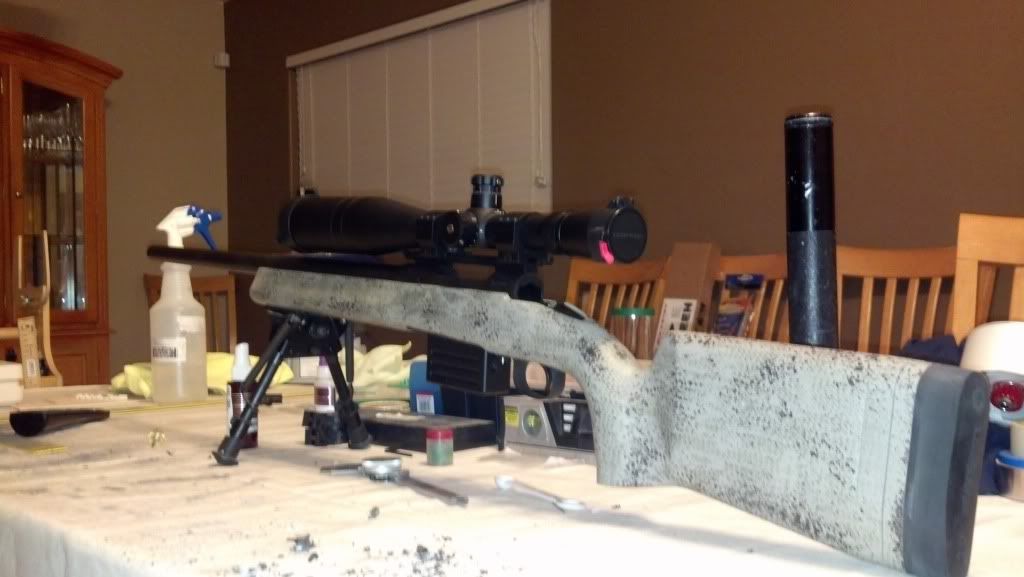
In the process of painting it now. Nothin special, just a krylon job. Honestly, if it wasn't "for the hell of it" and being broke i wouldn't have bothered with this stock. Much prefer manners or McMillan.

very nice work, waiting for the final results.....
Paint is done. Picture doesn't do it justice really, and the matte finish clear ended up with a little sheen to it. I'll have to hit it with some scotchbrite.
Looks much better with a barreled action on it. Much, much better. But it will look even better than this when i get my flat dark earth cerakoted, APA Little Jimmy braked Krieger barrel chambered in rem260 ;-)
Nice job. Great description and pictures
6CM
Thank you!
I have a stock in route to stockdoc to have the kit put in. I hope mine comes back looking as nice as yours. You did most excellent work and did a great job of documenting it.
The thread is bookmarked for future reference. :t
Thank you! Stock doc does a more practical/tactical cheek. Its not seamless like mine. All the corners are rounded to avoid pinching, nicking etc.
Excellent Job!
That job came out very clean. Nice job!
I have kept this link as it was an inspiration then and now for all DIY'ers. Thanks Bodywerks.
The Dunning-Kruger effect is alive and well.
You did a great job on the installation. Great write up!!
One of my favorite write-ups to date. Even if it is 3 years old.

[I]"In the end, run what 'ya brung because it's better than nothing and don't give two ****s what some interwebs chat board guy says about your rig."[/I]
My Savage 12 LRP will be the same pretty soon 😉
As has been said, thank you for the step by step write up, that's great work. Can I ask what type of mag youre using and how does it function?
 Members who have read this thread in the last 1 days: 0
Posting Permissions
Members who have read this thread in the last 1 days: 0
Posting Permissions


Bookmarks