Results 1 to 24 of 24

Thread: Drilling into a HS Precision stock???

  1. #1
    Team Savage nathantc's Avatar
    Join Date
    Nov 2014
    Location
    Lumberton Tx
    Posts
    239

    Drilling into a HS Precision stock???


    Ok So im finally starting my rifle project. Im $1900 invested up to this point, so i don't want to ruin the stock. My issue is i want to install this

    150-108 Stock Embedding Spigot Versa-Pod Bipod Adapter


    So has anyone here modified a HS Precision stock? I'll need to drill a hole about 8" deep into the forearm, and then decide what to use to epoxy/glue the spigot into place. I know there is other ways of attaching my Fortmeier bipod but this is how i want my end results to look, feel, and function.


    Below is a photo of my rifle (Savage 110 FCP HS Precision in 300 PRC, SKU Number. 22088) using the dual swivel stud mounting holes with a picatinny rail i had, that just happened to fit perfectly, and the rail to spigot adaptor that came with the bipod


    And this is how i want my finished bipod set up to look, feel, and function. This is just sitting in place for a mockup to give a better understanding.


  2. #2
    Banned
    Join Date
    Jan 2016
    Location
    Suburb of Filthadelphia.
    Age
    45
    Posts
    5,704
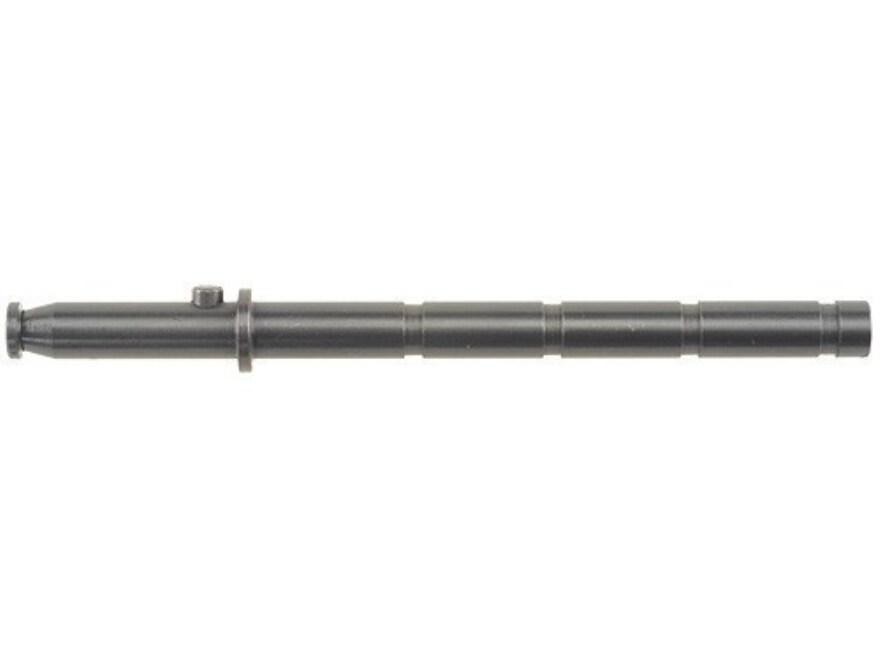
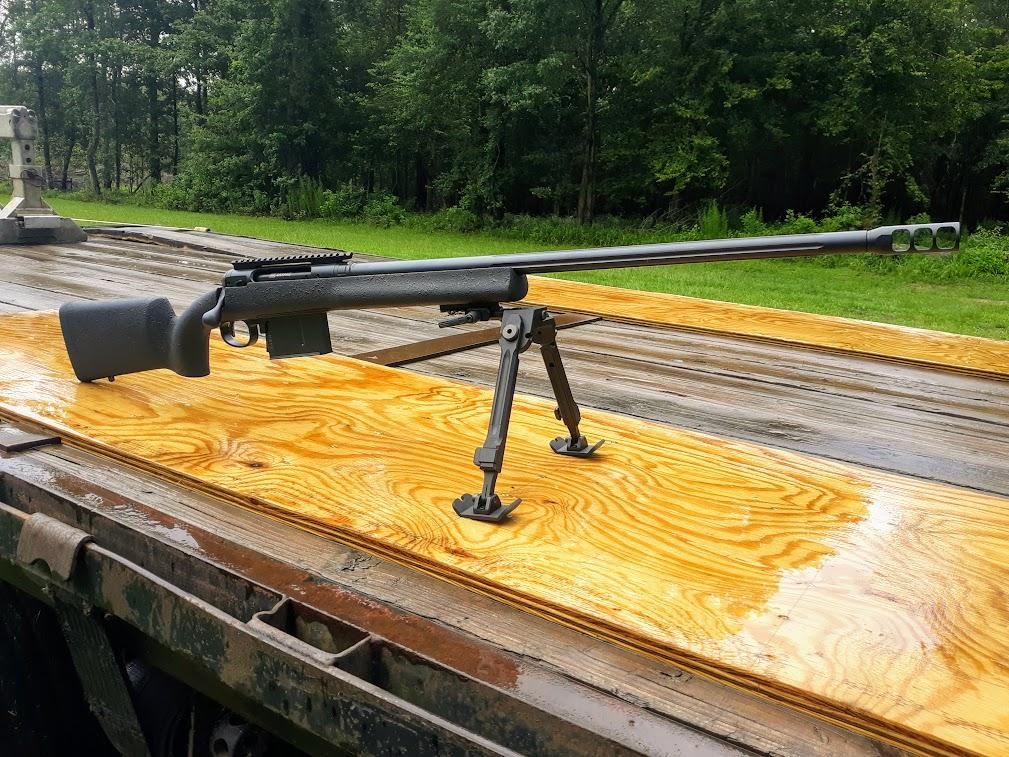
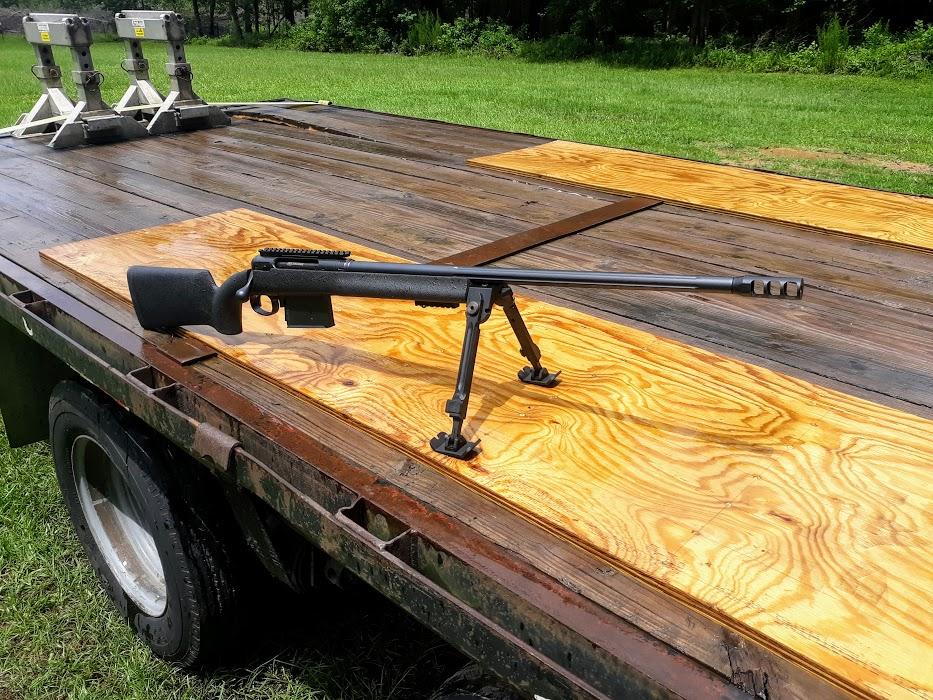
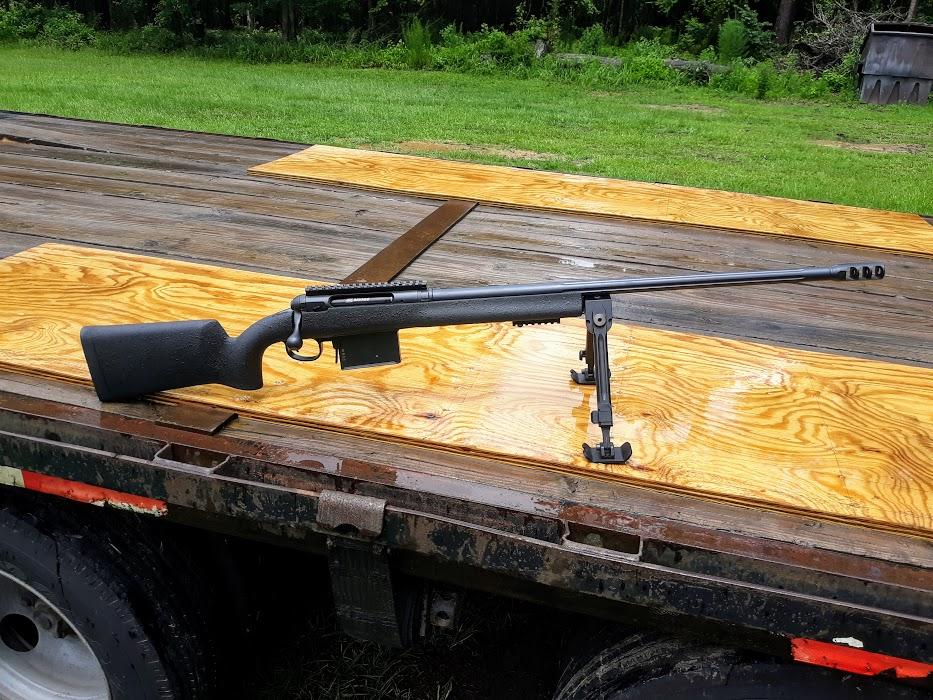
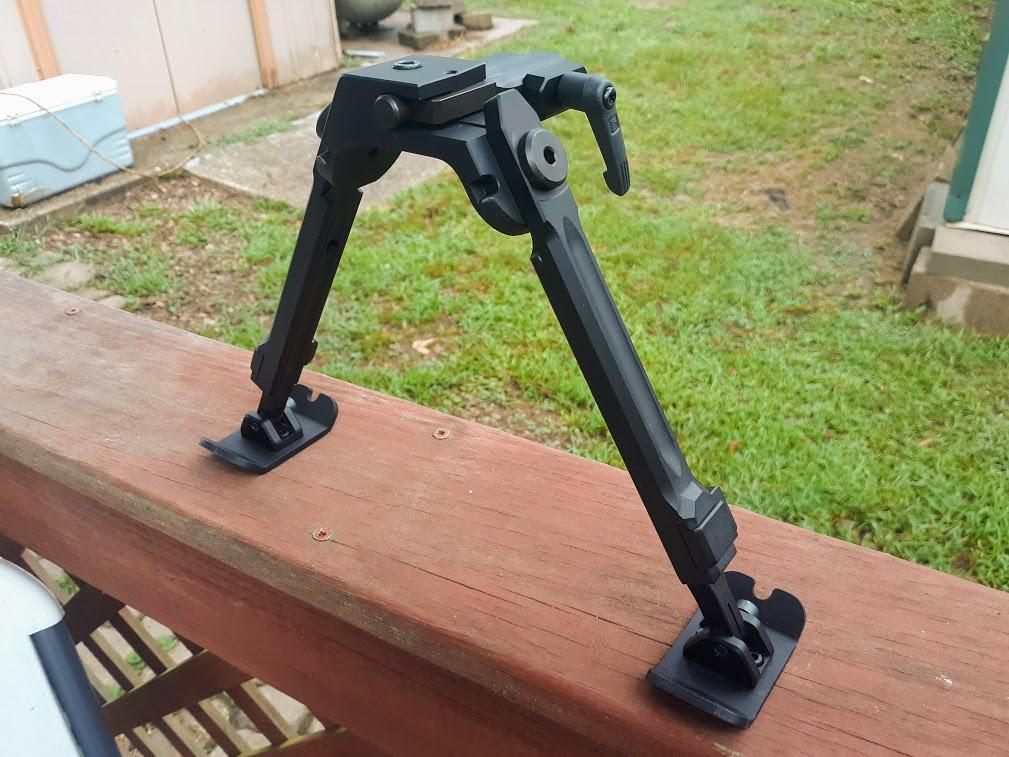
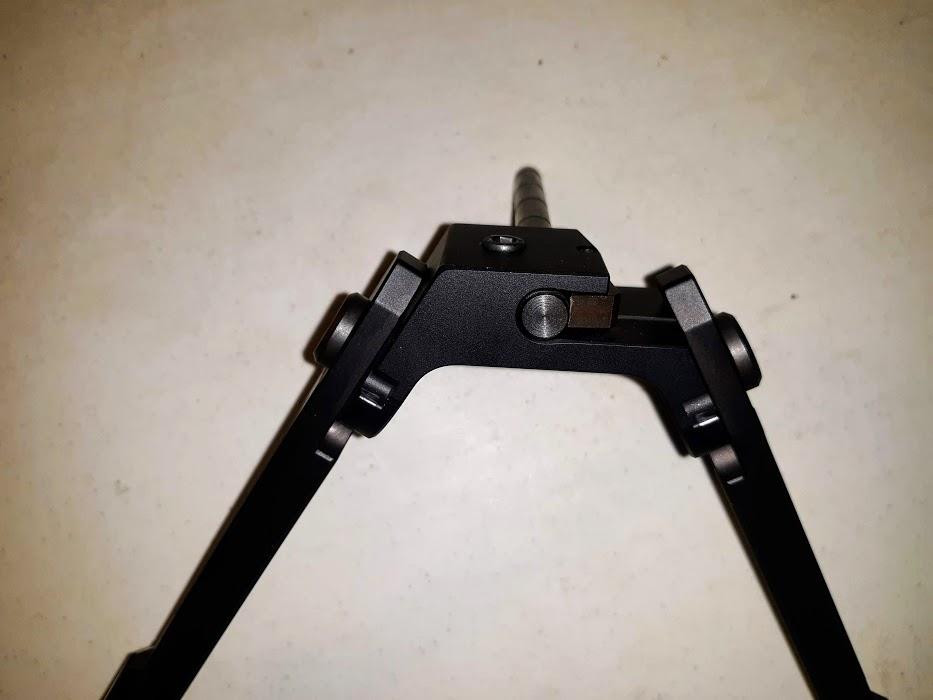
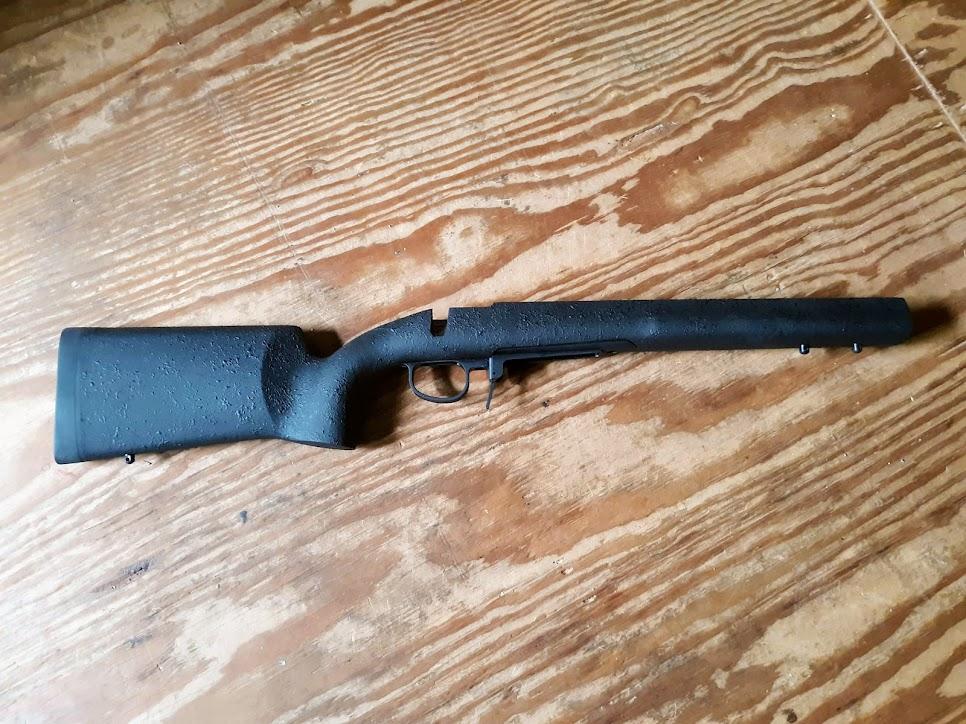
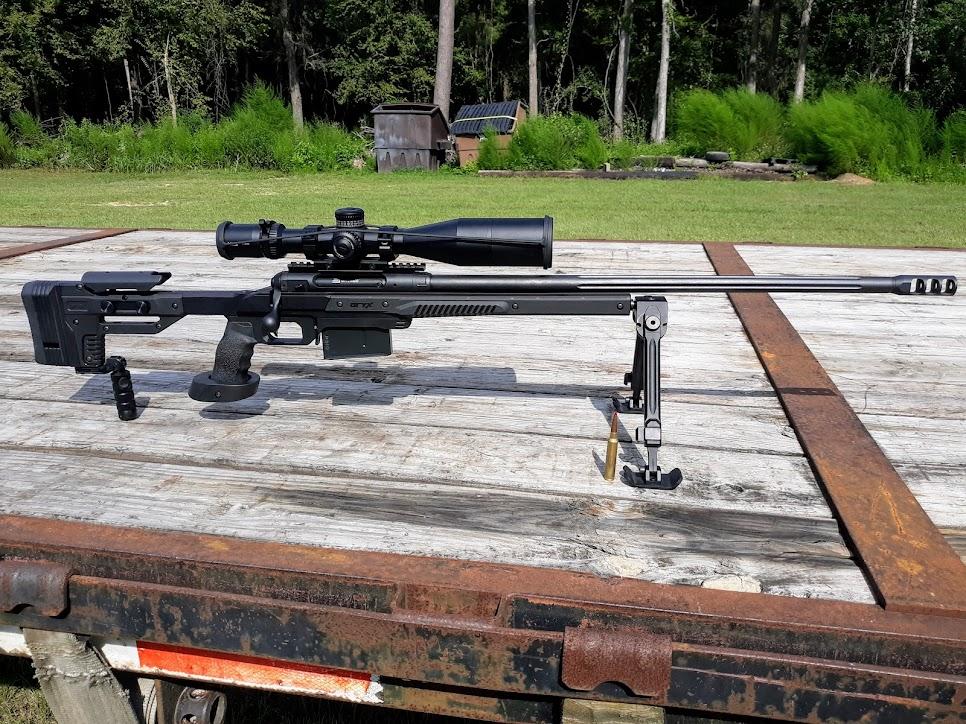
    8” into the stock?? For a bipod adapter? Overkill much...

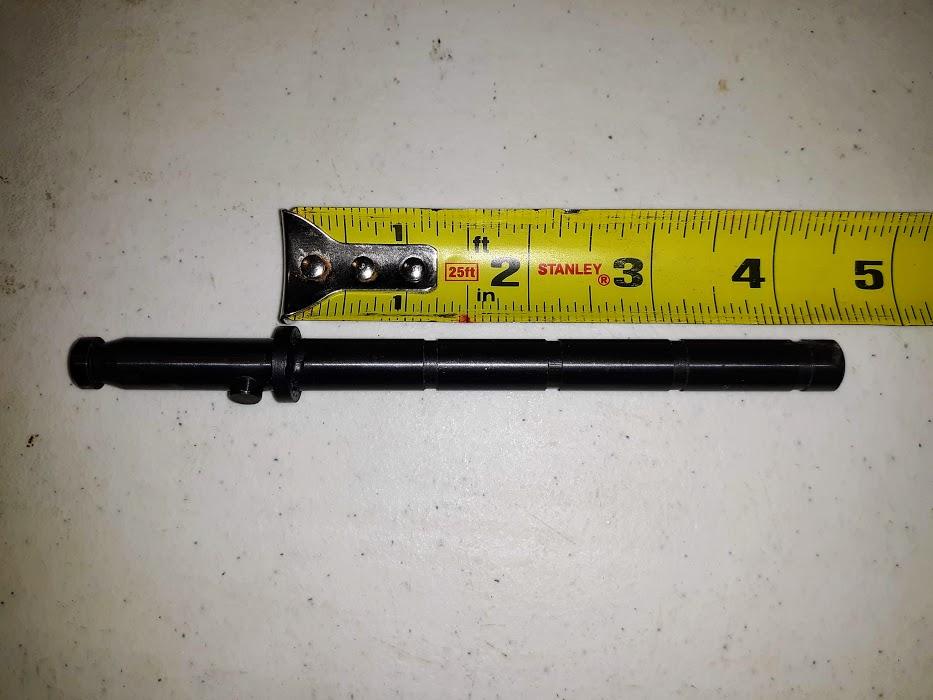
    What diameter is the adapter rod? Looks about 1/2”? Well, you’ll need an extra long drill & some way to keep it straight. Doing this with a hand drill is NOT recommended. Probably need set up in a lathe with a custom jig. But don’t see how that would even work.


    And this is just for a bipod you say? Does it like.... DO something else? Cook breakfast..or babysit the kids??

  3. #3
    Basic Member Robinhood's Avatar
    Join Date
    Apr 2014
    Location
    South Texas
    Age
    66
    Posts
    7,799
    Quote Originally Posted by Dave Hoback View Post
    Probably need set up in a lathe with a custom jig. But don’t see how that would even work.
    I agree with Dave. You could put the drill bit in the chuck and tie the stock down to some cribbing on the carriage. Or a tall drill press maybe. Indicate the best horizontal surface and the center line of the barrel channel. Shift it off center to put the hole in center of forearm mass. That is a ton of setup time though and a Real Gunsmith or stock finisher may have a way better idea.


    Or you could strap it in, get someone with a precision eye to watch the axis you cant see. Possibly two people. Drill a little oversize. Take it slow. Grind the bit cutting edges flat on the flute so it does not get away from you. Adjust it in the epoxy before it sets. You got this!

    Nice looking rig BTW
    The Dunning-Kruger effect is alive and well.

  4. #4
    Team Savage nathantc's Avatar
    Join Date
    Nov 2014
    Location
    Lumberton Tx
    Posts
    239
    decided to take it to a smith that i know, and have him do it on a lathe. Not sure when i'll have the time to do so, but that is now the plan, and yes its a full aluminum block all the way except for the first half inch or so. So the spigot will be embedded into the aluminum making a very sable bipod mount.
    the reason i want this setup is, well, i love the looks and stability of the Fortmeier Bipod, and i want a spigot mount directly embedded into the stock. This does 3 things
    1 moves the bipod about as far forward as reasonably possible
    2 stows inline with the stock when folded so its a bit more compact
    3 is extremely quick to remove and reattach the bipod for times you just don't need/want it there without anything on the forearm when removed.

    On another note there is no stronger way to attach a bipod. A swivel stud is ok for a range gun. This rifle is going to be my deadicated hunting rig that i plan to travel with. Wanting to do some trophy hunting as well as culling. I also plan on going to west texas where there is a bit of a hog problem and wide open range to try my hand at extended ranges. Popping balloons in the wind on my property at 500 yards is fun and all, but i want to do more before i'm to old to have the chance. So im building a rifle that is very capable yet extremely durable. Optics are still up in the air but im leaning towards biting the bullet for a schmidt & bender, overkill i'm sure but im wanting this to be my "forever" rifle.

    I know that is a lot of info, but it should better explain why i like the bipod set up im going with.

  5. #5
    Team Savage nathantc's Avatar
    Join Date
    Nov 2014
    Location
    Lumberton Tx
    Posts
    239


    The item description was a bit incorrect. So i will not need to go 8" into the forearm. This should be very doable. Also, for anyone interested, YES the Fortmeier Bipod does 100% fit the Versa Pod spigot. It actually fits a bit better than it does on the oem spigot.


  6. #6
    Basic Member Robinhood's Avatar
    Join Date
    Apr 2014
    Location
    South Texas
    Age
    66
    Posts
    7,799
    and 10mm it is
    The Dunning-Kruger effect is alive and well.

  7. #7
    Team Savage nathantc's Avatar
    Join Date
    Nov 2014
    Location
    Lumberton Tx
    Posts
    239
    yup. that would give it about .4mm wiggle room.

  8. #8
    Team Savage nathantc's Avatar
    Join Date
    Nov 2014
    Location
    Lumberton Tx
    Posts
    239
    i might be abandoning the HS Precision stock. The aluminum bar is actually thinner than the spigot i want to instal. There is just no practical way to get what i want.
    The GRS Bifrost is already set up to instal the spigot like i want. Though im not so sure the stock would be idea being only fiberglass with no aluminum bedding or reinforcement. I know there are a lot of chassis out there. They are neat, just not honestly comfortable to me. so idk where to go from here. kinda bummed about the stock. Seems like an ok stock and there is not exactly a lot of options for a savage long action.

  9. #9
    Banned
    Join Date
    Jan 2016
    Location
    Suburb of Filthadelphia.
    Age
    45
    Posts
    5,704
    Any Fiberglass stock you go with SHOULD be bedded. I would do Pillar bedding actually That’s kinda understood when choosing a Glass/Carbon stock.

    But going back....why worry about the aluminum in the HS stock? Just have the hole bored & epoxy the spigot in. It wouldn’t hurt the strength of the stock or sacrifice strength of the bipod attachment. Won’t be a cosmetic issue, as it’s inside the forearm. Just go for it!

  10. #10
    Team Savage nathantc's Avatar
    Join Date
    Nov 2014
    Location
    Lumberton Tx
    Posts
    239
    Quote Originally Posted by Dave Hoback View Post
    Any Fiberglass stock you go with SHOULD be bedded. I would do Pillar bedding actually That’s kinda understood when choosing a Glass/Carbon stock.

    But going back....why worry about the aluminum in the HS stock? Just have the hole bored & epoxy the spigot in. It wouldn’t hurt the strength of the stock or sacrifice strength of the bipod attachment. Won’t be a cosmetic issue, as it’s inside the forearm. Just go for it!
    i have concerns as there is no way to accurately hit the aluminum support dead on. If i do manage to do so, the drill bit is actually going to cut the aluminum support in half, not drill a hole. This can cause some issues with binding or trying to spread the stock. Think if trying to use a 3/8 or 10mm drill bit to drill into the end of 1/4" thick flat bar. its not going to to go well at all. Its not at all that i feel i would lose rigidity as im adding a steel rod that is stiffer than the aluminum itself.

  11. #11
    Basic Member Robinhood's Avatar
    Join Date
    Apr 2014
    Location
    South Texas
    Age
    66
    Posts
    7,799
    There is know way to keep it on axis without a pilot hole that is very well centered. When drilling a soft material with something even slightly harder in the same hole the drill will want to drift. An extrememly rigid setup with an end mill might do better but the setup cost would be prohibited.

    I see you have a parallel thread on the hide. Some really strong DIY and professionals there.
    The Dunning-Kruger effect is alive and well.

  12. #12
    Team Savage nathantc's Avatar
    Join Date
    Nov 2014
    Location
    Lumberton Tx
    Posts
    239
    yes i do. I called HS this morning and the tech said its 1/4" thick aluminum at the tip of the handguard. He also said they do not offer custom work like this. So yeah. Still waiting for enough free time to take it to a friends machine shop to see how he feels about milling out a channel inside the barrel channel the depth, length, and width needed to drop the spigot in directly from the top, Then fill, sand, and paint the fill material to clean it up a bit. I'm thinking this will be the only realistic way to get this done on this stock. That said i still kinda want to make the HS stock work the way i want just because it will be like no other. Close, but not identical, and still very functional.


  13. #13
    Basic Member Robinhood's Avatar
    Join Date
    Apr 2014
    Location
    South Texas
    Age
    66
    Posts
    7,799
    another idea. use 1/2 aluminum square stock the length of the rod you want to be held in the stock to make bushing. Drill and tap shallow holes #10 oe # 8 screw in the four corners on one side of the

    Test drill from top and bottom to locate the aluminum bedding block. Look for aluminum shavings to determine depth. Mill on the side that gives you room for half inch aluminum square stock and still be able to fill and sand to the original contour ....if possible. mill milling a half inch spot/key 1/8th inch the bedding block. Drill 4 screws holes on each end/corner of the square bushing to match tapped holes.

    Mount and fill. Epoxy mount in the bushing. this will make your project bullet proof and could be done on any mill with some good cribbing and a good vice.
    The Dunning-Kruger effect is alive and well.

  14. #14
    Team Savage nathantc's Avatar
    Join Date
    Nov 2014
    Location
    Lumberton Tx
    Posts
    239
    Quote Originally Posted by Robinhood View Post
    another idea. use 1/2 aluminum square stock the length of the rod you want to be held in the stock to make bushing. Drill and tap shallow holes #10 oe # 8 screw in the four corners on one side of the

    Test drill from top and bottom to locate the aluminum bedding block. Look for aluminum shavings to determine depth. Mill on the side that gives you room for half inch aluminum square stock and still be able to fill and sand to the original contour ....if possible. mill milling a half inch spot/key 1/8th inch the bedding block. Drill 4 screws holes on each end/corner of the square bushing to match tapped holes.

    Mount and fill. Epoxy mount in the bushing. this will make your project bullet proof and could be done on any mill with some good cribbing and a good vice.
    i think i follow what you are saying.
    That said, i know where the aluminum is at this point as the swivel stud holes are drilled all the way thru to the barrel channel and the aluminum is the only part threaded for the screws. So pushing the screw in from the barrel channel and from under the stock confirms its about dead center. Only about 1/8th inch closer to the barrel channel, not leaving enough room to go above, or below the aluminum reinforcement. It will have to be embedded into the aluminum as well. That is why im thinking mill the channel (from the barrel channel side) instead of drilling/boring. This way i can leave about 1/8" of aluminum untouched to jb weld the spigot to. then drill and tap the spigot to accept the very same swivel studs. Fill in the channel and finish the stock cosmedicaly. Then the two swivel studs screw into the spigot bar, sandwiching at least some of the original aluminum support between the stock and spigot. So kinda double duty. I know a mill can accomplish this task in just a few minutes. the rest i can do at home. Currently this is my plan. Unless my machinist friend has a better idea

    going to be a lot of work just for a bipod lol. But when you want something that does not exist.......

  15. #15
    Team Savage nathantc's Avatar
    Join Date
    Nov 2014
    Location
    Lumberton Tx
    Posts
    239
    thinking about selling the HS Precision stock or trading for an Oryx Savage long action chassis. I know there are other options out there, i just don't care for them. So i'm strongly considering getting the Oryx, milling out the magwell to fit my CIP 3.85 magazine size (it is only cut for 3.715), installing my bipod spigot into the forend, and getting rid of the ugly green panels for some plain black ones. So far everyone i've bought the rifle to refuses to even give it a try out of fear of destroying the stock. Im quickly falling out of love with the stock anyway. So this might be the direction im headed with this build. $400 for a new Oryx. I can get that for my HS stock for sure.

  16. #16
    Basic Member
    Join Date
    Jul 2009
    Location
    Johnson County,Tx
    Posts
    569
    Quote Originally Posted by nathantc View Post
    i think i follow what you are saying.
    That said, i know where the aluminum is at this point as the swivel stud holes are drilled all the way thru to the barrel channel and the aluminum is the only part threaded for the screws. So pushing the screw in from the barrel channel and from under the stock confirms its about dead center. Only about 1/8th inch closer to the barrel channel, not leaving enough room to go above, or below the aluminum reinforcement. It will have to be embedded into the aluminum as well. That is why im thinking mill the channel (from the barrel channel side) instead of drilling/boring. This way i can leave about 1/8" of aluminum untouched to jb weld the spigot to. then drill and tap the spigot to accept the very same swivel studs. Fill in the channel and finish the stock cosmedicaly. Then the two swivel studs screw into the spigot bar, sandwiching at least some of the original aluminum support between the stock and spigot. So kinda double duty. I know a mill can accomplish this task in just a few minutes. the rest i can do at home. Currently this is my plan. Unless my machinist friend has a better idea

    going to be a lot of work just for a bipod lol. But when you want something that does not exist.......
    This should be rather easy to do with a Horizontal end mill and an extended bit to get the depth than you need. Using a milling bit, you don't need to worry about it drifting if you aren't centered on the bedding block.

  17. #17
    Team Savage nathantc's Avatar
    Join Date
    Nov 2014
    Location
    Lumberton Tx
    Posts
    239
    Quote Originally Posted by Txhillbilly View Post
    This should be rather easy to do with a Horizontal end mill and an extended bit to get the depth than you need. Using a milling bit, you don't need to worry about it drifting if you aren't centered on the bedding block.
    i would agree, trouble is no one around here with the proper tooling is willing to either work on anything firearm related, or take the risk of destroying the stock. I simply don't have the machining tools to do it myself and i fear my drill press is just not in anyway going to help me here. I can 100% guarantee the spigot is larger in diameter than the thickness of the aluminum. Clearly the spigot could be turned down some. So plunge milling would work just fine if it can be done so at that dept. Milling a deep channel inside the barrel channel would probably work too as long as some aluminum is left behind for me to use the 2 swivel studs to (bolt) the spigot to the bedding block then glass fill the channel. My issue is no one local is willing to give it a go. I know im being stubborn but if i cannot get the set up i want with this stock, ill replace it with one i personally can modify to my liking. Just a real bummer at this point.

  18. #18
    Team Savage nathantc's Avatar
    Join Date
    Nov 2014
    Location
    Lumberton Tx
    Posts
    239
    This marks the end of this idea.
    I ordered a ORYX chassis.
    going to mill out the magwell .135" to accommodate the 3.85 CIP magazine, then embed the bipod spigot to the chassis like i had planned for the HS stock. Going to custom cerakote the aluminum part of the chassis and the barreled action in a semi-gloss black. Then hydroprint the ugly green plastic in a dark green/grey carbon fiber with a semi-gloss cerakote clear over the top.

    I think this will be 100% what im wanting, and quite beautiful.

    Once the ORYX arrives im thinking of selling the HS Precision tactical stock and savage CIP bottom metal. Just trying to figure out what both are currently worth.

  19. #19
    Basic Member Robinhood's Avatar
    Join Date
    Apr 2014
    Location
    South Texas
    Age
    66
    Posts
    7,799
    txhillbilly,

    I have got to see one of them horizontal end mills. :)
    The Dunning-Kruger effect is alive and well.

  20. #20
    Basic Member
    Join Date
    Jan 2020
    Posts
    98
    similar idea. lets say alum bed block in forearm is at least 1.5" wide, and stops 1.5" from plastics end. we already know its .250 thick. cut original section of oem shaft that was intended to go into forearm off, so its only 1.5'' long. take a new steel 1"x1 x1" square steel block, and drill/ream a hole through center for press/near press fit (10mm) , tap set screw(s) in sidewall for the shaft. weld that block to piece of steel flatbar (4.5 x1.5x.250") end. hog/rout out plastic from forearm back 4.5+" x 1.5"+ width. now lay plate down on underside side of alum bedding block , drill/tap/screw into bedding block. the 5/16 wall of bored block, puts the center of oem shaft on center line of the orig .250 alum bedding block, and steel block is receesed into plastic foremarm, so it can be epoxy over. only shaft sticks out, and alum bedding block never got damaged , the new flatbar is overlapping 3" of length of alum bedding. everything is rigid, and low cost/$

    Quote Originally Posted by Robinhood View Post
    another idea. use 1/2 aluminum square stock the length of the rod you want to be held in the stock to make bushing. Drill and tap shallow holes #10 oe # 8 screw in the four corners on one side of the

    Test drill from top and bottom to locate the aluminum bedding block. Look for aluminum shavings to determine depth. Mill on the side that gives you room for half inch aluminum square stock and still be able to fill and sand to the original contour ....if possible. mill milling a half inch spot/key 1/8th inch the bedding block. Drill 4 screws holes on each end/corner of the square bushing to match tapped holes.

    Mount and fill. Epoxy mount in the bushing. this will make your project bullet proof and could be done on any mill with some good cribbing and a good vice.

  21. #21
    Team Savage nathantc's Avatar
    Join Date
    Nov 2014
    Location
    Lumberton Tx
    Posts
    239
    sounds like that could have worked.
    My oryx chassis will be here next week. The HS stock is not going to be used. The spigot will be attached to the oryx and the oryx magwell will have to be extended .135" to fit the 3.85 CIP magazine for the 300 PRC. Might keep the HS stock and bottom metal, might sell it. Not sure yet.
    Went with the oryx due to the fact i don't care for any other chassis that fits a savage long action. Don't care for much adjustability as i'll leave it in one place once set anyway. I liked the oryx for its simplicity. Nothing should be more rigid than a one piece chunk of aluminum. Didn't really want a chassis, but quickly fell out of love with the HS stock before it ever got any use.

  22. #22
    Basic Member
    Join Date
    Jan 2020
    Posts
    98
    well, main thing is you get what you want. i thought about chasis, but havent ventured it yet, kinda sticking to traditonal feel. i might change later, yes, probally can get more rigid

  23. #23
    Team Savage nathantc's Avatar
    Join Date
    Nov 2014
    Location
    Lumberton Tx
    Posts
    239


    suppose this will be my last post on this tread. HS stock and bottom metal will be sold/traded for temporary glass (swfa temp mocked up) Oryx will be getting sent off to a machine shop to have the magwell opened up .135" for the 3.85 CIP 300PRC magazine and bored for the bipod spigot. Black panels will be ordered as well. LOVE the oryx compared to every other chassis i put in my hands. very comfortable. RIFLE IS HUGE

  24. #24
    Team Savage nathantc's Avatar
    Join Date
    Nov 2014
    Location
    Lumberton Tx
    Posts
    239


    Best decision i've made with this rifle was ditching the HS Precision stock. Far more comfortable to shoulder, far more rigid. That is all.. now ill let this tread die.

Similar Threads

  1. Drilling out holes for pillars
    By jrgreene1968 in forum Other Firearm and Shooting Accessories
    Replies: 9
    Last Post: 01-31-2018, 12:51 PM
  2. drilling length for pillars
    By Bowers in forum 110-Series Rifles
    Replies: 7
    Last Post: 04-01-2015, 01:22 PM
  3. Drilling and tapping Stevens trigger
    By AaronS in forum 110-Series Rifles
    Replies: 7
    Last Post: 10-31-2011, 06:54 PM
  4. Drilling out a bolt head
    By Ksmirk in forum 110-Series Rifles
    Replies: 5
    Last Post: 12-15-2010, 10:09 PM
  5. Re-Drilling a Barrel
    By deerndingo in forum 110-Series Rifles
    Replies: 21
    Last Post: 12-07-2009, 06:31 PM

Tags for this Thread

Bookmarks

Posting Permissions

  • You may not post new threads
  • You may not post replies
  • You may not post attachments
  • You may not edit your posts
  •