


This is from a recent thread -
I am retired, I could go sit in the bars or casino's with other retirees I know, or play with my collection, which IMO is more fun and and leaves more to show for the time & money spent!Originally Posted by Mad Dog

Here's one I did for another forum that might be of interest here combined with a related post from here, I put the newer information in where it is applicable -
_______________________________________
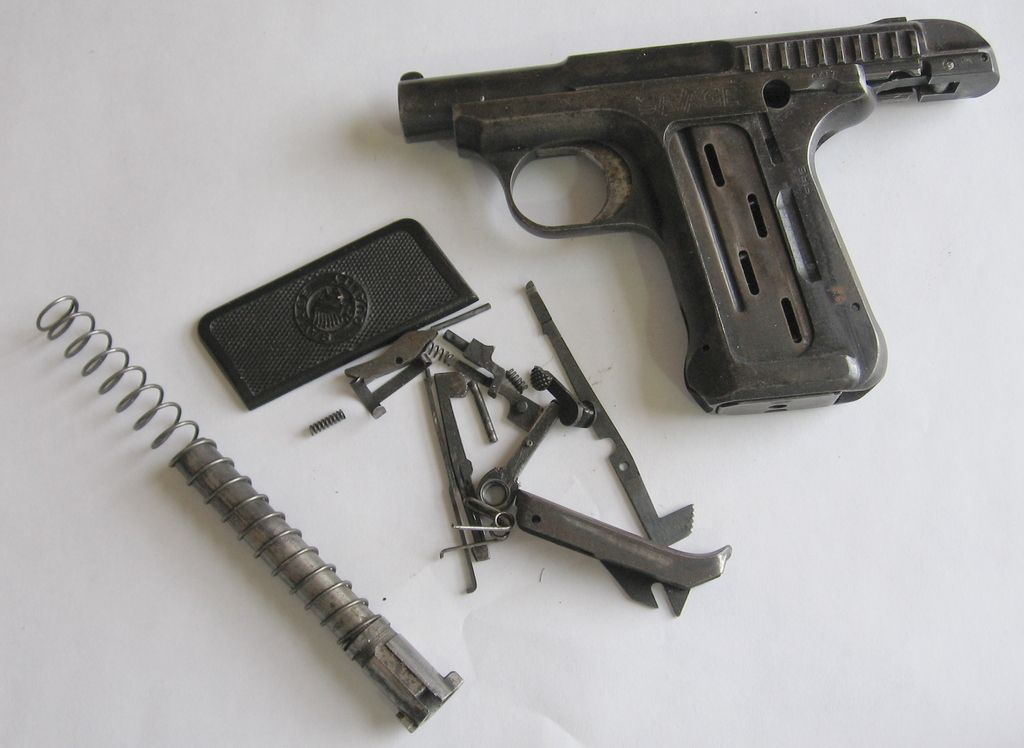
I got a 1915 that consisted of a slide, frame, breech block, one grip and a bag of parts. Here is the way I got it with the parts dumped out of the bag -
I thought since it was already in parts it would be a good time to take some pictures showing the assembly process (I would never take one apart this far if I didn't have to, and I cannot think of any reason to ever have to!) I also tried some video's but they all are very dark, if you have a way to adjust the brightness it would help, also they were all taken with the camera on a tripod just under my chin so sometime not everything is in the frame or in focus.
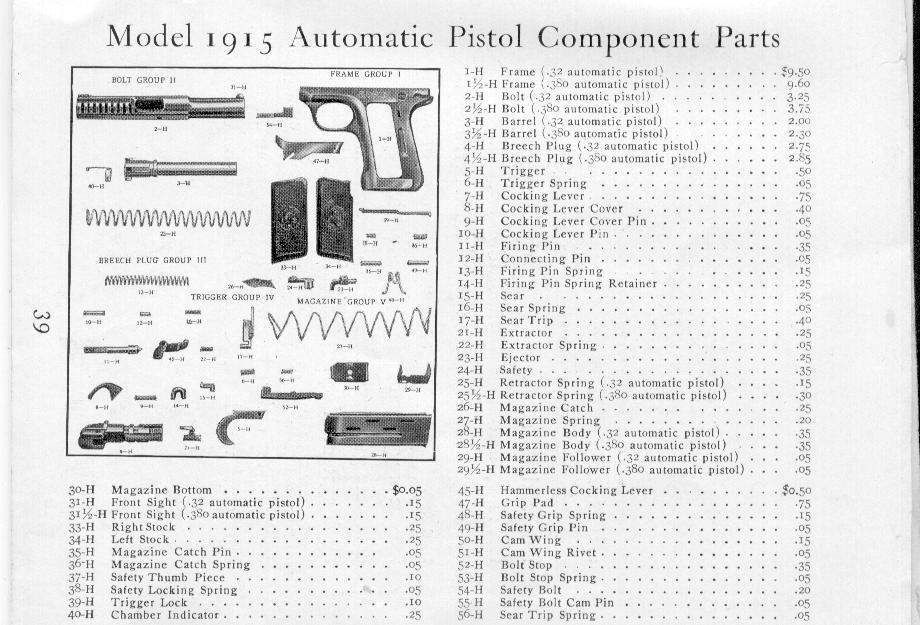
Here are all the parts organized so I could compare them to a parts list -
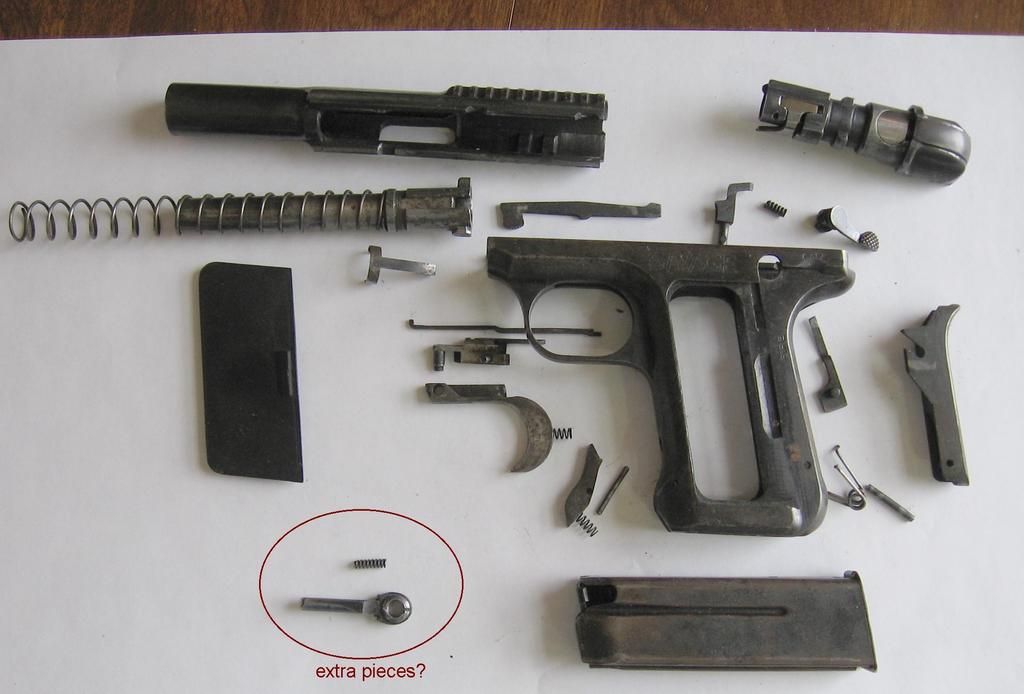
I had two parts I could not place, a small spring and and a part I knew didn't belong, I am fairly sure it's the locking arm for a Climin' Lyman receiver sight but the small set screw heads are really damaged so I don't know it it's usable.
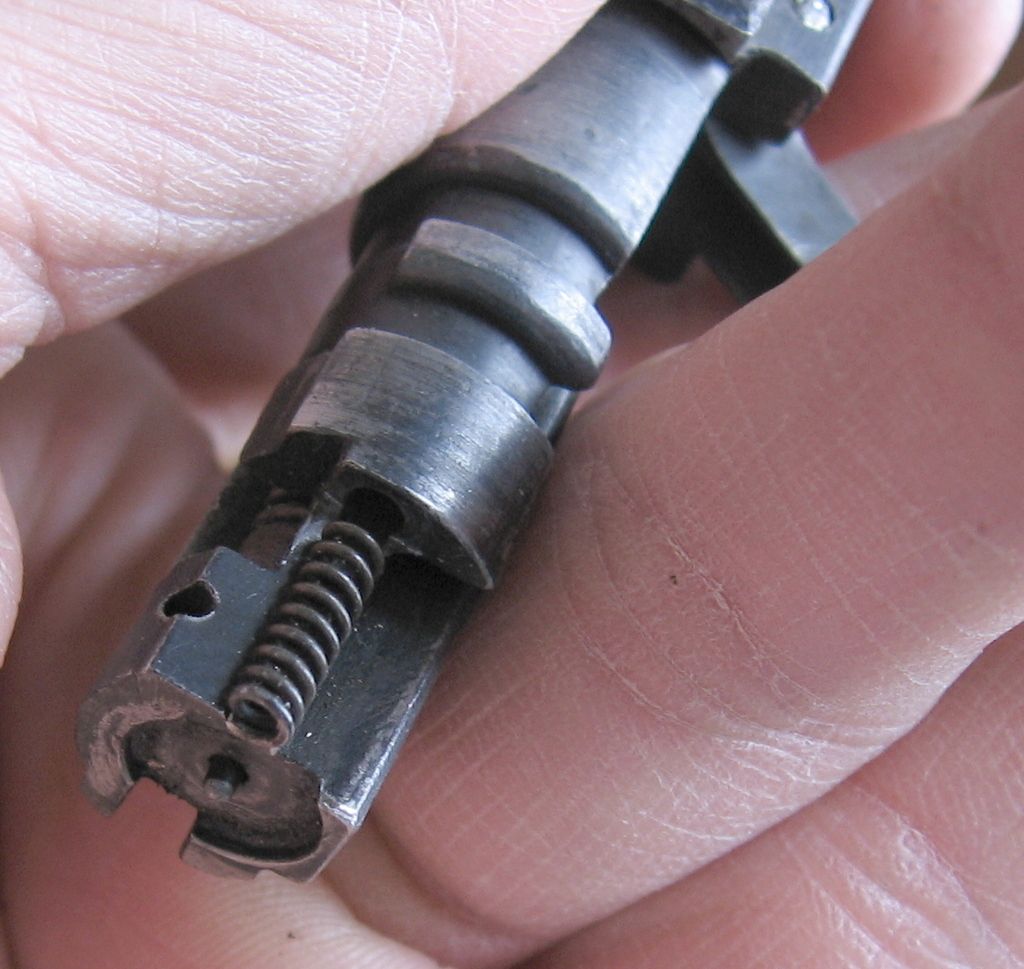
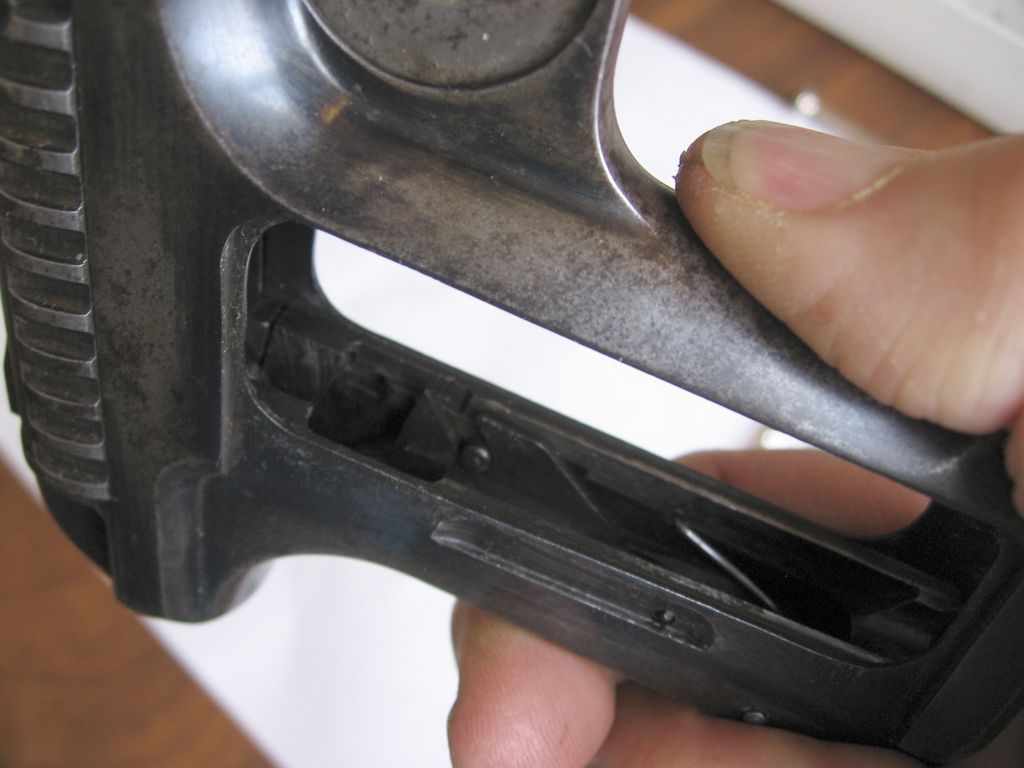
After double checking the parts list I found that there were two more small springs used on the 1915 that go in the breech block, I at first assumed they were there because the block was together, looking at it closer I saw signs on the pins that suggest the block also had been disassembled and noticed the sear spring was missing. Working the action slow allows gravity to make the sear work but I don't think it would hold if fired, so it might go full auto if left that way -
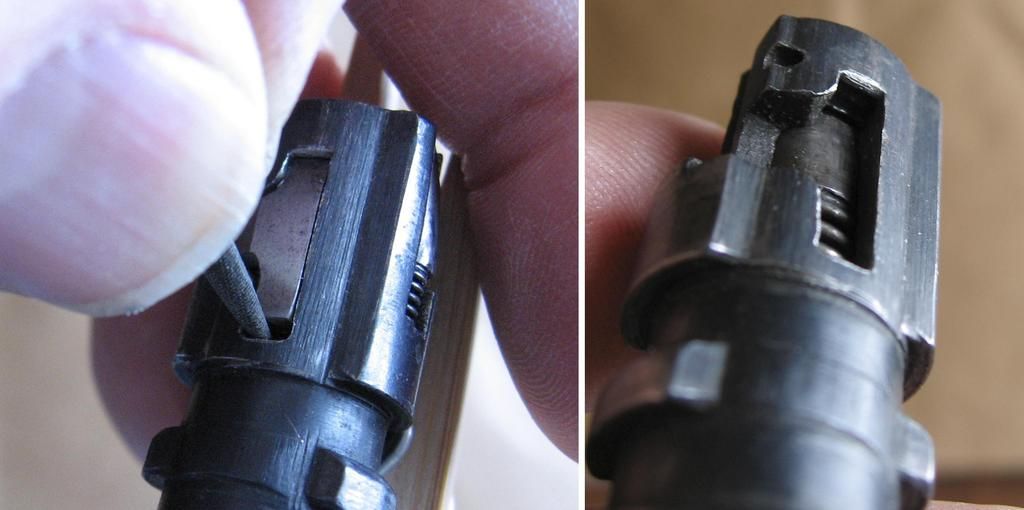
I tried a couple times to remove the sear, it appears it should easily come out if the firing pin is removed first, that should allow the rear to tilt down more which should let it slip right out, but I didn't see that until I had removed it another way. I smoothed up the edges of the breech block around the sear with a very small file and gained enough clearance so it snapped out by tapping on it, probably not a good way to do it, I was afraid I might bend or break the sear, if I ever did it again I would remove the firing pin, I think I am lucky I didn't break it.
Video -
sear removal
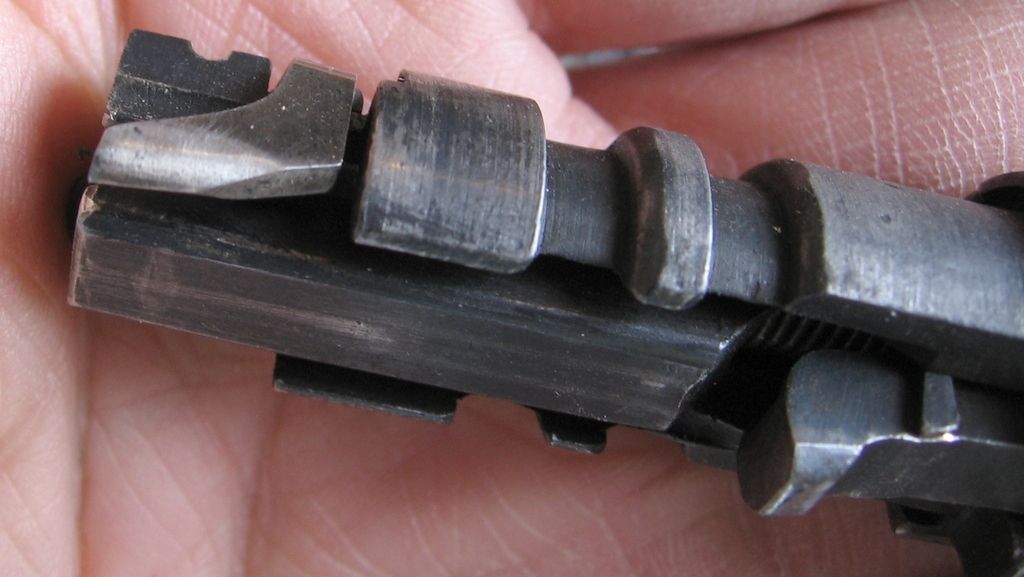
added section - This next part was not in the original posts, this shows firing pin removal & replacement and should be done before removing the sear -
Still pictures show details that are hard to see in the video's.
details for removal -
removal video - http://vid200.photobucket.com/albums...psgnpbovf0.mp4
details for assembly -
install video - http://vid200.photobucket.com/albums...psejsvfm7j.mp4
INTERMISSION
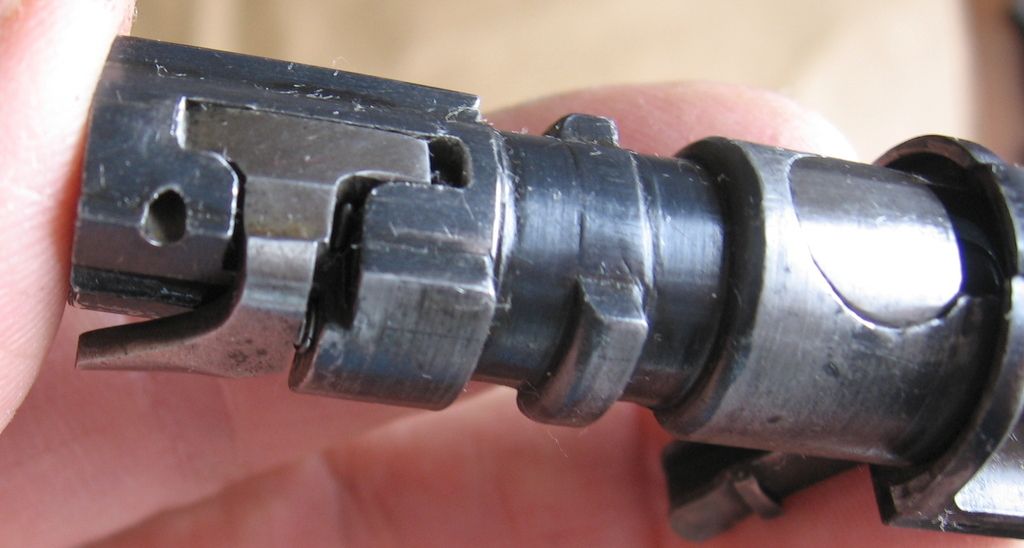
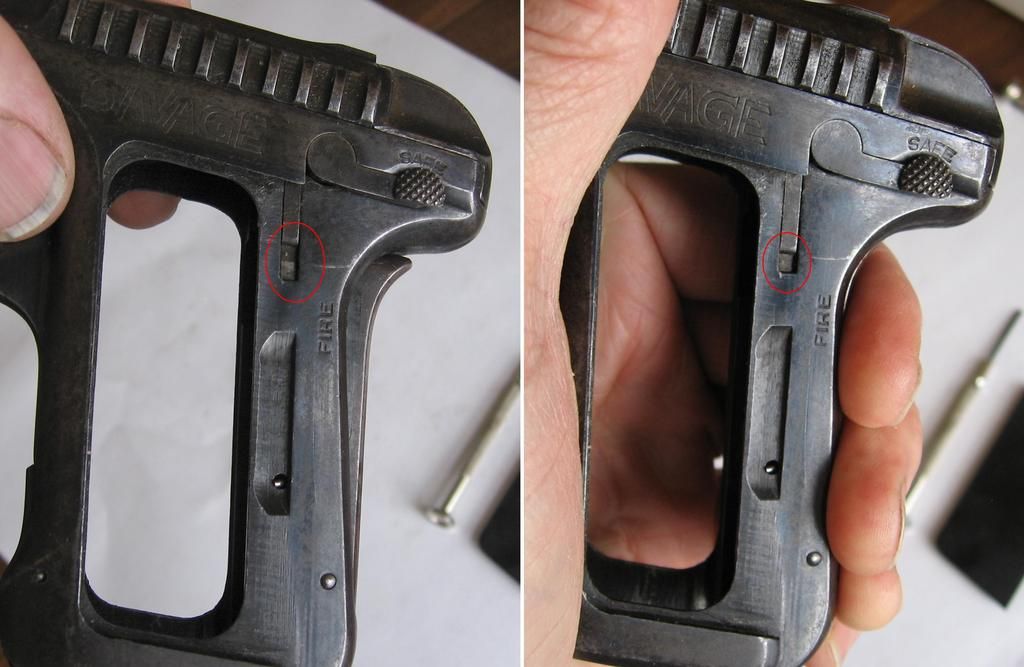
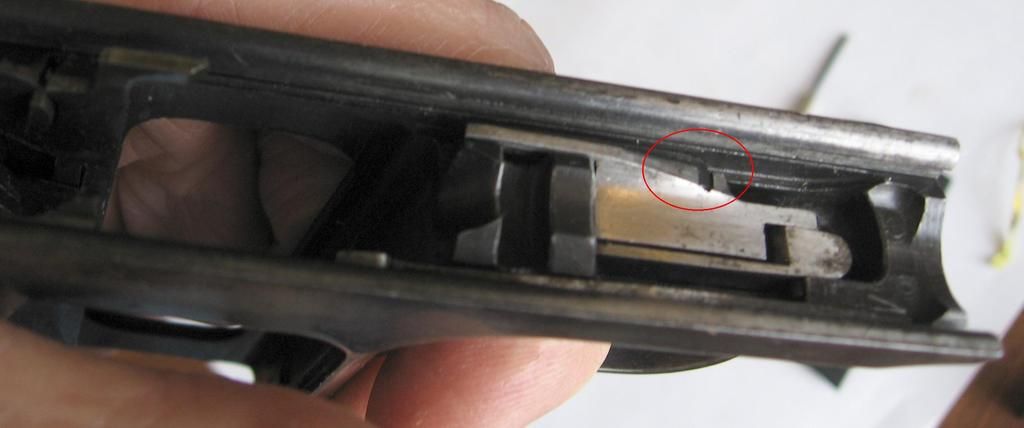
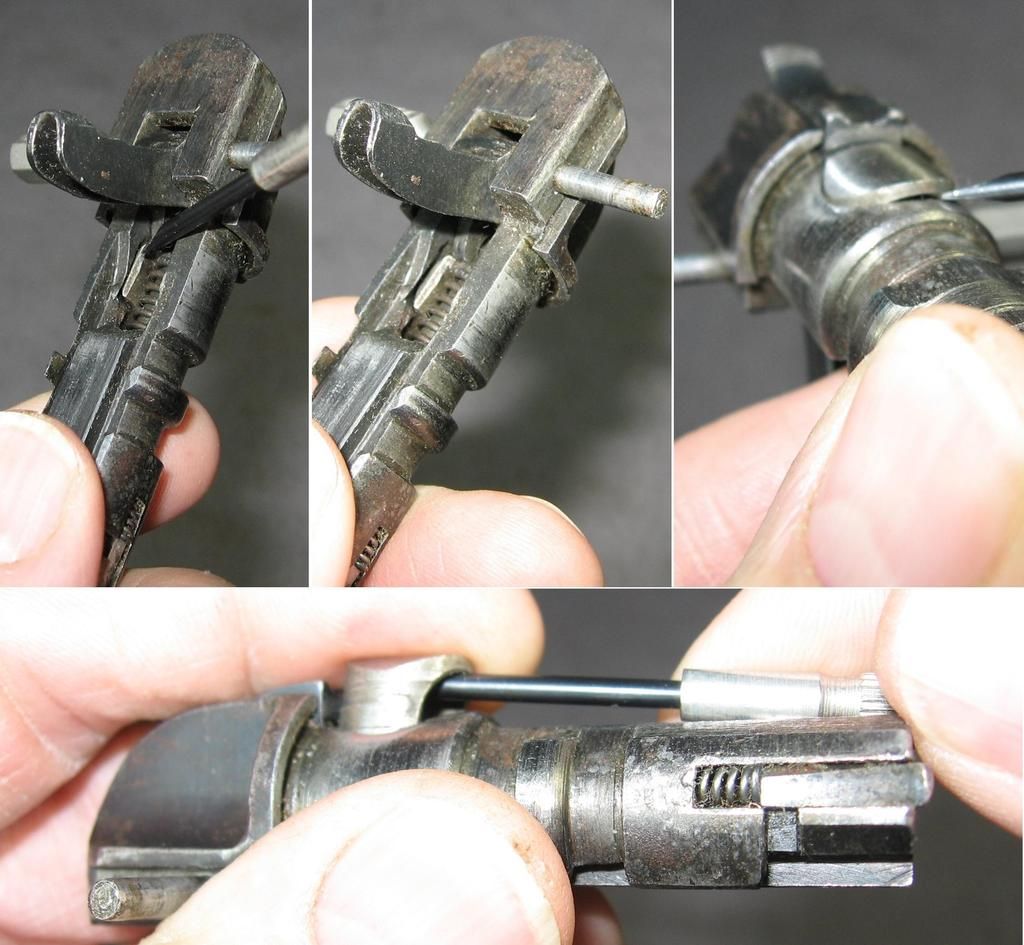
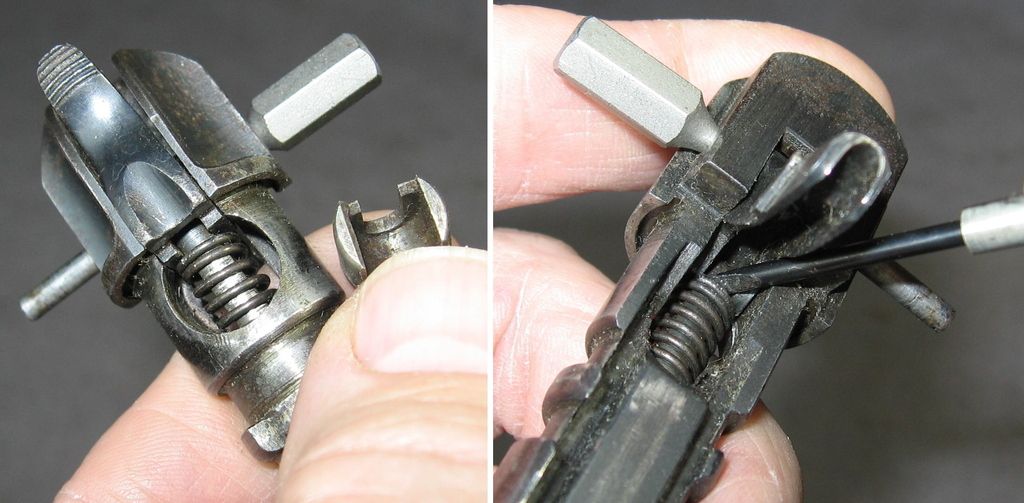
After getting the sear out I found the the 'extra' spring was to big to fit.
I figured out it was the extractor spring and that the sear spring was installed behind the extractor - Video, extractor removal
Video, sear install
Video - extractor install
I had the most problems with the spring for the grip safety, it is very hard to get lined up to insert the pin. The first attempt I tried to hook the spring in the frame first but I couldn't get the spring lined up - Video, Grip safety install - failure #1
I then tried to put the spring in last, the prongs that snap into the frame kept making it hard to hold and made it pop out of position, so I wired the prongs together and finally got it installed - Video, grip safety install success part 1
Video, grip safety install final
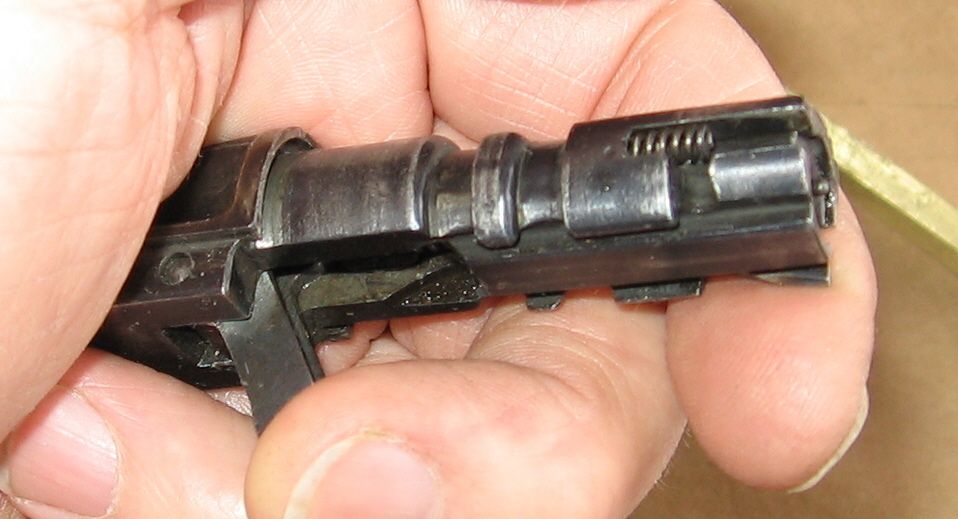
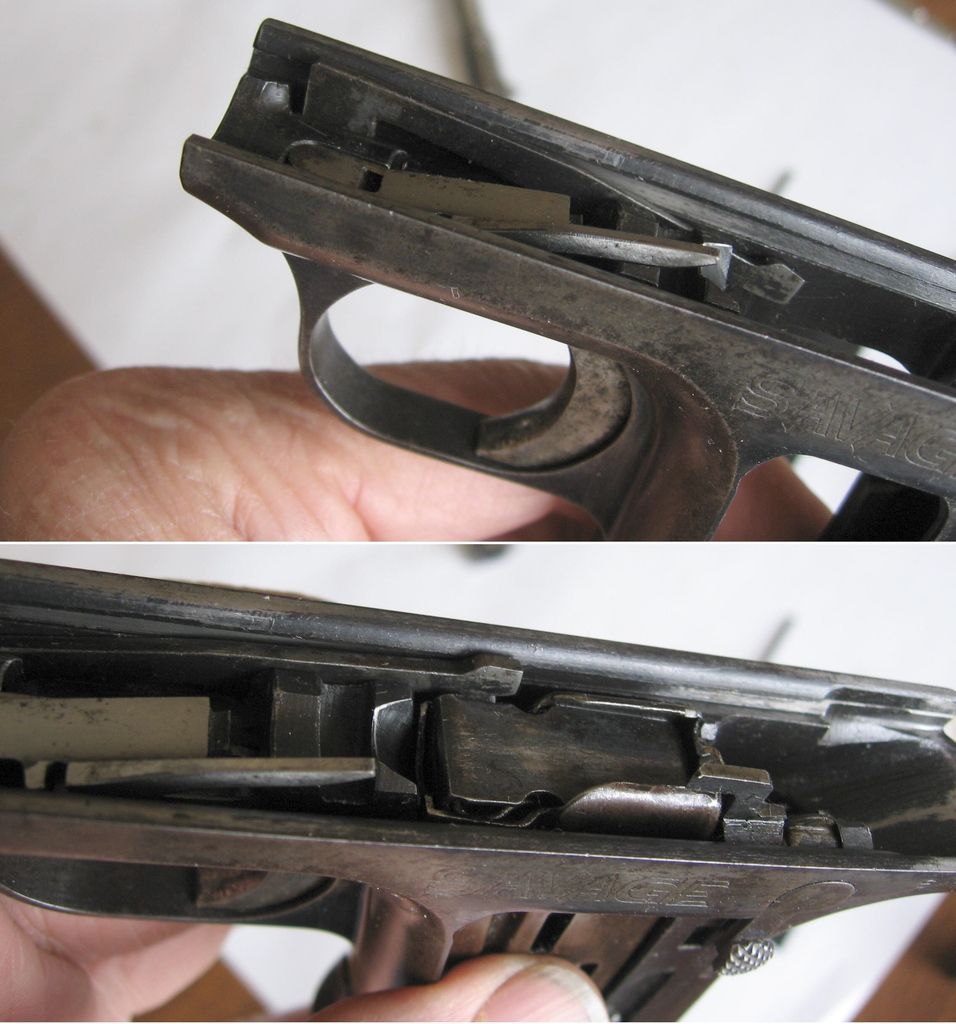
Installation of the safety and ejector - Video, safety and ejector install
Installing the trigger, sear trip, and trigger lock. The trigger lock has to be full forward and then pried up over the front of the sear trip and slid back to snap into a slot in the sear trip - Video, trigger install
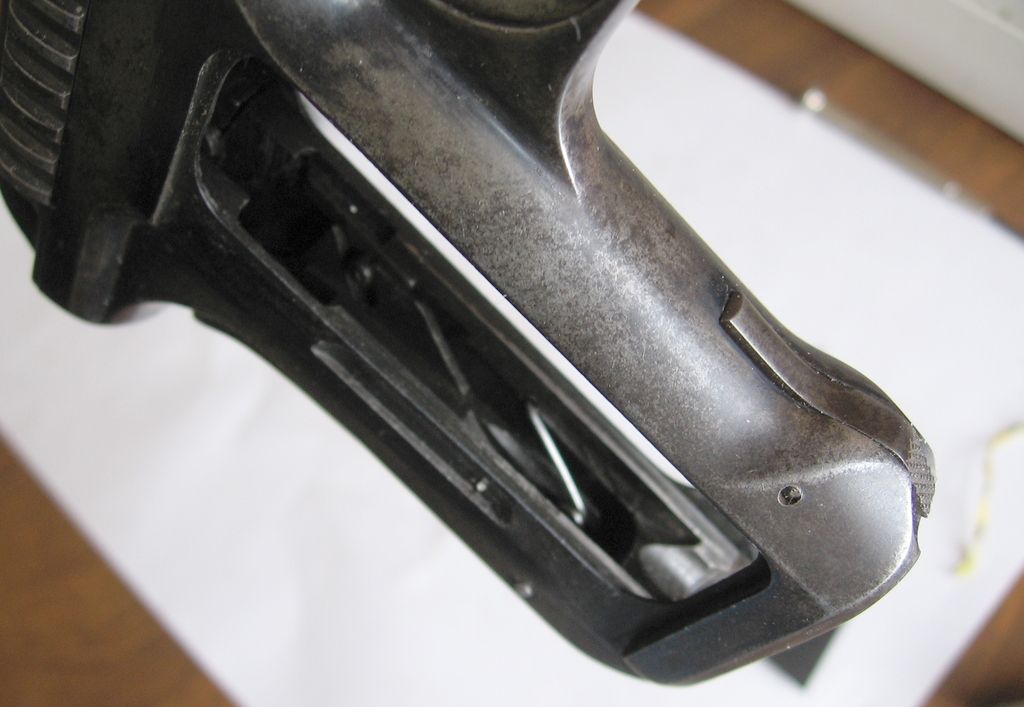
The bolt stop just slides into a slot -
Final assembly - Video, final assembly
Added 05-28-2017 - video, bolt removal

 Reply With Quote
Bookmarks