Savage 110E .270 Winchester to Personalized 260 Remington.
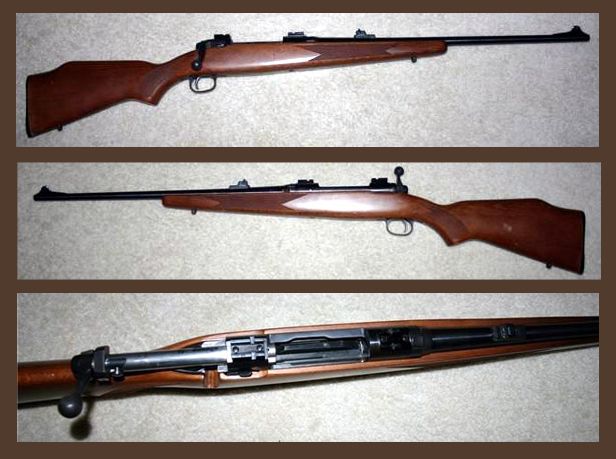
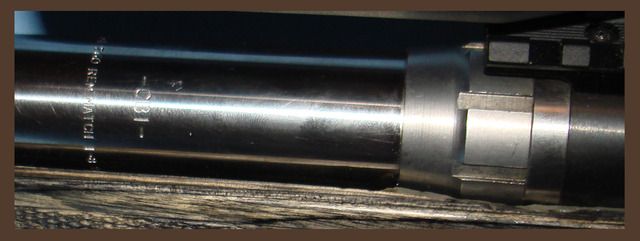
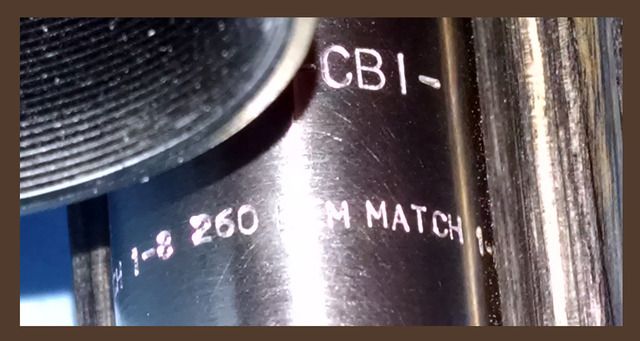
Some things take a while, and this rifle’s transition took about 3 ½ years. In April 2012 I located and purchased a clean Savage 110E on Craigslist. This rifle, a 270 Winchester, was configured as a staggered feed, blind magazine box. While waiting for my rifle to be delivered, I got on the phone with Jim Briggs of NSS, who patiently walked me through the selection of the parts most suitable for my build. My first order from Jim included a black metal trigger guard, a surface ground recoil lug, a stainless barrel nut, and a stainless steel CBI barrel. With Jim’s help I was able to settle on a 26 inch, varmint contoured barrel with a recessed crown and a 1 in 8 twist. My barrel was to be chambered in 260 Remington Match. This was, at the time, A-New-For-Jim-Chambering, and we had to wait several months for the first batch of barrels to arrive from CBI. According to Jim the Match designated chamber would be throated to allow the longer VLD bullets to be seated out a bit further in the case. The proclaimed advantages were twofold. First, there would be more room in the throat to seat the longer bullet closer to the lands. Secondly, by seating the bullet out further there was room in the case for more powder, which translates into higher velocity.
A special shout out to readers wondering if Savage building/tinkering is beyond their skill level, stop wondering. YOU CAN DO IT! I’ve been shooting all sorts of firearms for over 50 years and I had never changed a barrel on a centerfire rifle until I began this project. Jim Briggs promised me, when I ordered my parts, that he would walk me through my barrel change when the time came. True to his word he walked a friend and me through barrel removal and new barrel installation in what seemed to be the blink of an eye. 15 minutes and my buddy and I had a properly headspaced barrel installed on my action; a few additional minutes had us bolting my barreled action into a laminated stock. I’ve taken more time baking a frozen pizza then I did swapping barrels.
Mostly pictures from here on out along with a couple of resources, and one tip on action bolt torquing that I found particularly useful. Some notes:
BEDDING. There are more posts on this forum on bedding than you can shake a stick at. A buddy and I pillar bedded my barreled action into a nice laminated stock in one step as outlined in a number of posts on this site. Everything turned out fine and the rifle shot great. However, not one to leave well enough alone, my buddy and I proceeded to destroy this stock in a manner completely unrelated to bedding. I will not embarrass myself by discussing this any further.
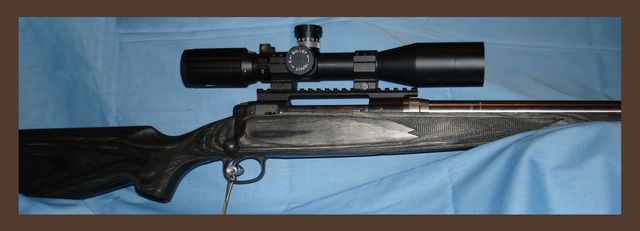
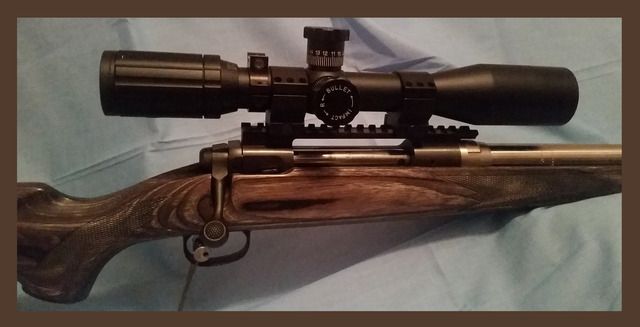
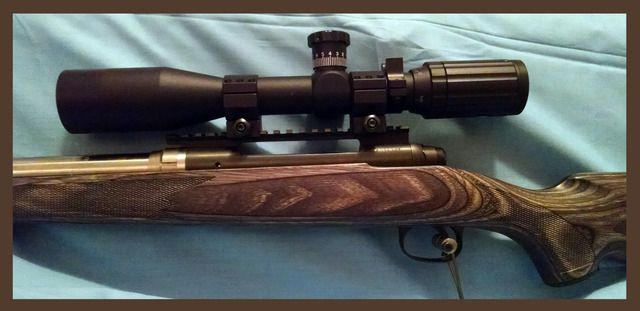
I recently bought another laminated stock from a forum member from this site’s classified ads. Oh yeah, I have a real thing for laminated stocks. It is my personal belief that a laminated stock is pretty darn stable. I have experienced incredibly accurate results from bedding my actions into laminated stocks and it would take an awful lot to make me spend more money on some high dollar stock. MY OPINION ONLY! This stock already had factory pillars and our bedding job went even more smoothly and more quickly than the last time… Funny how that works. The tang is free floated as is the barrel except for the first couple of inches out of the receiver. The rifle shoots great as you will see below. If you are not a paid member of this site you are missing out on some incredible deals. BECOME A PAID MEMBER.
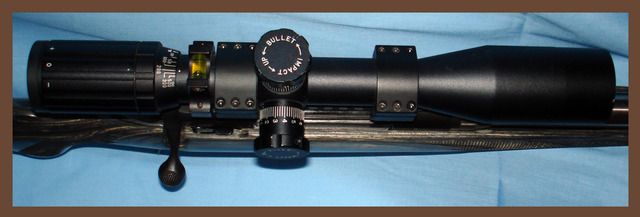
I chose to mount a SWFA Super Sniper fixed 10 X scope on this rifle, using an EGW one piece, 20 MOA, picatinny base, and a pair of Burris 30 mm Extreme Tactical Rings. I also have a real thing for these scopes and own 3 of them. My Savage enabler buddy has 7 of these Super Snipers on 7 different rifles ranging from ARs to his favorite 300 Winchester Magnum. The turrets have positive ¼ MOA clicks, the scopes are tough with lifetime warranties, and the adjustments are repeatable. I’m not associated with SWFA; my only role is that of an extremely satisfied customer.
ZERO STOP. I like this feature but none of my SS scopes come with it. Not to worry. I stumbled across a fellow on another site, who manufactures and sells a set of shims that converts my zeroed elevation turret into a Zero Stop in minutes. 20 bucks!
Tim Kulin Cabinetry, (719)686-9663, www.timkulincabinetry.com
ACTION BOLTS. Unless you are putting your newly barreled action into its original stock, chances are you will need at least one stock bolt that is a little longer than what you have. Most folks here seem to be only a short drive away from finding bolts that will fit but that is not the case where I live. I found a place online that will sell you 1 bolt or 1000 bolts. Their prices & service are outstanding, and their shipping prices are quite reasonable for small orders. Here they are:
http://www.boltdepot.com
I buy 2 inch long 1/4-28 button head cap screws, and a handful of matching nuts. Figure out how long you need your bolts to be; thread a nut on; trim to length and dress; unscrew the nut and you’re ready to go.
TIP FOR ACTION BOLT TORQUE SEQUENCE. This tip came from forum member davemuzz:
“Just askin....but when you install your barreled action onto your stock, you: First, just get the action screws to lightly snug against the stock, then Second, Hold the rifle in a vertical position and give it a light "bang" (off the floor or your bench) to set the recoil lug against the stock, then Third, Tighten the front screw FIRST to a given inch\lb of 40-45in\lbs, then tighten the rear screw to the same in\lbs?”
I have used this method on half a dozen rifles since coming across Dave’s post in 2012. I like it and it works for me. I know it may not be for everyone but I’m just throwing it out there.
MY LOAD. Emphasis on MY LOAD is safe in MY RIFLE but it may not be safe in yours. Follow sound reloading practice and work up to a safe load in your rifle. That said there is nothing secret about this load. One of my many shortcomings is that I research things to death before jumping in and this load seems to work for a large number of people. MY LOAD-
Remington 260 Brass
Federal 210 Large Rifle Primers
43 Grains IMR 4350 Powder
Hornady 6.5 mm, 140 Grain A-Max Bullets
Overall Length of My Loaded Cartridge is 2.90 inches which, in my rifle, equates to 0.020 inches off the lands
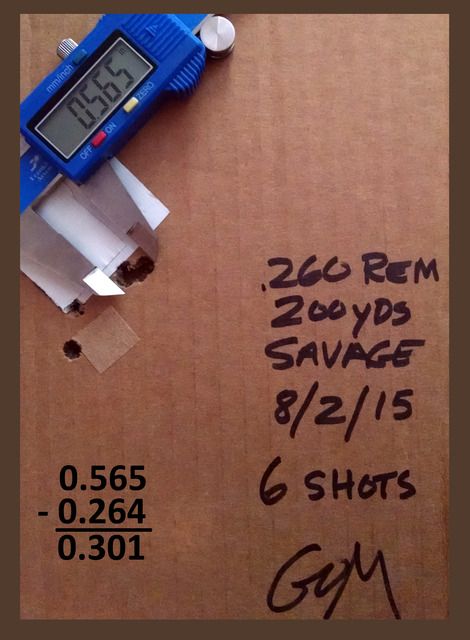
The target above shows the very first 6 shots fired out of my newly bedded rifle. I’m not about to write that my rifle shoots tiny little 3/10 inch groups at 200 yards. As you can plainly see there are 6 bullet holes in this target with an outside spread of about an inch and a half. What I am going to write is this rifle clearly has great accuracy potential. In fact, I’m going to call my load development done and concentrate on getting some shooting in before hunting season opens. Seeing as my cow elk area opens in a week and my antelope areas open in 3 weeks I’ve got some shooting to do.
A final note. In most of my pictures there is this doohickey attached to the trigger. A couple of decades ago my dirt bike and I had a falling out. (Pun definitely intended). I do not have use of my hands or fingers and so that trigger extension is a means by which I can “squeeze” the trigger by applying pressure with the knuckle of my right hand. It works quite well. No, I didn’t shoot the target pictured above but I’ve got some great friends who helped me out with that and lots of other things. I haven’t slowed down much and putting this rifle together, and a couple more since then, has been extremely gratifying.
To any of you who may have friends or relatives that might benefit from some or all of my shooting set up please PM me and I would be happy to share some things that have worked for me.
A big thank you to all of the folks on this site. The collective wisdom of the members here as well as the vendors, who are extremely generous with their time and advice, make this a site to be proud of!






 Reply With Quote
Bookmarks