

 Reply With Quote
Looks great

Decided to do pillars and bedding on my Boyds stock as I was not that happy with the fit and had some small issues when torquing down the action.
This is NOT a how to but a rundown on what I did and the result. Hope it helps others.
With the stock and action apart I started looking at how and what I needed to do the pillars. After reading other threads from members here I decided to tap out the pillars from the factory stock. I used the front pillar from the factory stock for the front pillar in the Boyds (note that it is slightly longer than the Boyds front pillar and needed cutting down). For the rear I used the factory rear pillar but because its some what shorter you need to use the Boyds front pillar and grind the sides down to fit in the stock as a 2 piece setup. I didn't get any pix but you can get a better understanding from a thread that patrolit did in this thread link.
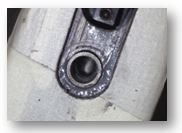
This picture shows the rear pillar in the Boyds stock. Notice that it is raised and not flush with the stock. One of the issues I had was the Timney trigger would touch the trigger guard when the action screws were torqued down causing it to totally lock up. Before the pillars and bedding I had washers under the guard to get the clearance I needed.
Now I needed to prep the stock. I wanted a full bedding job from about 5 mm in front of the barrel nut to the end of the receiver. Starting with sandpaper wrapped around a battery I soon got bored and broke out the dremel with a barrel sander bit and got to work (about 2 to 3mm removed) every now and then test fitting the barrelled action for clearance, also at this point I ground down the pillars until the action was stable and seated at the correct height. When I had taken out enough wood and was happy with the the fit it was time to tape up and start damming with the plasticine.
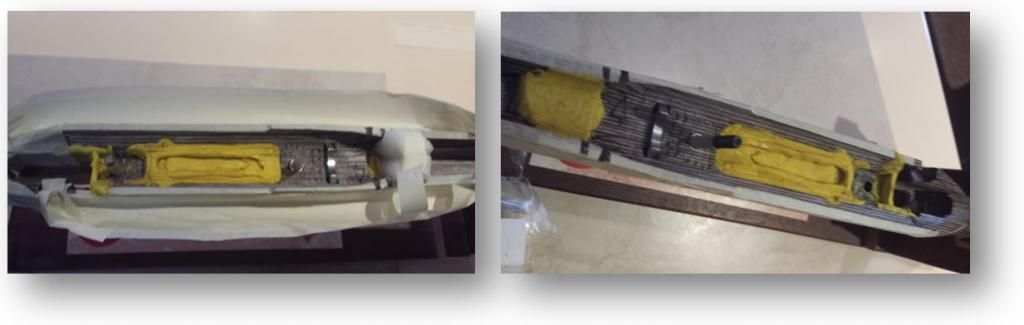
These 2 pictures show the plasticine in place. A sponge dam at the front.
With the stock done and ready it was time to prep the barrelled action. I had electrical tape wrapped around the barrel in 2 places to get it centered in the barrel channel and at the correct height (something I did before I started adding pillars and chopping wood from the stock). I removed the trigger, springs and sear only replacing the alloy trigger assembly with the safety. If you go this way remove the spring between the receiver and the trigger assembly and fill the recess that the spring fits into or it could fill with epoxy. A bit more plasticine in places where you don't want the epoxy to go and tape up the mag well. Release agent is applied at this point. Use as much as possible everywhere. Even if you dont think its needed, use it.
Now the fun bit: I used MatchGrade Rifle Bedding Compound from http://www.ballisticstudies.com/ , and they have the best videos that help alot. I have used Devcon and I found this Bedding Compound better. It mixes well, pours well and takes some time to set giving you plenty of time to take it easy and not rush.
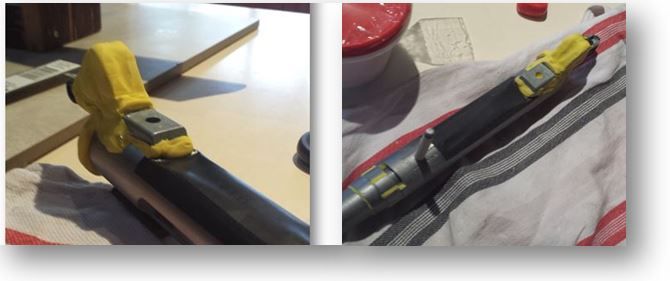
With the stock and barred action ready I mixed up the epoxy and poured it into the stock and left it to settle and thicken up some. This picture shows the rear action guide peg that was wrapped with tape and release agent then placed in the pillar hole to stop the epoxy running out. Using threaded bar stock as a guide wrapped with tape and screwed into the front of the action will act as a guide when lowered into the stock matching up the action to the recoil lug. With the recoil lug I figured that it was glued into the stock it can stay there so it was left in place and wiped with release agent.
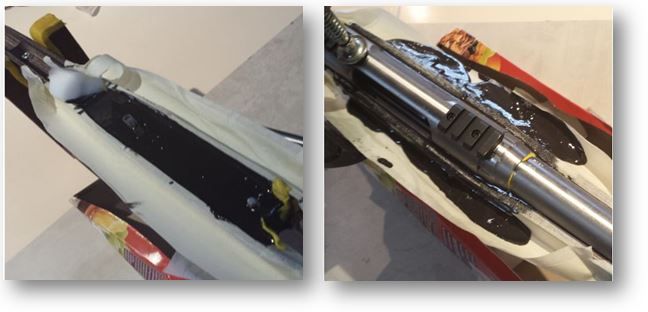
Now the scary bit: Making sure you have applied release agent "every where" on the barreled action and guide peg its time to lower it into place. I just took my time and lined up everything and sank it into the stock. The dam was removed and straw needed to be pulled out slow from underneath. Because I went a bit over overboard with plasticine I needed to use a G clamp to seat the receiver onto the rear pillar. After some time I cleaned up some of the over run of epoxy.
Stress free bedding? After 48 hours it was time to get the action out. Worried that I may have locked it in I held the stock upside down and gently tapped the barrel with my hand.................... And it just fell out with very little ease.Now I'm stress free.
With the action out its time to clean out the plasticine (hate that stuff) and file down the high points and remove bits of epoxy that got passed the dams. This process took hours but the results were well worth it.
With the action cleaned up from plasticine and release agent it went back into the stock with trigger replaced. It fits tight with no movement and can be removed without any binding and is now like a rock. The barrel is centered and free floating all the way to the barrel nut. And yes, that is the barreled action in the sink.
Im happy with the way it turned out and it was a learning experience.... Now to the range.
Any questions please ask.
Thanks for looking.


Looks great

Very nice job!
Sooo, what was the results at the range?
Looking forward to seeing your range results. Did you shoot it before to have a comparison?
I did get a chance to shoot it about 2 weeks ago but only at water bottles for a bit of fun. It has been a bit hit and miss but has shot well in the past with 1 1/2 to 1 MOA. It is a hunting rifle after all and with a bit of luck will be better now. I'm having a range day with my brother tomorrow at an indoor 50 meter range with some handloads. The best I got at this range was shot with 45gr Winchester White Box ammo that we cant get here any more. Looks Ok at 50 but Im sure it would open up at 100.. Let you know how I go.
Cheers
Jas
Last edited by jasta; 08-18-2014 at 07:40 PM.
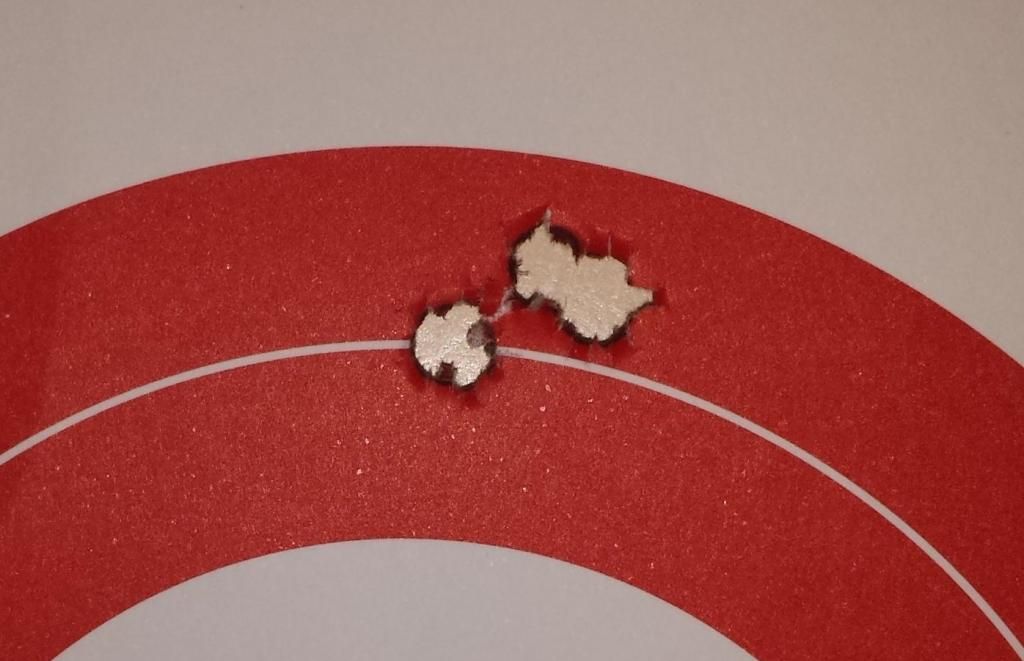
Results from the range today. Shooting better and consistent no matter loads I sent down range. However, I did have problems with handloads not chambering so the 1st target got 4 and same with the 2nd. The 2nd target was looking very good until I pulled it....One of them shots that as soon as you let it go you know its going to mess up your shot.
53gr VMax with 25gr of AR2206H powder
Nice shooting! What other modifications have you done to your rifle besides the stock bedding?
Cheers turbotoast. The only thing I have done was change the trigger with a Timney and I had issues with ejecting and fixed it by replacing the detent ball to a bigger size.
Thats it really. Might look at polishing the trigger sears and parts of the bolt..... Bolt knob for easy lift would be something to look at later.
 Members who have read this thread in the last 1 days: 0
Posting Permissions
Members who have read this thread in the last 1 days: 0
Posting Permissions

Bookmarks