Page 1 of 2 12 LastLast
Results 1 to 25 of 36

Thread: First Time Bedding- Need Help!!

  1. #1
    Basic Member
    Join Date
    Apr 2012
    Posts
    310

    Question First Time Bedding- Need Help!!


    I've finished relieving some area for the bedding compound and am left with this puzzle:


    All the good instructions I've been able to find use pillars, but I don't have those and don't plan on getting them. My dilemma is this: how will I put the bedding compound down, place the receiver, and screw in the action screws without getting the action screw holes in the receiver FULL of bedding compound? I'm puzzled! What am I missing here?

  2. #2
    Basic Member
    Join Date
    Sep 2012
    Location
    MN
    Posts
    806
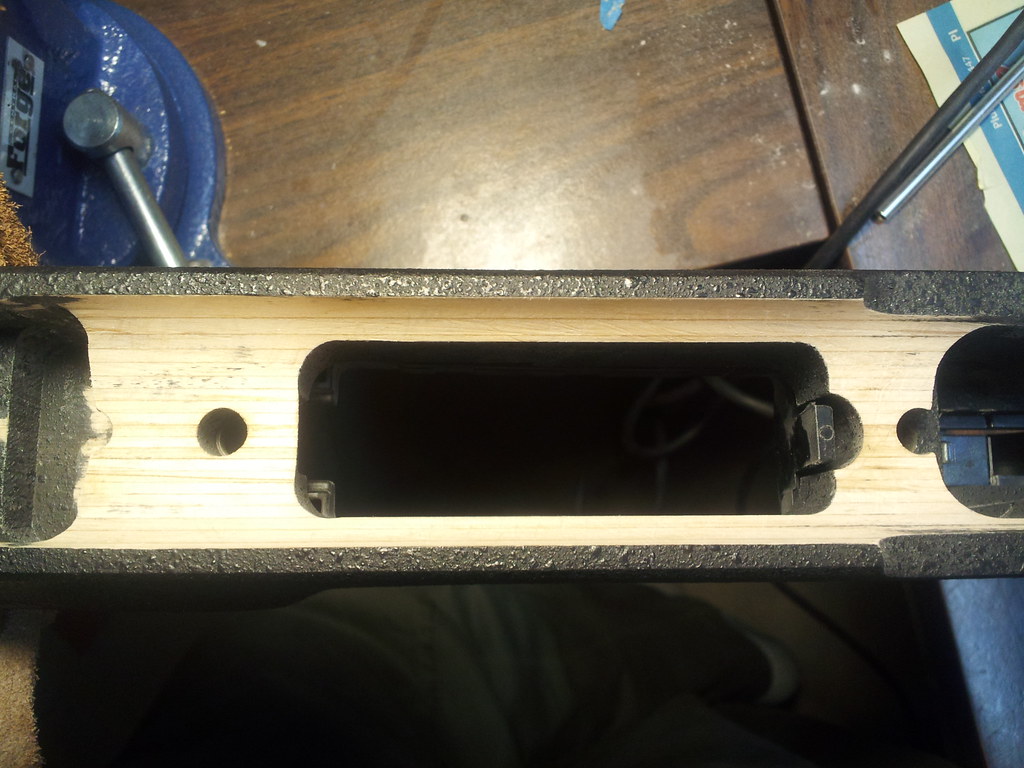
    I just plugged the holes with release agent. Used electric tape to hold it together. Of course the holes in the action are more important to fill/plug. Ya can always drill the stock not so much the action. Read this its an Axis but essentally the same. Important thing is take your time, check everything beforehand.
    http://www.savageshooters.com/showth...edding-an-axis
    There isn't anything you can do that can't be fixed. Its just a lot nicer when the first run at it comes out perfectly.

  3. #3
    Basic Member
    Join Date
    May 2011
    Location
    Lower Alabama
    Posts
    1,091
    I'm thinking I put tape around the action screws to provide clearance. Be sure to cover the tape with release agent.

  4. #4
    Basic Member
    Join Date
    Apr 2012
    Posts
    310
    But how do you even get the action screws in there without getting the compound in the holes? Do you just smear the compound far enough away? But then how do you get it to fill in around the screw perfectly if you do that?

  5. #5
    Basic Member
    Join Date
    Sep 2012
    Location
    MN
    Posts
    806
    Putting it in the holes is what keeps the holes from filling with epoxy. I press it in like greasing a wheel bairing. Your bedding the action not the screws.

  6. #6
    Basic Member
    Join Date
    Jan 2013
    Location
    traverse city,michigan
    Age
    46
    Posts
    701
    I tape the screws. But I also have a set of screws with the heads cut off for bedding. If your not using pillars you dont want to pull the action down with the screws they are only there for alignment.
    Some people put a small ring of clay around the screw.
    Either way coat it well in release agent tape and all.

    Push the action firmly down and secure with masking tape to the stock. Then begin cleanup with q tips where ever compound runs out.

  7. #7
    Basic Member
    Join Date
    Jan 2013
    Location
    traverse city,michigan
    Age
    46
    Posts
    701

  8. #8
    Basic Member
    Join Date
    May 2011
    Location
    Lower Alabama
    Posts
    1,091
    As usual I forgot an important detail, "limige" has the complete picture.

  9. #9

  10. #10
    Basic Member
    Join Date
    Apr 2012
    Posts
    310
    The extra screws idea looks like the way to go. Can bolts with the right threads be found at the local hardware store?

    Thanks for the help!

  11. #11
    Basic Member upSLIDEdown's Avatar
    Join Date
    Mar 2014
    Posts
    568
    Ideally, you'd buy two screws like the stock ones, but longer, and trim the heads off. Slot the end of each with a dremel, so a flathead can be used to turn them back out. They're usually referred to as blind screws. That way you can install them in the action, tape around them, coat the tape with release agent, as well as the holes in the stock. Then when you put in the compound, and press the action down in it, the blind screws will guide it down into the holes. Make sense?

  12. #12
    Basic Member upSLIDEdown's Avatar
    Join Date
    Mar 2014
    Posts
    568
    This video will give you an idea. Watching all of his videos, and searching for more, will help you immensely if you haven't watched any yet.

    http://www.youtube.com/watch?v=esr3BSNGpNc

  13. #13
    Basic Member
    Join Date
    Sep 2012
    Location
    Elizabethtown,Pa
    Age
    75
    Posts
    1,313
    Quote Originally Posted by Chrazy-Chris View Post
    I've finished relieving some area for the bedding compound and am left with this puzzle:

    My dilemma is this: how will I put the bedding compound down, place the receiver, and screw in the action screws without getting the action screw holes in the receiver FULL of bedding compound? I'm puzzled!
    Simple, you get two 1/4-28 bolts, cut the heads off, shorten the threads to make guide screws.


    That's a Rem 700 I was bedding but you get the idea. Give then a coat of neutral Kiwi shoe polish or Johnson's paste, add the goop in the stock then set the action in and allow the goop to cure. The guide screws will aid in aligning the stock to the action.


    The guide screws will turn out cutting threads in the cured goop as they are turned out. I cut slots in them and use a straight blade screwdriver.


    All that's left is the final cleanup and opening the screw holes to 5/16" for screw shank clearance.

    Bill
    Each morning eat a live green toad, it will be the worst thing you'll have face all day.

  14. #14
    Basic Member
    Join Date
    Apr 2012
    Posts
    310
    Thank you! I'm headed out for modeling clay and bolts now! I look forward to posting some pics of the final result

  15. #15
    Basic Member
    Join Date
    Jan 2010
    Posts
    280
    Tape around the barrel to center and float it. Two pices of tape under the tang to float it. Headless 1/4x28 3" long screws. Devcon and kiwi natural shoe polish. Polish in all the screw holes, headless bolts and buffed on the action good. Two layers of tape on the front, sides, and bottom of the lug. Good luck with it.

  16. #16
    Basic Member
    Join Date
    Apr 2012
    Posts
    310
    I finally got everything all ready to go, opened the brownells acraglass gel I bought locally, and it was almost completely dried up. The directions say it has a 20-30 year shelf life... BULL****! I'm beyond pissed.

  17. #17
    Basic Member
    Join Date
    Jan 2010
    Posts
    280
    That stuff is crap anyway. Get some devcon 10110, marine tex, or steel bed.

  18. #18
    Basic Member
    Join Date
    Sep 2012
    Location
    MN
    Posts
    806
    Man you just can't catch a break with this!

  19. #19
    Basic Member
    Join Date
    Jan 2013
    Location
    traverse city,michigan
    Age
    46
    Posts
    701
    I like acraglass. .it not dried up. One is a wax consistency and one is like honey...just mix it as instructed it makes a nice gel that goes where you want it and doesn't run all over the place like some.

  20. #20
    Basic Member
    Join Date
    Jan 2013
    Location
    traverse city,michigan
    Age
    46
    Posts
    701
    Btw one level spoonful of each is about perfect. Tint and use

  21. #21
    Basic Member
    Join Date
    Apr 2012
    Posts
    310
    Quote Originally Posted by limige View Post
    I like acraglass. .it not dried up. One is a wax consistency and one is like honey...just mix it as instructed it makes a nice gel that goes where you want it and doesn't run all over the place like some.
    I exchanged it for a new box of the stuff and thank God limige posted this little tidbit of info here, otherwise I would have thought this batch was just half-dried out because of the honey and wax consistency of it. I really appreciate the info, thanks limige!! Here she sits drying... I'll post pics of the final product tonight! Crossing my fingers!!!


  22. #22
    Basic Member
    Join Date
    Sep 2012
    Location
    Elizabethtown,Pa
    Age
    75
    Posts
    1,313
    Quote Originally Posted by Chrazy-Chris View Post
    What's all that blue tape for?


    Bill
    Each morning eat a live green toad, it will be the worst thing you'll have face all day.

  23. #23
    Basic Member
    Join Date
    Apr 2012
    Posts
    310
    Quote Originally Posted by BillPa View Post
    What's all that blue tape for?


    Bill
    Because it just looks so pretty 
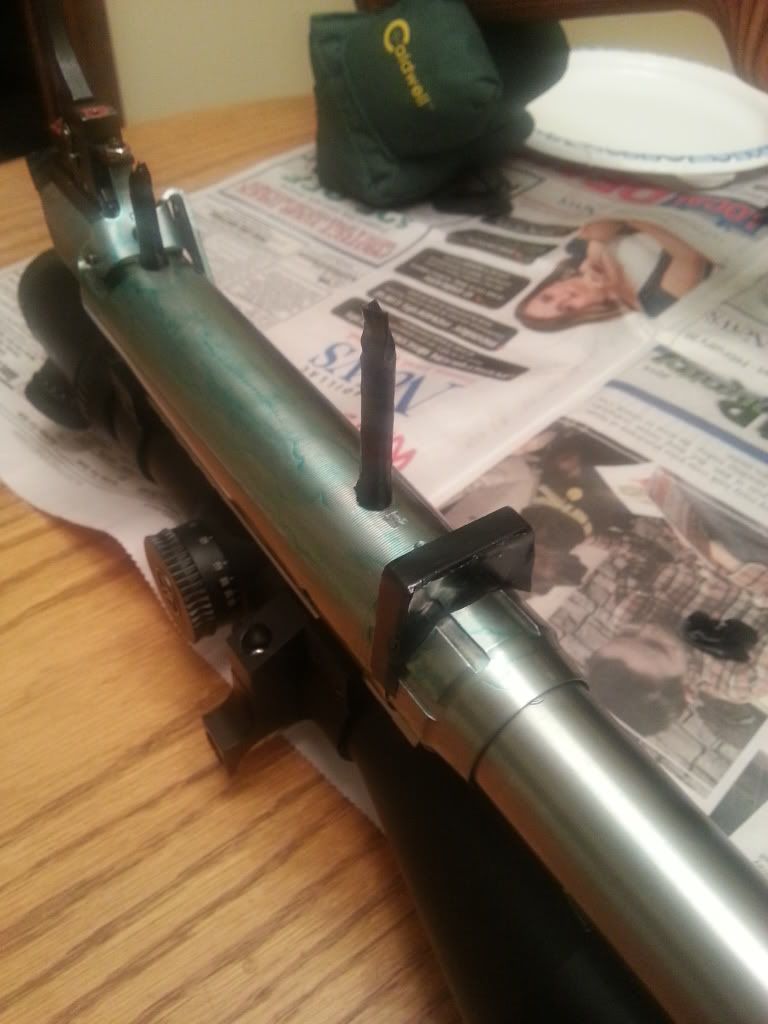
You should have seen all the purple play-dough

  24. #24
    Basic Member
    Join Date
    Jan 2013
    Location
    traverse city,michigan
    Age
    46
    Posts
    701
    Electrical tape will stretch. Its always good to wrap it additionally with masking tape so it doesn't sag.

    How'd she look when you popped it out??

  25. #25
    Basic Member
    Join Date
    Apr 2012
    Posts
    310
    It ended up being a little thin along the bottom of the recess, but other than that it looked good. I ended up not putting enough compound in the area under the barrel nut but am happy enough with the rest of it so it should do. I'll be installing a kydex cheek rest and painting the stock in the near future so I'll be sure to snap so pics. Of course, I'd also like to get to the range and shoot some before/after groups... I'll keep you posted.

Page 1 of 2 12 LastLast

Similar Threads

  1. Long Time Listener, First Time Caller
    By henryholub in forum Introduce Yourself
    Replies: 6
    Last Post: 12-17-2016, 04:21 AM
  2. hi first time poster, long time reader.
    By cm12setx in forum Introduce Yourself
    Replies: 7
    Last Post: 10-22-2015, 09:43 PM
  3. Time between bedding and shooting
    By jordan in forum 110-Series Rifles
    Replies: 6
    Last Post: 07-26-2015, 08:18 AM
  4. Bedding epoxy cure time
    By romad97 in forum 110-Series Rifles
    Replies: 14
    Last Post: 05-26-2015, 09:44 PM
  5. Replies: 32
    Last Post: 09-02-2011, 09:20 AM

Bookmarks

Posting Permissions

  • You may not post new threads
  • You may not post replies
  • You may not post attachments
  • You may not edit your posts
  •