This is my first post on this board. I have been lurking for a while. I posted this on another board, but figure it also might be of some use over here.
Back in October I put in the paper work for my first suppressor. I decided to get the SWR Spectre II. The next step was to find a gun to put it on. I wanted a .22 that I could mess around with and maybe even start taking some shots out to 100 yards or beyond. Basically I wanted a precision rifle trainer but didn’t want to pay a lot for a .22.
After a lot of reading here as well as other sites, I decided on the Savage FV-SR. I knew it would be a bit of a project to turn it into what I wanted, but I like a good project.
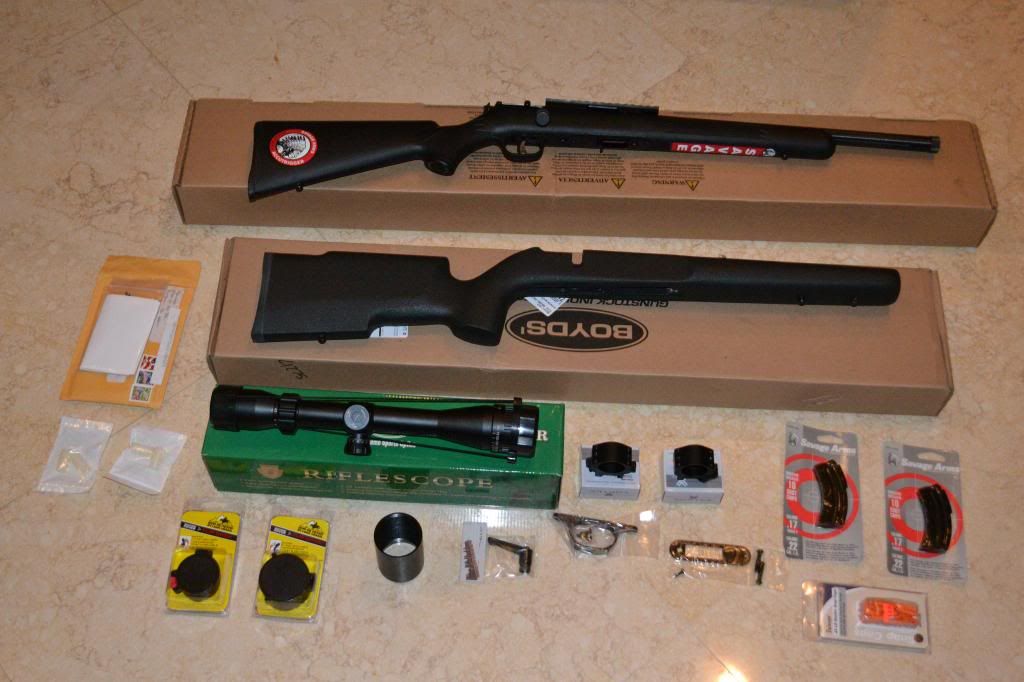
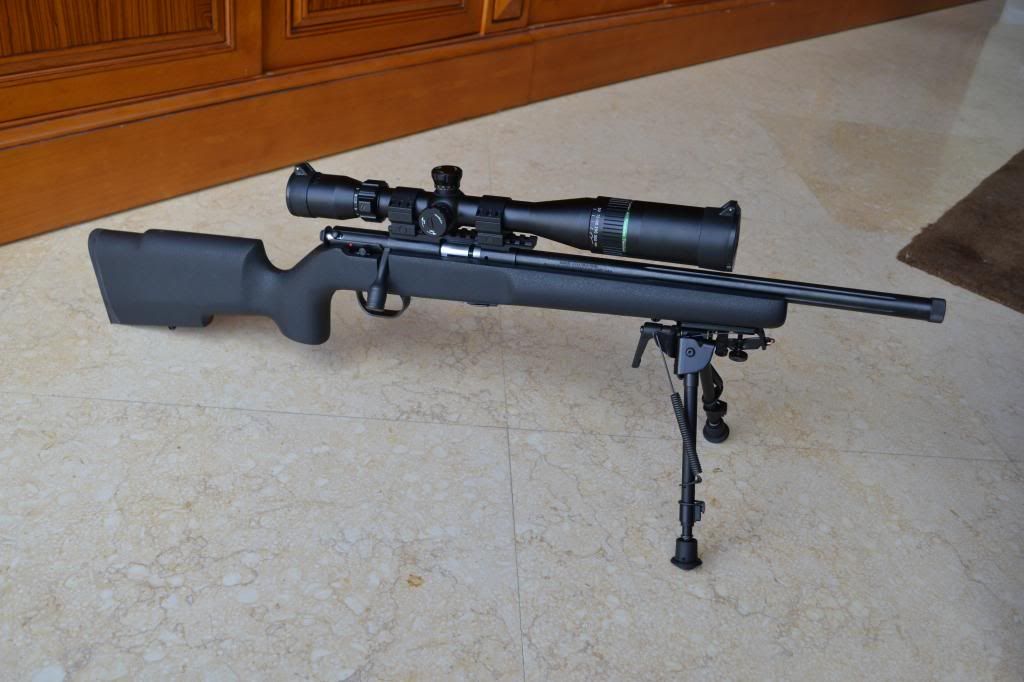
I will include a full write-up the project, but below is a summary of the set-up:
- Savage FV-SR (e-receiver)
- Boyds Tacticool Stock
- DIP bottom metal (item 13096)
- Mueller APT 4.5-14x40AO Scope with sunshade and Butler Creek scope caps (#20EYE/#34OB)
- Vortex scope rings (low)
- Apache trigger kit
- Harris bipod (S-LM 9”-13”) with DIP extended bipod lock
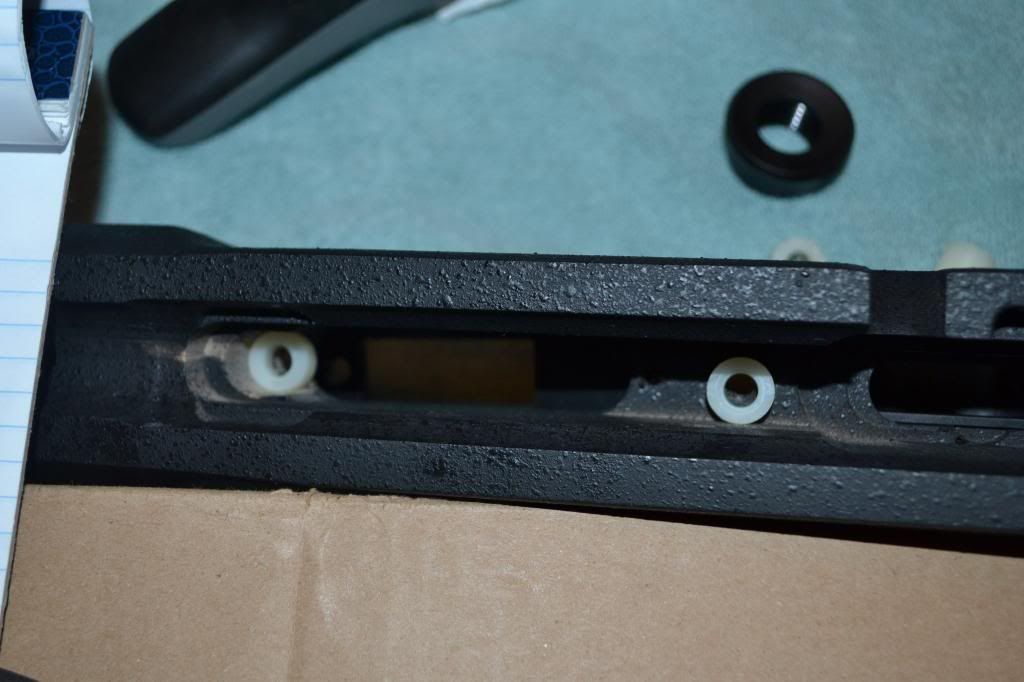
- Create and install nylon pillars between stock and action
- Polished bolt
I spent weeks combing over the internet reading everything I could get my hands on related to modifications for a Savage FV-SR. I am compiling some of the best information I found in one place as well as some of the observations from doing it myself.
I AM NOT A GUN SMITH. EVERYTHING INCLUDED WITHIN THIS POST IS ONLY MY OWN EXPERIENCE AND NOT INTENDED TO PROVIDE INSTRUCTIONS TO OTHERS WITHOUT PROPER TRAINING.
Stock
I knew the tupperware stock wasn't going to cut it. I decided on the Boyds Tacticool stock mostly because it looked cool. I also wanted something that I could paint if I ever decided to do so. I used nylon inserts cut to size to create pillars for the action. I used a pvc pipe cutter
I am not sure if I did the best job ever at measuring because I have written down two different dimensions but this should give an idea of the size for the “pillars”. My dimensions were as follows:
Rear: 0.2555 - 0.2600
Front: 0.2220 – 0.2250
I followed an example I found on another site (I couldn’t find any rules that prohibited posting of links to other forums so hopefully this is ok. http://www.ar15.com/forums/t_6_11/33...2.html&page=56
I torqued the action screws to approximately 15 inch pounds for the front and rear as a starting point. I’ll tinker with it after I get a brick or two of ammo through it.
Scope
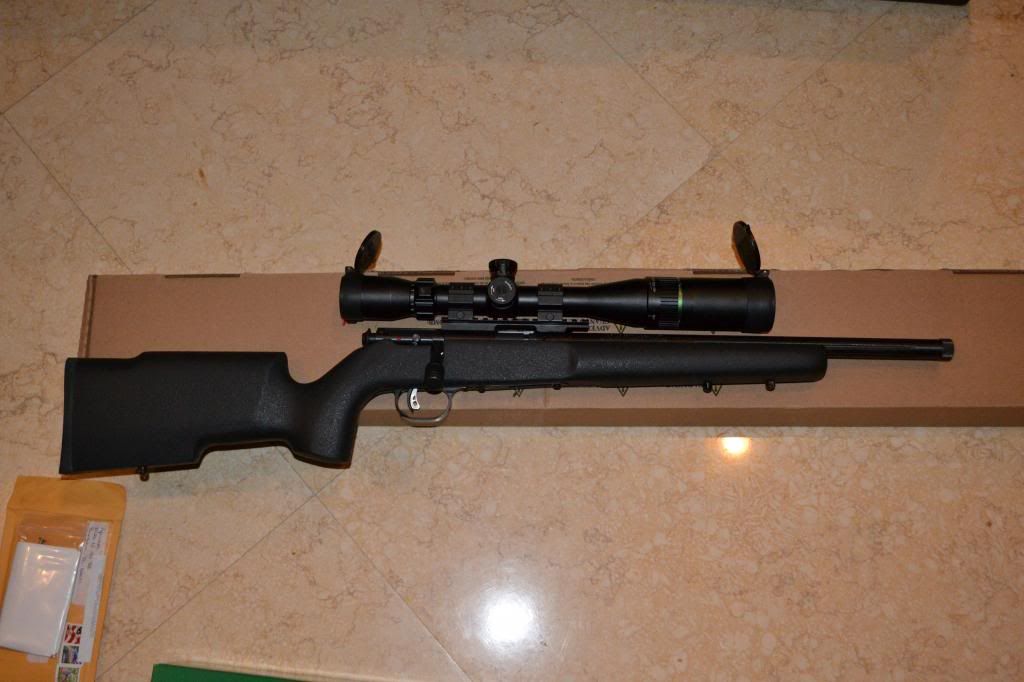
I mounted the scope. Nothing special, just removed the scope mount which was on the gun when I bought it and added a little LocTite. I then mounted the Vortex scope rings. There is plenty of clearance with the low rings (0.3345”). All of the top screws were torqued to 15 inch pounds.
If I could get the scope lower, I certainly would. When I bring the gun up with my eyes closed, get a nice cheek weld, and then open my eyes, I am about even with the bottom of the rear objective. I might have to get a cheek riser or switch to the Boyds Varmint Thumbhole stock to get extra elevation. For now I will just adjust my cheek weld.
Trigger
I am not new to shooting, but certainly new to the level of attention given to every aspect my equipment. I have read a lot about wobble, creep, etc. but have never really paid enough attention to notice it on my other guns. The stock accu-trigger was not very good on my gun. Even when adjusted to the lowest setting, the pull was very difficult and just all around didn’t feel very nice.
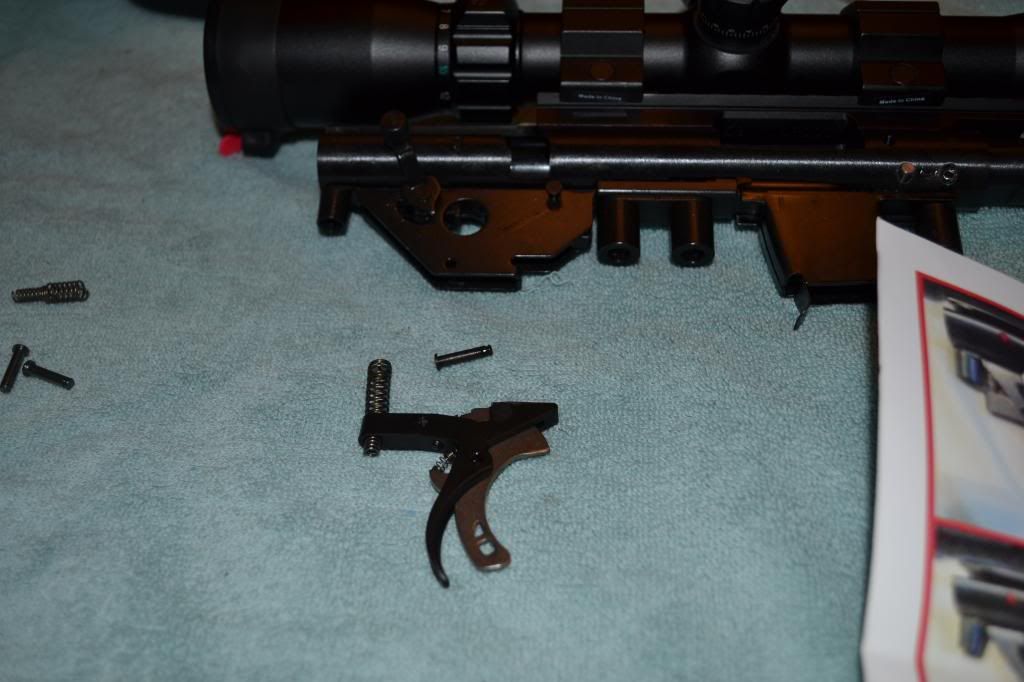
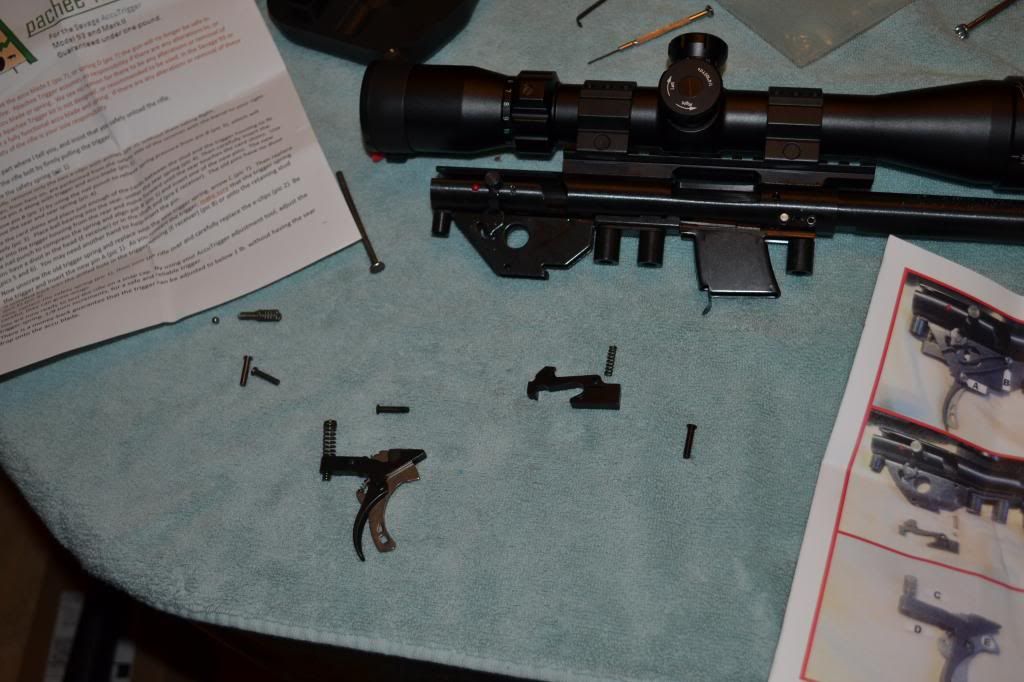
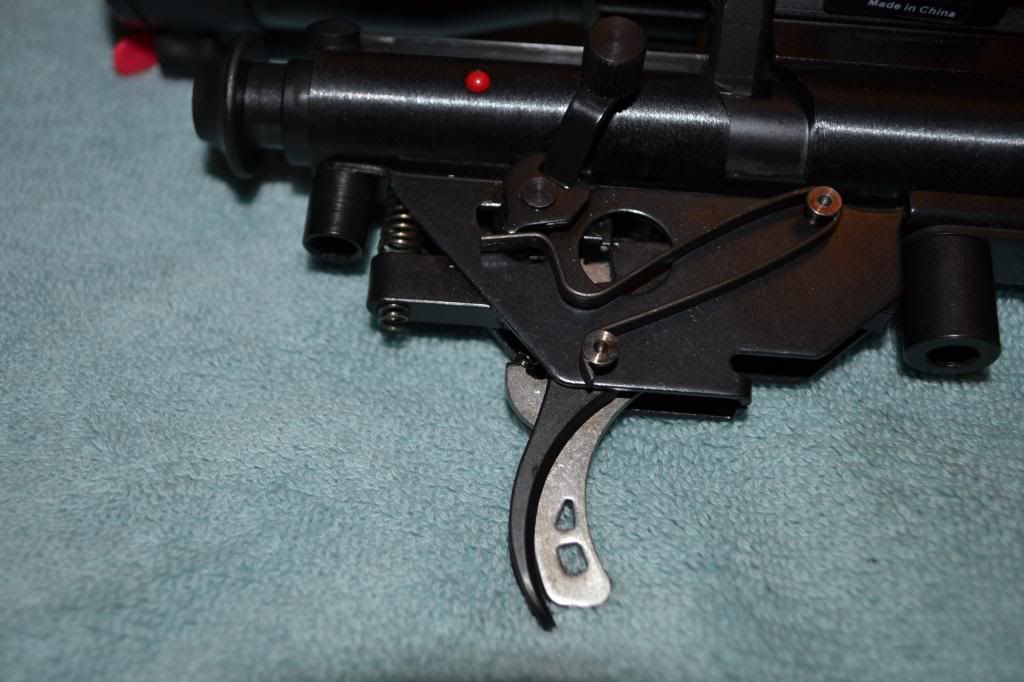
I read about the Apache trigger kit and for the price, thought it was worth a try. The kit arrived promptly and included two replacement pins, a ball bearing, and a new trigger spring. The directions included are very clear and made the modification very easy. Basically I removed two clips holding in the pins for the trigger and the sear. I removed the pins, replaced the adjustable trigger spring, placed a ball bearing on the sear spring, and put it all back together.
Many people have noted the “E” clips on the left side of the gun like to take flight when removed. I used a pair of precision needle nose pliers so that I could apply even pressure to both sides of the clip and didn’t have any problem.
I cannot believe the difference this trigger kit made. The trigger has no creep or wobble any longer and the trigger pull adjusts lower than I care to have it set. This truly was the most impressive part of the entire build.
The Apache trigger kits are made by rdssert on this board.
http://www.rimfirecentral.com/forums...d.php?t=520772
Polish Bolt
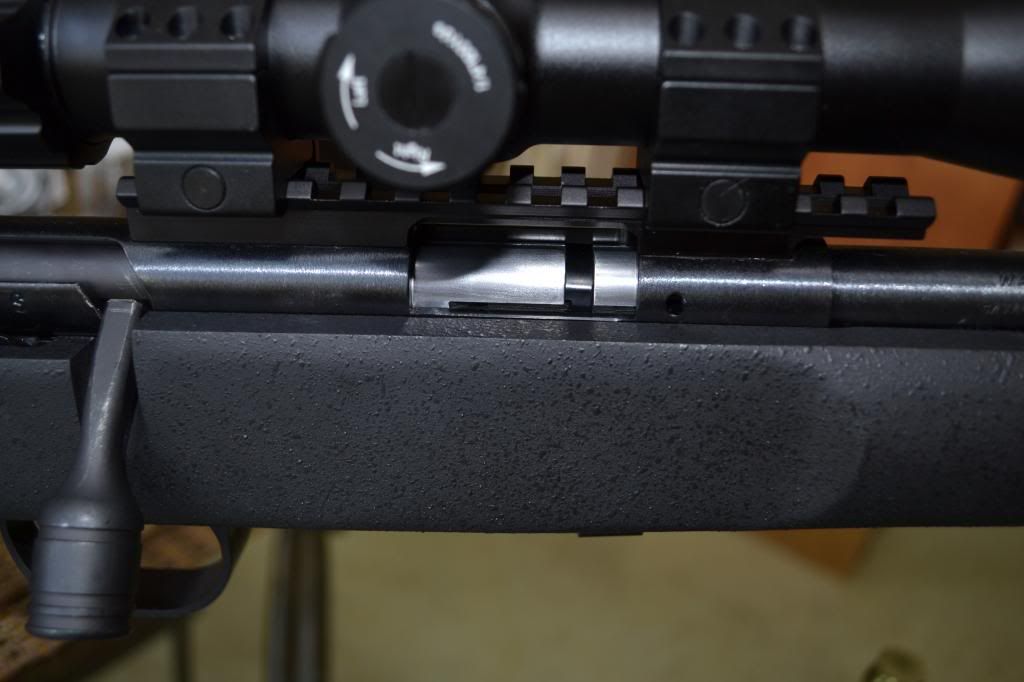
I didn’t like the feel of the cocking the bolt. It felt grainy and just generally was not smooth. I decided to polish the bolt for the internal riding surfaces as well as the font half. This was the scariest part of the entire project. I have never done work on a bolt before and even the thought of taking it apart was a little concerning. I found some good references and decided to give it a try.
I followed the directions from post #18 from the below thread: http://www.rimfirecentral.com/forums...ad.php?t=78552
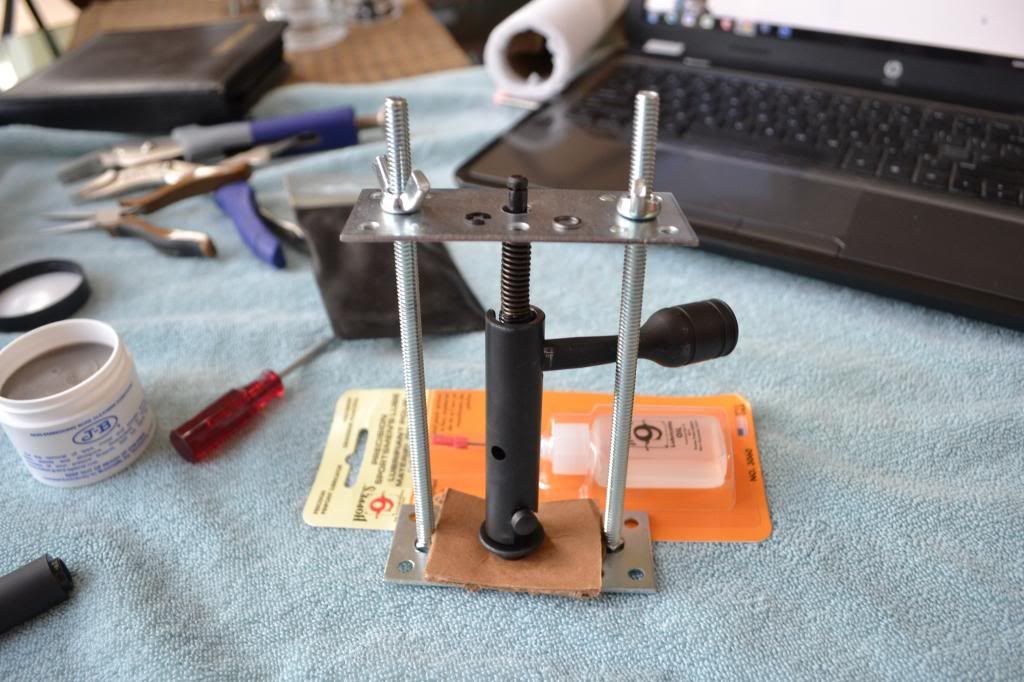
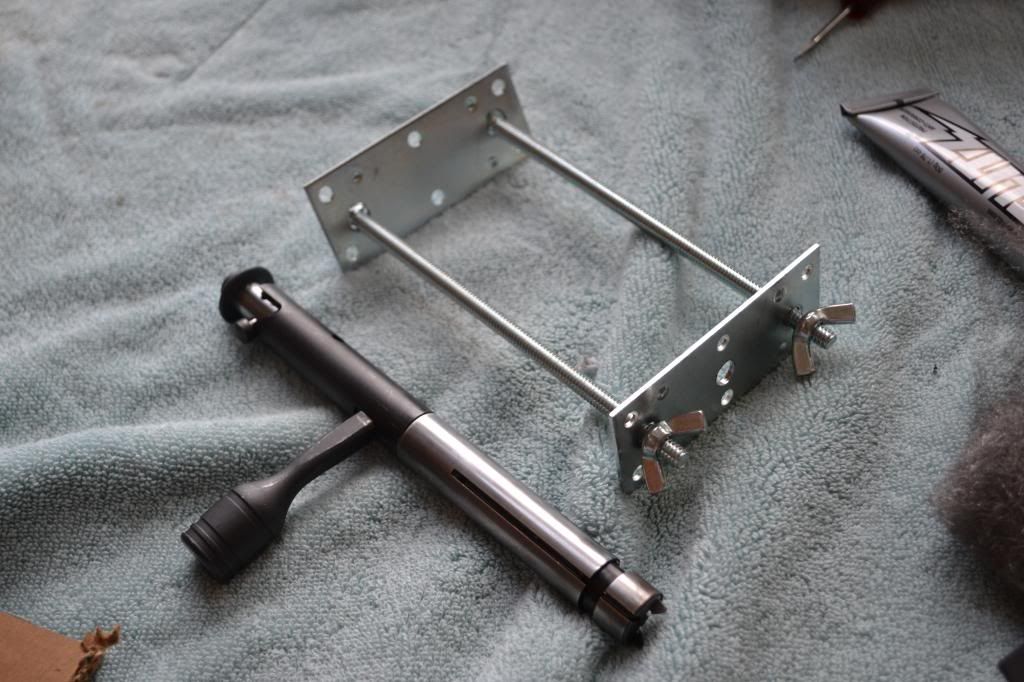
I made my own variation of the spring compressor found in this thread:
http://rimfirecentral.com/forums/sho...d.php?t=522872
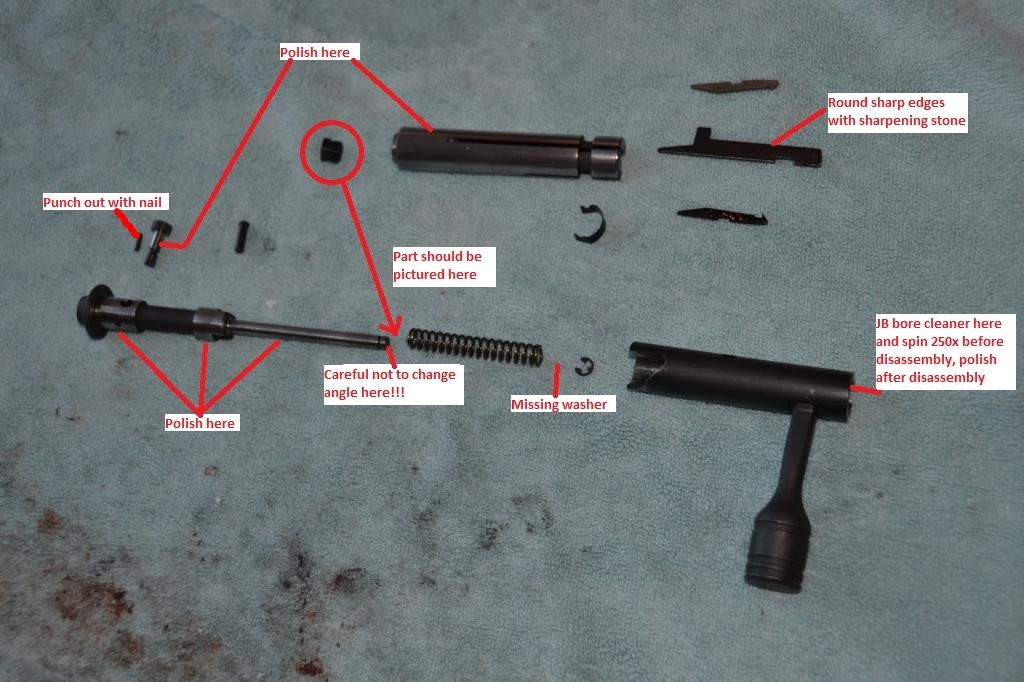
It’s made from some flat metal brackets, 6” 1/4x20 carriage bolts, wing nuts, and a piece of cardboard to keep from scratching the rear end of the striker. The center hole has to be large enough to let the “E” clip through but not so large as to allow the spring through. Mine worked out to be exactly to be the size of my 5/16” drill bit.
There was an extra washer between the spring and the “E” clip on the rear half of the bolt. I have seen some debate before on whether the washer exists or not, and I can assure you that it did on mine (see top of spring compressor). Unfortunately, I lost the washer. It doesn’t seem to impair the ability for the “E” clip to hold the spring back, but I will likely be looking to replace the washer anyhow for additional peace of mind.
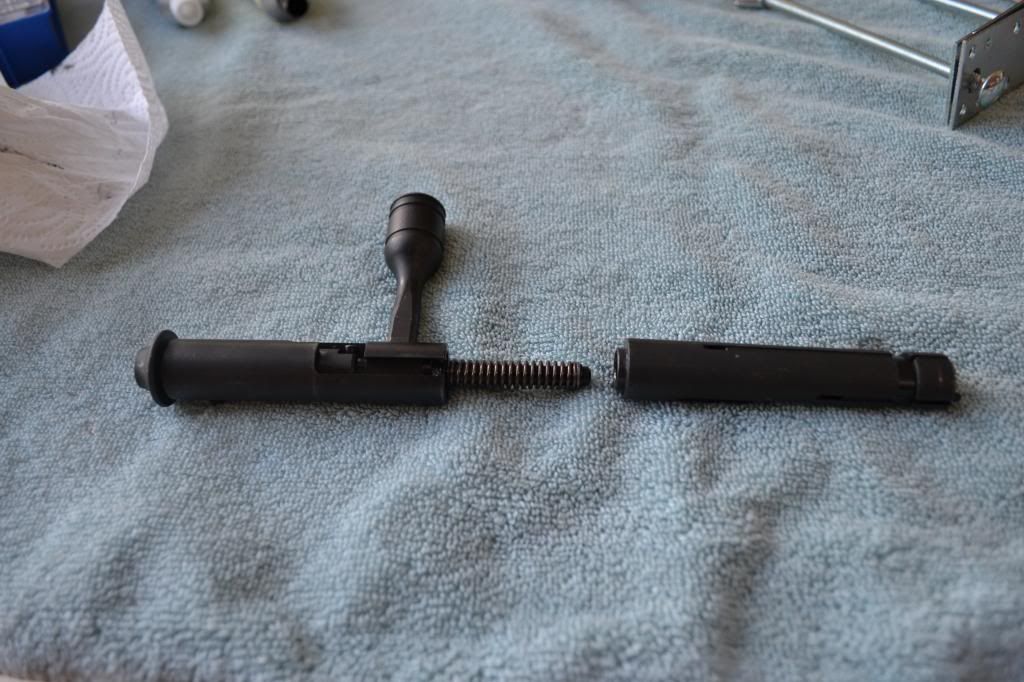
I used a small nail to punch out the pin holding in the cocking piece at the back of the striker. I probably should have cut the nail so it was square and didn't risk flaring out the end.
I tried using a Dremel to polish the entire bolt but quickly realized I was going to need to use sandpaper to get the job done. I used 400, 600, 1,200, fine steel wool, and then a polishing wheel with Flitz. The lighting is pretty terrible, but hopefully you can see the areas which I polished. It made a world of difference in the smoothness of the bolt.
Things I wish I did differently
The first thing would be that I would go with the Boyds Varmint Thumbhole stock. I didn’t give me the look I was going for, but I am not thrilled with the fact that the comb sites a few inches below the action.
I will likely be sending back the bipod to get the bench rest model with 6”-9” range (BRMS). Laying prone there is a little more distance between the ground and the butt plate to get on a target on a level plane than I would like (approx 6 inches).
Finished product
Future work
I will consider doing a pillar and/or action bedding job after I see how the gun shoots. I will tinker with the action screw torque before I decide to do any bedding.
If I stick with the Tacticool stock, I will be trying out an after-market comb riser. Before I decide to trade out the stock, I may try and do a project similar to this:
https://www.ar-15.co/threads/38425-S...in-a-Tacticool
http://www.waveform.eclipse.co.uk/WE...ek%20Piece.htm



 Reply With Quote
Bookmarks