Page 1 of 2 12 LastLast
Results 1 to 25 of 41

Thread: Any Way to Reduce Excessive Bolt Lift Effort???

  1. #1
    Basic Member
    Join Date
    Feb 2013
    Age
    69
    Posts
    21

    Any Way to Reduce Excessive Bolt Lift Effort???


    I tried posting this once before and it hit the dead letter file, so let's see if it goes through this time...

    Just purchased a new Axis .22-250 to do a little varmint hunting. I like most things about the gun and its a great value, but there is one nagging problem I can't get used to: high bolt lift force. Holding the gun on one's shoulder and trying to cycle the action quickly and smoothly is a difficult maneuver, due to the rather high bolt lift force necessary. By comparison, my only other BA rifle is a Ruger American, which has a very smooth and easy-to-actuate bolt for quick followup shots..

    I've tried other Axis models and they all seem to have the same stiff feel to the bolt. Is this just a Savage Axis design characteristic? A friend has put many thousand rounds through his Axis, and the bolt is just as stiff as the day he bought it, so wearing it in does not seem to be an option.

    Somebody here once posted that using "proper" grease on the bolt reduced bolt lift by 25% but he did not elaborate as to what type of grease he used, nor where and how he applied it. I want to make sure I do not cause any issues by greasing the bolt and would like if somebody could advise as to the type of grease, and exactly where to apply, as to not interfere with firing integrity.

    Any comments and advice on the bolt lift force issue would be appreciated.

    Thanks,
    Dennis
    San Diego, CA

  2. #2
    thomae
    Guest
    Proper lubrication is always a good idea when metal rubs against metal, but it won't reduce your effort by 25%

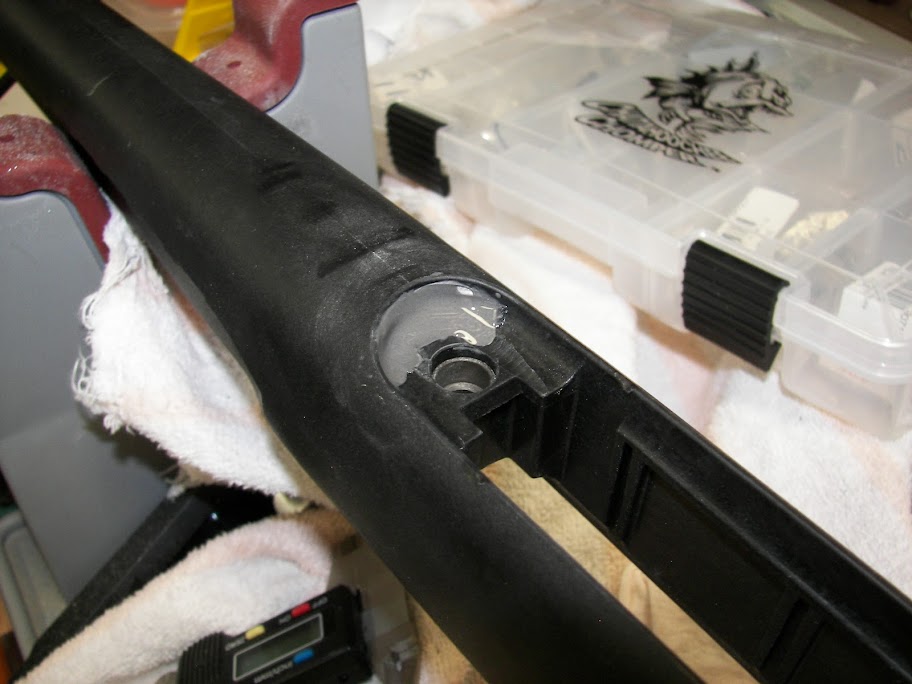
    You can reduce some of the bolt lift effort by really polishing any surfaces that rub, especially the cocking ramp and the shaft of the cocking pin. Polishing the sides of the various parts of the trigger where they rub will help as well. Make sure the sides of your sear are not bent so that they produce extra friction when resetting the sear as you lift the bolt handle.

    A longer bolt handle (home made extention) will also help with the apparent force required to lift the bolt.

    A timing job by Fred ("Sharpshooter" on the forum) will make things easier, but I am not sure what your budget is.

  3. #3
    65impala
    Guest
    I use slide grease (Wilson Combat brand specifically) on all my slides as well as heavy contact points on my bolt guns and it makes a world of difference. This is assuming that the lift is not caused by some problem...

  4. #4
    Basic Member Willoughby's Avatar
    Join Date
    Jul 2011
    Location
    NW Montana
    Age
    65
    Posts
    311
    as Thomae has allready mentioned
    IMHO
    only way that really works is leverage
    adding lenght to the bolt handle
    see my post on axis bolt lift effort
    I worked on one for a freind all the polishing & lubing I done netted me maybe 1/4 lb reduced effort
    when I added 1' to the length
    bolt lift effort was decresed by 4lbs or so
    buy or build yourself a longer bolt handle
    leverage works....
    Last edited by Willoughby; 03-08-2013 at 06:38 PM.

  5. #5
    Administrator J.Baker's Avatar
    Join Date
    Dec 2006
    Location
    NW Ohio
    Age
    49
    Posts
    6,490
    This is cause by a mechanical timing issue and can't be properly eliminated/addressed without having the action timed by a gunsmith that actually knows what he's doing (and by that I mean knows the inner workings of a Savage and NOT treating it like it's a Remington action). Here's a good explanation by Fred Moreo (aka sharpshooter here on the forum) who pioneered the process and tooling for timing the Savage's...

    http://www.savageshooters.com/conten...uing-Explained

    Polishing up the parts might help a wee little bit.
    The so-called "bolt lift kit" might help a wee little bit.
    A longer bolt handle does nothing but mask the real problem by giving you more mechanical advantage.

    To fix it rightly and permanently the action needs to be properly timed. With a properly timed Savage action you can lift/recock the bolt with nothing more than the tip of your index finger.
    "Life' is tough. It's even tougher if you're stupid." ~ John Wayne
    “Under certain circumstances, 
urgent circumstances, desperate circumstances, profanity provides a relief denied even to prayer.” —Mark Twain

  6. #6
    Basic Member
    Join Date
    Dec 2009
    Location
    Steamboat Springs Colorado
    Age
    58
    Posts
    93
    That link didn't work for me, but I think I can find it.
    Life is short, make every shot count.

  7. #7
    Basic Member
    Join Date
    Feb 2013
    Age
    69
    Posts
    21
    I appreciate all the replies so far guys! So if I'm understanding this correctly, Savage designs and builds rifles with an inordinately high amount of bolt lift, which does not get significantly better with use or lubrication, and does not respond to simple modifications? One needs to take it to a gunsmith, have it specially worked on at total cost incl. shipping of ~$225 - and finally end up with a bolt that feels like a Remington or Ruger? If so, my love affair with Savage is unfortunately not starting off very well.

    Regarding the timing work, I did a search on Google and found reports from people where in some cases it improved the action remarkably well, and in other cases the improvement was barely perceptible. I guess it all depends on how bad the action was in the first place.

    I don't believe this timing operation will be an option for me. Putting $225 more into a $325 rifle doesn't sit too well, and from there is the trigger which will then need to be worked on. Flexing stock? Like many people have pointed out, it is probably better to just buy a more expensive gun in the first place. I'm assuming that the more expensive Savage models uphold the great name and reputation this company has earned.
    Last edited by CA Turkey Huntsman; 03-09-2013 at 11:22 AM.

  8. #8
    Basic Member
    Join Date
    Jan 2013
    Location
    Upstate SC
    Age
    71
    Posts
    244
    Last edited by Apache; 03-31-2013 at 12:27 PM. Reason: Read the rules.

  9. #9
    Basic Member
    Join Date
    Sep 2012
    Location
    MN
    Posts
    806
    While Mr. Furious spells it out as usual. I would back up to thomae's post #2 work the steps outlined. You may be surprised at the progress you can make. Clean, Polish, Lube! Quality lube makes a difference BreakFree ect.. Might start out like a Mosin but with minimal effort you can make significant improvements.

    I doubt 1 finger cycling is required for a hunting grade rifle. Actually compared the Rem 700 ADL, Mossberg DeerTHug and the Ruger American cycling prior to buying 2 Axis 308's last Christmas and found the Axis to be much smoother from the get go. The Mossbergs were close but seemed overall sloppier and still noisier. YMMV

  10. #10
    Basic Member
    Join Date
    Feb 2013
    Age
    69
    Posts
    21
    I am seeking courteous advice for how to make my admittedly budget Axis a better-shooting rifle, since I have probably made the mistake of not buying a higher-end model from the start. I'll work with what I now have, thanks to the people whom have offered me technical advice for how to improve it. If anyone is interested, I'll post details of my progress as I work on the rifle. I've already pondered a novel approach to stiffening the "flexing stock wrist" that I have yet to read about elsewhere.

  11. #11
    65impala
    Guest
    I haven't even held an Axis yet so I really can't say what would or wouldn't work for it, but I have stiffened several plastic stock forends by pouring in a mix of epoxy and various fillers. If I want to weight the rifle down a bit I use epoxy and lead shot, if I just want to stiffen it I use epoxy and micro-ballons (stuff I use in composite boat building...) Either way, get creative and share your results with us.

    ~George

  12. #12
    Basic Member
    Join Date
    Feb 2013
    Age
    69
    Posts
    21
    George, go to any gun store and pick up any Axis and hold it. You will see that the stock flexes noticeably in the "wrist" area just behind the tang safety where the stock narrows way down for your hand to grip. It also flexes in the forend - but to Savages credit, the weight of the rifle alone on a stud-mounted bipod will not cause the free-floating barrel to touch the plastic forend.

    Other people have placed two lateral steel stiffening rods in the forend and surrounded the rods and voids with 100% epoxy. I may try this myself, but I'm also curious as to what these micro-ballons are - can you please elaborate on these parts and your stiffening procedures?

    For me, the most bothersome flex is in the wrist area - and this is what I want to get at first. Looking very closely, I can see that Savage designers have incorporated the removeable plastic trigger guard as a structural element that assists in stiffening the wrist. But the execution is unfortunately inadequate. One end of the guard is held in place by an action bolt, and the other end is a mere plastic tab inserted into a hole in the stock. There is a 1 mm gap when the two pieces fit, and the stock wrist is free to flex and move about this gap.

    One can reduce a great deal of the flex in one direction by removing the magazine, loosening the rear action bolt, and pressing the trigger guard tightly toward the rear end of the stock while retightening the action bolt. This takes up the 1mm gap, and prevents the butt end of the stock from flexing downward when the forend is kept level. Unfortunately, flex in the opposite direction is not helped by this method as it widens the gap that was just closed up. If Savage had simply added one more bolt at the rear end of the trigger guard, it would have locked the two pieces tightly together and produced an adequately stiff wrist area. But, cost cutting was done here and that's just the way it is.

    I will attempt to epoxy a threaded brass insert in the stock wrist so that this "missing" bolt can be added. Others have done essentially the same thing by epoxying the trigger guard permanently to the stock. I however, prefer to not make such permanent modifications and hope I can come up with a method that allows removal of the trigger guard. Stay tuned...

  13. #13
    Tack
    Guest
    Hey, CA, you can't leave us all hanging like that...we all want to know the new unchartered approach you have planned. I still await my axis, but when it comes, I plan to test and document all the stock flex at all angles and then stiffen according to the information on this site and then test again to actually measure the difference made. I am thinking of hollowing out the pistol grip and epoxying in a steel shaft up to the base of the action to see if that will help too. Do share your plans, you may go down in savage history.
    Tack

  14. #14
    Tack
    Guest
    ^ got me by a minute...

  15. #15
    65impala
    Guest
    CA,

    The phenolic microballons are just tiny spheres of phenolic material that you mix with the epoxy resins when you are fairing a boat hull. Think of it is the upgraded "marine" version of bondo. It's just there as a filler so that it takes less epoxy and since they are lower density the mixture will weigh less than pure epoxy.

    It comes in a container and looks like a course powder:


    For a good place to buy some check out http://boatbuildercentral.com/prodde...b#.UTzWVZizdU0

    This is the place I buy all my epoxy resins and fillers for building boats. There are other options of course, but this is the company I have found to be best to work with. Until I get a chance to play with an Axis I can't say for sure if this is a valid option for your gun or not, I'll try to grab one and play with it, but until then I'm just tossing out options for stiffening the forearm. If there is a void somewhere that can be filled solid then this is the material I would use to do so. Maybe I just need to buy an Axis to play with and see what I can come up with!!

  16. #16
    Basic Member
    Join Date
    Feb 2013
    Age
    69
    Posts
    21
    George:

    Thanks for the info on the filler. I assume these beads are pretty hard and will not considerbly weaken the tensile strength of the epoxy, right?

    There is an excellent thread on here with photos, showing how one fellow put steel rods into the forend, and then surrounded them with epoxy resin. I'll likely do the same, or a slight variation thereof.

    Can anybody please tell me how the Savage-emblem hole filler plug is removed from under the stock grip area? Just a simple friction-fit pry out, or is it held in there with plastic clips and/or adhesive? I want to remove it to investigate additional methods for stiffening up the wrist area, but do not want to damage the plug nor the stock itself.

    Thanks again,
    -Dennis, CA Turkey Huntsman

  17. #17
    65impala
    Guest
    Dennis, they are dense enough that they won't negatively impact the tensile, at least not to the point of concern for it's intended use!

  18. #18
    thomae
    Guest
    The Savage logo is lightly glued onto the stock. I used a sharp knife to gently pry it off and it came off without breaking. OT stiffen the wrist area, I epoxied a piece of threaded metal stock through the wrist of the stock. Then I glued the Savage logo back on. It helps some. Not perfect, but better.

  19. #19
    Basic Member
    Join Date
    Feb 2013
    Age
    69
    Posts
    21
    Tomae: do you have any photos of how you did that wrist reinforcement...or can you please give a few more written details?

  20. #20
    Tack
    Guest
    Yeah, photo's, photo's. We need photo's. All us beginners love photo's.

  21. #21
    thomae
    Guest
    I pried off the Savage logo, and using JB weld, epoxied a length of threaded rod that I had cut to an appropriate length. It isn't pretty, but everything gets covered up and you can't see it from the outside. Here is what it looked like looking at the hole where the Savage Logo was.


    I also took some extra long drill bits and drilled lengthwise through the forearm and epoxied aluminum rods from the front all the way through to the area just in front of the DBM.

    Here's what it looked like from the front:


    Here's what it looked like by the magazine:


    I filled in the voids on the interior of the stock:


    I ended up using a dremel and sandpaper and sanding this area smooth:


    I filled in the gaps in the trigger area:


    I smoothed the front and rear where the rods protruded:


    Then I painted the outside of the stock with black undercoating paint:


    It looked like this:


    I think I used two or three coats. Then I masked the stock and sprayed sand textured paint:


    Since then, I have not shot the rifle, nor do I have any photos of the finished product. I'll get them up when I do.

  22. #22
    Basic Member
    Join Date
    Feb 2013
    Age
    69
    Posts
    21
    WOW Thomae...nice work! Thanks so much. You take excellent pictures and explain very well. I read your pictorial instruction about how to take the bolt apart, and was very impressed at the clarity of instruction.

    Couple of questions about the stock mod:

    1) Did you sand the plastic surfaces before adding the JB Weld (I assume it was the fast-setting type)? I do have a concern that JB (or clear epoxy) will not adhere very well to that slick plastic stock material.

    2) Is the entire wrist area completely filled up with JB after the threaded rod is set in place, or is that the total amount of epoxy that you finally used?

    3) How much better is the stock now that all this work has been done? Are you satisfied with the rigidity?

    Thanks,
    -Dennis

  23. #23
    Tack
    Guest
    That's exceptional Thomae, absolutely perfect for a newbie. Clear, precise and very informative. Now I'm set like jelly, ready for this bangin stick to turn up so I can go all medieval on it.
    Tack
    Last edited by Tack; 03-13-2013 at 02:26 AM.

  24. #24
    thomae
    Guest
    Quote Originally Posted by CA Turkey Huntsman View Post
    1) Did you sand the plastic surfaces before adding the JB Weld (I assume it was the fast-setting type)? I do have a concern that JB (or clear epoxy) will not adhere very well to that slick plastic stock material.
    It was not fast acting JB Weld, and, although I thought I had let it set up long enough, I had to be careful because it kept moving around. I don't recall if I roughed up the inside surfaces where I put the rod in. That is a good idea, however, even though the JB Weld appears to adhere to the plastic without any problems

    Quote Originally Posted by CA Turkey Huntsman View Post
    2) Is the entire wrist area completely filled up with JB after the threaded rod is set in place, or is that the total amount of epoxy that you finally used?
    I did not fill up the entire wrist area. What you see is how much epoxy I used. If I were to fill up the wrist, I would consider using some type of expanding foam. Filling that whole area with epoxy would be rather heavy and would take about a full cup or two of epoxy.

    Quote Originally Posted by CA Turkey Huntsman View Post
    3) How much better is the stock now that all this work has been done? Are you satisfied with the rigidity?
    The stock is more rigid, but not perfect. It still flexes some, due to other inherent problems with the stock, but it is better than before. I really have not shot it (it's been one heck of a winter) since then, but holding it and practicing, I think it will do well for casual shooting and hunting. I like the extra grip that the textured paint adds. Time will tell how durable the finish is.

  25. #25
    Basic Member
    Join Date
    Feb 2013
    Age
    69
    Posts
    21
    Thomae, thanks for the clarifications. I'm trying to understand these procedures the best I can before I go hacking into my brand new stock.

    Frank (fgw_in_fl) also put rods in his forend, but did not allow them to protrude out of the front. Since I'm not up for a custom paint job like you did, I'll probably follow Frank's method and cut the rod length to about the front sling swivel. There is one other detail worth discussion, and that is the holes you made back at the magazine end for the rods. Frank was only able to drill in 3/8" or so before hitting an obstruction, but I see you went totally through the thick plastic boss clean through to the mag well. I'm not sure if Frank hit the recoil lug as he was drilling, or some other metal part that has been moulded into the recoil lug seating boss.

    You apparently drilled in very low from the front of the forend, allowing you to keep the drill bit parallel with the forend, and negating the requirement to remove the plastic "webs" to drop the rods down into the bottom. I like the fact that your method set the rod ends into the entire recoil lug boss, but am now wondering if it would be possible to drill in that far with the bit coming in at an angle, as Frank had done?

    Did your two holes clear the recoil lug itself, or was it necessary for you to notch the lug to fit over the two rods?

Page 1 of 2 12 LastLast

Similar Threads

  1. Do newer Target Actions have less bolt lift effort?
    By Ratbuster in forum 110-Series Rifles
    Replies: 15
    Last Post: 07-07-2016, 06:08 PM
  2. Bolt Lift - Savage 116 Trophy Hunter with newer (axis) bolt
    By Camar068 in forum Axis Series Rifles
    Replies: 9
    Last Post: 02-02-2016, 08:35 PM
  3. Mark I/II/93R: KRG Bolt Lift
    By UncleSarge58 in forum Savage & Stevens Rimfire Rifles
    Replies: 1
    Last Post: 04-18-2014, 04:13 PM
  4. Bolt Lift Kit
    By Rezmedic54 in forum 110-Series Rifles
    Replies: 9
    Last Post: 08-25-2012, 02:22 PM
  5. Reducing bolt lift effort
    By Aircraftmech76 in forum 110-Series Rifles
    Replies: 36
    Last Post: 11-27-2010, 09:58 PM

Bookmarks

Posting Permissions

  • You may not post new threads
  • You may not post replies
  • You may not post attachments
  • You may not edit your posts
  •