Page 3 of 10 FirstFirst 1234567 ... LastLast
Results 51 to 75 of 226

Thread: Axis / Edge Stock Reinforcement Made Easy - Take II

  1. #51
    rjmorel
    Guest

    How do you take off the butt pads on the axis ?
    I just got mine a few weeks ago and the wrist area has been strengthened like thorshammer in another post but still a little different in the width of holes . There may be several mods done to the stock mold during production that they worked in around production demands and it took them several tries to get it to their liking.
    Maybe we should post some pics and put them all in one reply so we can see???? rj

    Last edited by rjmorel; 03-12-2013 at 01:24 AM. Reason: add pic

  2. #52
    Basic Member thermaler's Avatar
    Join Date
    Aug 2012
    Location
    Downeast Maine
    Posts
    1,231
    Quote Originally Posted by fgw_in_fla View Post
    No....
    I have an older 110 (circa 1997 +/-) and lately the trigger has gotten a little harder to pull. I've performed all the old favorites - polised sear / trigger, .040" wire spring, adjust, etc - and I think its worn. Just doesn't feel light like it used to. This has happened over a period of about 2 months of every Sunday use.

    Maybe I should have clarified what I wrote. It does look like I have a RB that's not happy, doesn't it?...
    I think the RB is the best thing going for the Axis--short of getting an accutrigger in.
    [B][COLOR="#FF8C00"]Shooting--it's like high-speed golf[/COLOR][/B]

  3. #53
    Basic Member
    Join Date
    Sep 2011
    Location
    Right where I Always Need To Be. Usually...
    Posts
    2,507
    Quote Originally Posted by rjmorel View Post
    How do you take off the butt pads on the axis ?
    I just got mine a few weeks ago and the wrist area has been strengthened like thorshammer in another post but still a little different in the width of holes . There may be several mods done to the stock mold during production that they worked in around production demands and it took them several tries to get it to their liking.
    Maybe we should post some pics and put them all in one reply so we can see???? rj

    What difference would it make?.... They all suck. All you can do is wahtever you can conjure up for reinforcement.
    Butt pad removal....
    Screw on the bottom swivel point), square thingie on top. Remove screw, try not to loose. Gently press square thingie while gently pushing it towards the open end of the stock. Don't force it or it'll snap off.
    DOn't ask me how I know that....


    Therm...
    Thanks for the input.
    'Scuse me while I whip this out...!

  4. #54
    Basic Member
    Join Date
    Feb 2013
    Age
    69
    Posts
    21
    Frank, on the forend you mentioned only being able to drill 3/8" deep into the plastic post at the recoil lug. Was the recoil lug inserted when you were drilling? Perhaps you had drilled all the way through the plastic and got to the lug itself?

    Thanks,
    -Dennis

  5. #55
    Basic Member thermaler's Avatar
    Join Date
    Aug 2012
    Location
    Downeast Maine
    Posts
    1,231
    Quote Originally Posted by CA Turkey Huntsman View Post
    Frank, on the forend you mentioned only being able to drill 3/8" deep into the plastic post at the recoil lug. Was the recoil lug inserted when you were drilling? Perhaps you had drilled all the way through the plastic and got to the lug itself?

    Thanks,
    -Dennis
    Folks--I'm no expert--BUT DO NOT DO ANYTHING that effects the positioning of the recoil lug in the slot bed! Any misalignment/movement in the lug can translate to the trigger assembly not engaging properly and result in possible AD--it's happened to me!
    [B][COLOR="#FF8C00"]Shooting--it's like high-speed golf[/COLOR][/B]

  6. #56
    Basic Member
    Join Date
    Sep 2011
    Location
    Right where I Always Need To Be. Usually...
    Posts
    2,507
    Quote Originally Posted by CA Turkey Huntsman View Post
    Frank, on the forend you mentioned only being able to drill 3/8" deep into the plastic post at the recoil lug. Was the recoil lug inserted when you were drilling? Perhaps you had drilled all the way through the plastic and got to the lug itself?

    Thanks,
    -Dennis
    No it wasn't the lug. The holes drilled are well below the lug. The Axis stocks I've traumatised all were drilled until I hit something a little harder than what I was drilling. It wasn't the lug. Just harder plastic? maybe harder plastic for the lug to sit in?

    I really don't know. I just drilled until I needed to push harder on the drill, then stopped. That was deep enough to epoxy the rods.
    'Scuse me while I whip this out...!

  7. #57
    Basic Member
    Join Date
    Sep 2011
    Location
    Right where I Always Need To Be. Usually...
    Posts
    2,507
    Quote Originally Posted by thermaler View Post
    Folks--I'm no expert--BUT DO NOT DO ANYTHING that effects the positioning of the recoil lug in the slot bed! Any misalignment/movement in the lug can translate to the trigger assembly not engaging properly and result in possible AD--it's happened to me!
    Alright.... Just becauase of my Polish heritage you don't have to make fun of me......

    The lug never comes out whilst modifying the stock.
    Unless it falls out, in which case, I've never had that happen....

    Thanks for the heads up, anyway.
    'Scuse me while I whip this out...!

  8. #58
    Basic Member thermaler's Avatar
    Join Date
    Aug 2012
    Location
    Downeast Maine
    Posts
    1,231
    Quote Originally Posted by fgw_in_fla View Post
    Alright.... Just becauase of my Polish heritage you don't have to make fun of me......

    The lug never comes out whilst modifying the stock.
    Unless it falls out, in which case, I've never had that happen....

    Thanks for the heads up, anyway.
    Fun of you? Heck no--more like fessing up to my own knuckleheadedness.
    [B][COLOR="#FF8C00"]Shooting--it's like high-speed golf[/COLOR][/B]

  9. #59
    dirtysquared
    Guest
    Frank,
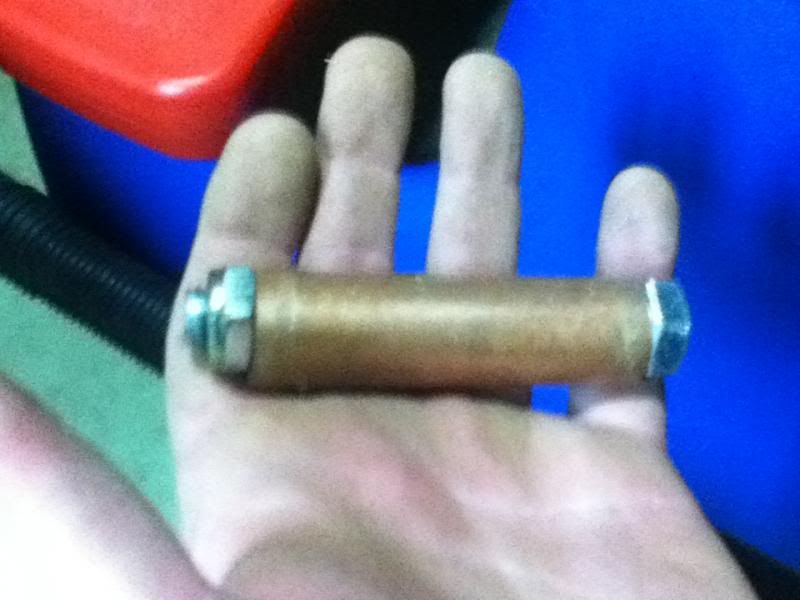
    I also did the mod with the rods. I used all-thread and drilled them a hair small. I then coated them in epoxy and got them threaded/epoxied into the stock. I also Epoxied them in like you showed in your Post. The only thing I did different is I Filled in most of the voids in the front of the stock with epoxy. It has seemed to tighten it up. I also made a counter-weight out of a piece of 3/4" copper and a bolt with a Ny-lock Nut. Its epoxied nice and tight into the butt end of the stock. I'd Love to share the pics with all of you guys, but I have no Idea how to upload them on here.

    Fred

  10. #60
    Basic Member
    Join Date
    Sep 2011
    Location
    Right where I Always Need To Be. Usually...
    Posts
    2,507
    Glad it worked out for ya. I ended up using pieces of sheet lead & old door hinges epoxied in the stock to counter weight it. Door hinges work pretty good. They open up partially & fit right in.
    'Scuse me while I whip this out...!

  11. #61
    dirtysquared
    Guest
    I'm a Plumber, so I was looking at what I had, and the 3/4" copper fits almost perfectly in the butt-stock. Copper is pretty light so the bolt and nut trimmed down to what I wanted made a perfect for me counter weight. I hope this can help someone else, at least until Boyd's makes a stock. But all in all, this really tightened up my flexy stock. Its very easy and worth doing for anyone that has time and is adventurous. can anyone tell me how to post pics? I have good pics of the copper and bolt.

  12. #62
    Basic Member thermaler's Avatar
    Join Date
    Aug 2012
    Location
    Downeast Maine
    Posts
    1,231
    Quote Originally Posted by dirtysquared View Post
    I'm a Plumber, so I was looking at what I had, and the 3/4" copper fits almost perfectly in the butt-stock. Copper is pretty light so the bolt and nut trimmed down to what I wanted made a perfect for me counter weight. I hope this can help someone else, at least until Boyd's makes a stock. But all in all, this really tightened up my flexy stock. Its very easy and worth doing for anyone that has time and is adventurous. can anyone tell me how to post pics? I have good pics of the copper and bolt.
    Easiest way I've figured is open a photbucket account, upload your photos to a library on there, and then click the "image link" button on the links code generator and post the code into your forum message. I did more or less the same thing you did with your stock on my 308 except I also cut the LOP down a bit in the process, it shoots very well now.
    [B][COLOR="#FF8C00"]Shooting--it's like high-speed golf[/COLOR][/B]

  13. #63
    thomae
    Guest
    Quote Originally Posted by fgw_in_fla View Post
    Glad it worked out for ya. I ended up using pieces of sheet lead & old door hinges epoxied in the stock to counter weight it. Door hinges work pretty good. They open up partially & fit right in.
    "Door hinge" is also the only phrase in the English language that rhymes with Orange.
    Quote Originally Posted by dirtysquared View Post
    can anyone tell me how to post pics? I have good pics of the copper and bolt.
    Read this and see if it helps: http://www.savageshooters.com/showth...eman-can-do-it!

    I use Picasa instead of Photobucket, but the process is basically the same.

  14. #64
    Tack
    Guest
    "Door hinge" is also the only phrase in the English language that rhymes with Orange.

    Somewhat of a stretch there. Maybe in your accent...What have you got for "silver" and "purple"???

    Sorry...back on topic, I've got nothing...

  15. #65
    Basic Member
    Join Date
    Sep 2011
    Location
    Right where I Always Need To Be. Usually...
    Posts
    2,507
    Ya gotta love this thread.
    it's a classic example of "Necessity being the mother of invention".

    Some of y'all (Youse guys for the New Yorkers) have come up with some cool variations on a theme here.

    Door Hinge rhymes with Orange?
    'Scuse me while I whip this out...!

  16. #66
    dirtysquared
    Guest
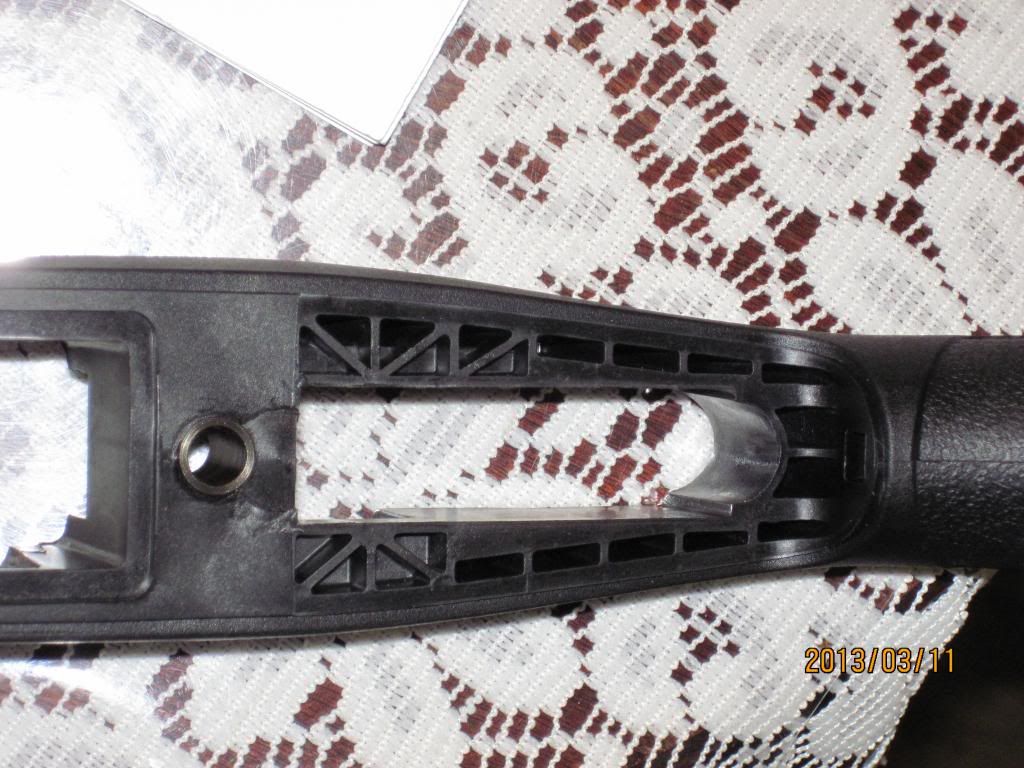
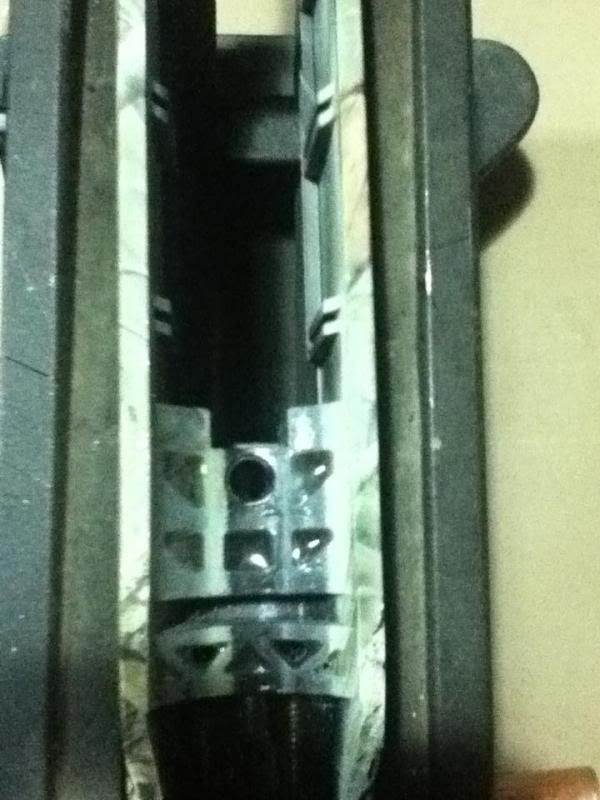
    ok here are a few pics
    Stock with all thread
    [IMG][/IMG]

    Stock void Fill ins


    My Counterweight


    Ill put the completed job up later on

    Fred

  17. #67
    Basic Member
    Join Date
    Sep 2011
    Location
    Right where I Always Need To Be. Usually...
    Posts
    2,507
    Looks like a winner.

    What type epoxy?

    I've tried a few different brands & always come back to Ace's own brand of quick set (5 min) epoxy. Smells bad, works great. JB Weld is a good one, too.
    The one time I tried PC-7, I swore never again. ALthough it's a good epoxy its too difficult to work with. Too stiff.
    'Scuse me while I whip this out...!

  18. #68
    dirtysquared
    Guest
    After I just dug through the garbage can....its Permatex Perma-Poxy. It stinks terrible too, but it seems to hold up well.

  19. #69
    gmruehle
    Guest
    Removed.

  20. #70
    kothomainew
    Guest
    Thanks, cĂ*ng lĂșc cĂ*ng hay

  21. #71
    stingray
    Guest

    Stock Reinforcment-Different Approach

    Hey Frank...great post. After contemplating a method similar to yours I decided on a different approach. I attached a picatinny rail almost the length of the stock fore end (aprox 10" or 11') attached with 3 evenly spaced screws to underside of the fore end of the stock. It did stop the flex of the fore end but I noticed flexing at the stock sides in the area of the receiver and trigger housing. I decided to remove the long picatinny rail and replace it with a shorter rail screwed just forward of the front action screw making sure not to interfere with the recoil lug. The result is I can mount and use a bi-pod with very little to no flex at all. It's not the optimum location to mount a bi-pod but it works. I find when using support other than a bi-pod it's best to rest the stock as far back as possible to reduce interfering with barrel float.

    I choose this approach with the idea of a minimum modification other than drilling a few holes in the stock. If it didn't work I could just fill in the holes with epoxy and be essentially back to square one. I did do the filling in the grip etc to beef that area up.

  22. #72
    Basic Member thermaler's Avatar
    Join Date
    Aug 2012
    Location
    Downeast Maine
    Posts
    1,231
    Quote Originally Posted by stingray View Post
    Hey Frank...great post. After contemplating a method similar to yours I decided on a different approach. I attached a picatinny rail almost the length of the stock fore end (aprox 10" or 11') attached with 3 evenly spaced screws to underside of the fore end of the stock. It did stop the flex of the fore end but I noticed flexing at the stock sides in the area of the receiver and trigger housing. I decided to remove the long picatinny rail and replace it with a shorter rail screwed just forward of the front action screw making sure not to interfere with the recoil lug. The result is I can mount and use a bi-pod with very little to no flex at all. It's not the optimum location to mount a bi-pod but it works. I find when using support other than a bi-pod it's best to rest the stock as far back as possible to reduce interfering with barrel float.

    I choose this approach with the idea of a minimum modification other than drilling a few holes in the stock. If it didn't work I could just fill in the holes with epoxy and be essentially back to square one. I did do the filling in the grip etc to beef that area up.
    Nice idea--any pics?
    [B][COLOR="#FF8C00"]Shooting--it's like high-speed golf[/COLOR][/B]

  23. #73
    Basic Member
    Join Date
    Sep 2011
    Location
    Right where I Always Need To Be. Usually...
    Posts
    2,507
    Quote Originally Posted by thermaler View Post
    Nice idea--any pics?

    Yeah.... What he said. We need pics on that. You may be on to something.
    'Scuse me while I whip this out...!

  24. #74
    stingray
    Guest
    I'll snap a couple pics and hopefully I can figure out this photo-bucket thing.

  25. #75
    Basic Member
    Join Date
    Sep 2011
    Location
    Right where I Always Need To Be. Usually...
    Posts
    2,507
    Quote Originally Posted by stingray View Post
    I'll snap a couple pics and hopefully I can figure out this photo-bucket thing.
    Piece 'o cake....
    If I can figure it out, anybody can. Just follow the instructions / prompts. And be careful you don't accidently upload the honeymoon photos you've been saving.
    'Scuse me while I whip this out...!

Page 3 of 10 FirstFirst 1234567 ... LastLast

Similar Threads

  1. Article: Axis Stock Reinforcement Made Easy
    By fgw_in_fla in forum Article Discussions
    Replies: 10
    Last Post: 03-11-2019, 06:40 PM
  2. Stock reinforcement
    By Johnendeavour in forum 110-Series Rifles
    Replies: 3
    Last Post: 12-29-2016, 08:38 PM
  3. 6.5x55 from 30-06 made easy
    By mwells72774 in forum Ammunition & Reloading
    Replies: 7
    Last Post: 07-04-2015, 09:40 AM
  4. Axis Stock Reinforcement Made Difficult
    By DrThunder88 in forum Axis Series Rifles
    Replies: 5
    Last Post: 02-11-2015, 03:50 PM
  5. Replies: 0
    Last Post: 11-03-2010, 05:36 PM

Bookmarks

Posting Permissions

  • You may not post new threads
  • You may not post replies
  • You may not post attachments
  • You may not edit your posts
  •