Page 1 of 10 12345 ... LastLast
Results 1 to 25 of 226

Thread: Axis / Edge Stock Reinforcement Made Easy - Take II

  1. #1
    Basic Member
    Join Date
    Sep 2011
    Location
    Right where I Always Need To Be. Usually...
    Posts
    2,507

    Axis / Edge Stock Reinforcement Made Easy - Take II


    Well, it seems due to a computer glitch my previous post about modifying the Axis stock is lost in cyber space. So, this affords me the oportunity to retype it with a few additions I'd like to make.
    As most of you are aware, the Axis can be quite the little shooter. With a little work anyone with even marginal skill can do, it'll be worthy of a bipod or it can be rested on the forend without the stock touching the barrel. I've modified several of these & it gets easier each time. The procedure I'm going to explain will cost the average Joe about $15 & takes about 2 - hours to complete.

    Start with removing the barreled action from the stock by removing the 2 screws in the underside of the stock. Carefully remove the barreled action so as to not let the pin fall out of the trigger assembly. Having a solid gun rest can be real helpful right about now, but not mandatory. Once you have it apart, you'll be looking at something like this:


    You'll see a main rib running down the center of the channel with shorter cross ribs. A few of the cross ribs need to be removed. Since it's a soft, flexible plastic they cut very easy with a hacksaw blade. Only cut the ribs between the point where the swivel is attached and the plastic recoil block:


    Cut along the inside of the stock & at the edge of the center rib. The hacksaw blade will cut almost down to the bottom. If it doesn't, the ribs can be removed by twisting them out with a pair of long nose pliers:


    Once you've cut & removed the ribs, it should look something like this:


    You'll need 2 pieces of 3/16th inch or 1/4 inch steel rod. I've tried this with different diameters & I prefer the 3/16" steel. Aluminum works well, too. What ever size you decide on, you'll need to drill 2 holes in the bottom of the plastic recoil block. I've found that by cutting the steel rod with a bolt cutter, the pinched end of the rod makes an excellent drill bit. You only need to drill in about 3/8" in. I find there's someting hard in the plastic block that will only let you drill in about 3/8" to 1/2".


    Now, you've already bought some 2 part epoxy when you went to Ace Hardware to get the steel rod. I'm partial to Ace's own brand of quick set epoxy or JB Weld - the quick set kind. If you don't think you can work with a quick setting epoxy, get the regular kind.
    Mix up a little epoxy - follow the instructions on the package - and scoop some up on the end of the rod. Before it drips all over, insert the end of the rod into the holes you just drilled. If you used the rod to drill the hole with, it should be a snug fit & you may need to tap it in. The rod will be precut to the length you'll need which will be from the swivel to the plastic recoil block PLUS about 3/8" to go into the block. You can run the rod to the end of the stock if you want to but, I've found it gets in the way if you ever put one of those truck axle sized barrels on & have to open up the barrel channel.


    After both rods are in place, it should look like this:


    Now, it's time to fill in the barrel channel with epoxy. Keep in mind you don't want to fill it any higher than the tops of the rods and about 1/8" more. Too much & it may interfere with the barrel. Before filling it with epoxy it's a good idea to scuff up the inside of the channel with sandpaper. This will help it adhere to the plastic. I find it's best to do this in 2 batches. Mix up about 1/2 tube of each part of the epoxy in a paper cup & pour it into the channel starting with the recoil block end. Remember to keep the stock level. The epoxy will run while it's setting up. Once you find out how much more you need, mix & pour. An ice cream stick comes in handy right about here...


    If you've got to the point where it looks like this, you did well.


    SO.....
    Now you're just about ready to put it back together. But before you do, it's always a good idea to remove a little material from the sides of the barrel channel. This will help keep the stock from touching the barrel when you're loading the bipod or leaning on a fence or whatever. A battery drill & some sanding / grinding gadgets will do the trick.


    Remove a little at a time & check the fit every few passes with the cutter. When you're comfortable that you've removed enough, a little sanding to clean it up & it should be ready to reassemble.
    Once you've got it back together, slide a card down the barrel to check the fit.


    Well, you're just about done...

    One of the weakest points on the Axis stock is in the worst possible place. The grip is thin & very flexible. I've heard a few hunting stories about climbing fences & ending up with a 2 piece stock or coming out of a tree & dropping the rifle only to regret it later. Here's a quick fix that'll stiffen it up a little -
    With the stock turned upside down & the trigger guard off, it'll look like this:

    You'll need some of this:

    Because you'll need to do this:

    Fill in all the voids in the stock all the way around the trigger guard. Once you have them filled, epoxy the trigger guard in place. This will stiffen & strengthen the stock quite a bit in this area. Not enough to use it for a pry bar but alot better than it was. By the way, don't ever plan on getting the trigger guard off without a fight. I find the benefits far greater than a $5 trigger guard.

    Re-assemble everthing, tightening the action screws evenly, & allow the epoxy time to fully cure. You should notice a considerable change & if you've free floated the barrel, you should have quite a shooter.
    Happy Shooting-
    Frank in Fla
    The guy that used this to do the work on his Axis... Don't laugh. It was cheap & it works if you have enough tie downs.
    Last edited by fgw_in_fla; 10-27-2012 at 12:53 AM.
    'Scuse me while I whip this out...!

  2. #2
    lockwoodjohn
    Guest
    thanks, Frank As soon as I get some time between work and cutting firewood I plan on doing the stock mod to my 2 Axis, The 243 and the 223. would you happen to know how to do the trigger mod with out cutting the spring. I heard you can modify the trigger block itself almost turn it in to a acutrigger.

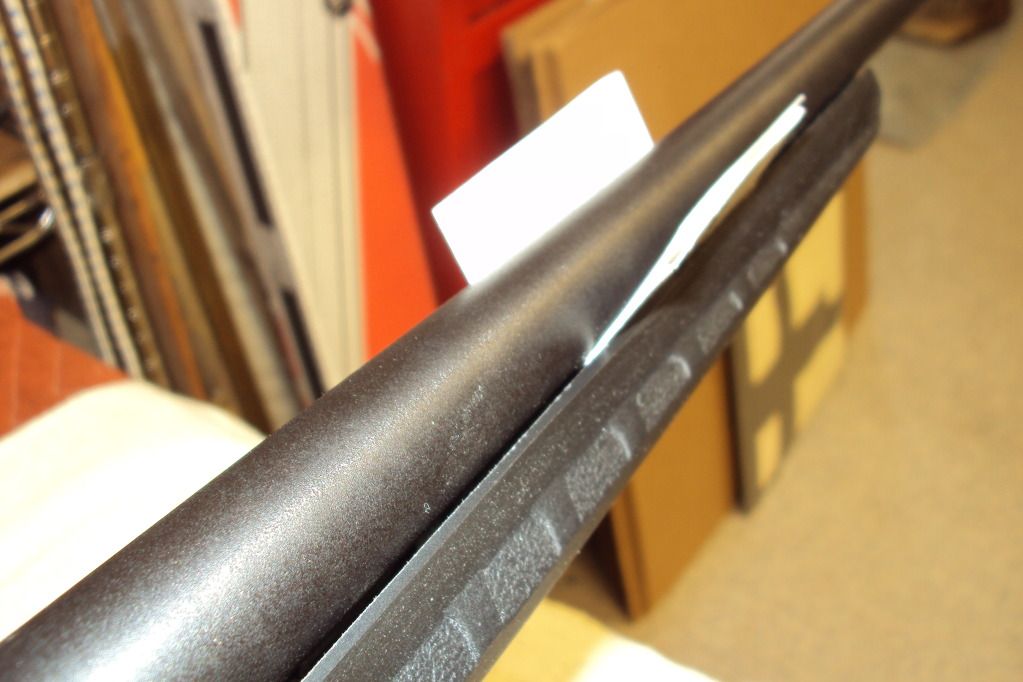
    Thanks for the detailed pictures
    lockwoodjohn

  3. #3
    Basic Member
    Join Date
    Sep 2011
    Location
    Right where I Always Need To Be. Usually...
    Posts
    2,507
    I read somewhere the accu-trigger will fit into an axis with minimum retro fit. Be careful though, I recall someone mentioning there was a difference between early accu-trigger & later models. May be one of the guys here will chime in & throw their 2 cents in the hat. The couple of axis rifles I have were given the 'ol nip & zip.
    Cut 3 coils off & it's ultra light in pull. In fact, one of my Axis's (Axises?... Axis'?) has the lightest pull I've ever felt. All you have to do is give it a light tap & it fires. I had more concern with the trigger side play so I shimmed them with some thin washers.

    Good luck with your project.
    Frank in FLa
    'Scuse me while I whip this out...!

  4. #4
    Basic Member
    Join Date
    Apr 2007
    Posts
    153
    Frank, you are the man....I've done everything but open up the barrel channel. I'm waiting til I get my go/no go gages then I'll be grinding the barrel channel.

    I also cut the stock, since I didn't like the LOP. I cut about 2" off and found that the WalMart branded Winchester/Limbsaver small size fits it perfectly. I think I'll use Great Stuff to fill the stock. I know that you used epoxy with some rods. I wonder if if rods and Great Stuff would work.

  5. #5
    Basic Member
    Join Date
    Sep 2011
    Location
    Right where I Always Need To Be. Usually...
    Posts
    2,507
    Recoil is pretty rough stuff. Even with some smaller calibers. I don't know if I'd trust Great Stuff. We've used it on the job pretty regular & it really doesn't have a lot of strength.

    Epoxy is cheap enough. It even comes in smaller tubes if you only need a little.

    As far as filling the stock, after swapping barrels with a fat .243 or 25.06, a little ballast is needed or else the rifle will nosedive. I've used anything I can get my hands on..... Like 1/2 of a big 'ol brass door hinge. If the barrel is a 26", then I have to use both halves. Point being, it gets epoxied in place & I've never had any come loose.
    If you do use the RGS, let us know....

    You might be on to something.
    Frank in Fla
    'Scuse me while I whip this out...!

  6. #6
    Basic Member
    Join Date
    Jun 2012
    Posts
    157
    I filled the rear portion of the stock w/ Great Stuff and it's more rigid that you would think. I used epoxy and rods in the front portion.

  7. #7
    Basic Member thermaler's Avatar
    Join Date
    Aug 2012
    Location
    Downeast Maine
    Posts
    1,231
    Quote Originally Posted by aubie515 View Post
    Frank, you are the man....I've done everything but open up the barrel channel. I'm waiting til I get my go/no go gages then I'll be grinding the barrel channel.

    I also cut the stock, since I didn't like the LOP. I cut about 2" off and found that the WalMart branded Winchester/Limbsaver small size fits it perfectly. I think I'll use Great Stuff to fill the stock. I know that you used epoxy with some rods. I wonder if if rods and Great Stuff would work.
    I cut my stock about 1 1/2" and it handles much better--just make sure your scope has more than 3" inch eye relief or you'll be wearing a third-eye forehead tattoo in no time--don't ask me how I know this. : )

  8. #8
    Basic Member
    Join Date
    Sep 2011
    Location
    Right where I Always Need To Be. Usually...
    Posts
    2,507
    I promise I won't ask If you'll tell me a little more about why & where you're cutting the stock. I've heard this from a few guys & I'm a little unclear about it. Are you cutting / removing from the end of the stock to change the length of pull?

    What are you doing about the pad?

    Inquiring minds want to know for no other reason than "because". The stock length is fine for me so cutting some off is not a consideration BUT....

    I'm interested in knowing.

    Thanx,

    Frank in windy rainy miserable Fla. (I hate hurricanes)
    'Scuse me while I whip this out...!

  9. #9
    Basic Member thermaler's Avatar
    Join Date
    Aug 2012
    Location
    Downeast Maine
    Posts
    1,231
    Well, basically the "new style" Axis stock is about that much shorter than the "old style" stock. When I received my 308 with the new stock I switched it to my 270 and the gun handles very nicely--but when I ordered a new stock direct from savage they sent me the older. longer one. So I simply cut down the length from the butt end and re-attached the buttpad (I also put a reinforcement rod inside and filled the stock area with RC7 and urethane foam. The buttpad is permanently attached to the rod and cannot be removed--but I have no reason to do so.

  10. #10
    Basic Member
    Join Date
    Apr 2007
    Posts
    153
    This is the Limbsaver recoil pad that I ended up buying. Best part of the recoil pad is cost...since Dick's has Limbsavers for nearly double the cost.

    http://www.walmart.com/ip/Winchester...l-Pad/16778340

    It fits perfectly on my Axis stock. I ended up cutting the stock right around where the rear swivel stud is on the stock. I wanted a shorter LOP since I'm looking for the shortest/lightest rifle that I can put together.

  11. #11
    Basic Member
    Join Date
    Sep 2011
    Location
    Right where I Always Need To Be. Usually...
    Posts
    2,507
    AAHAHhhhhhhhhhh.... I see.

    The 'ol slip fit recoil pad. That's good. Make it the way ya like it. Most of mine are set up full length with fat barrels & a little ballast in the rear. I wouldn't want to wander around the jungle with any of them strapped to my back.

    I kept one of my 110's as a hunting rifle. Nice & light, easy to handle & it feels comfortable. It also has the forend reinforced to accomodate to bipod. I stayed with the original Mossy Oak Camo.

    Good luck with it aubie... I got to do my evening leak check. The hurrricane off the coast is now sending copius amounts of weather our way.
    Later,
    Frank in Fla
    'Scuse me while I whip this out...!

  12. #12
    Basic Member
    Join Date
    Apr 2007
    Posts
    153
    The weather will be following us a couple of days later in the NorthEast. Stay safe.

  13. #13
    Basic Member
    Join Date
    Sep 2011
    Location
    Right where I Always Need To Be. Usually...
    Posts
    2,507
    You as well...

    Frank in Fla
    'Scuse me while I whip this out...!

  14. #14
    Basic Member
    Join Date
    Mar 2011
    Location
    Sun City, Arizona
    Age
    71
    Posts
    814
    Frank, i was hoping for an sequel to your first article on strengthening the Axis/Edge stock. was worth the wait. thanks.

  15. #15
    Basic Member
    Join Date
    Sep 2011
    Location
    Right where I Always Need To Be. Usually...
    Posts
    2,507
    Hey dog...

    Actually this isn't a sequel, this is more of a replacement. I wanted to add a few things anyway. My original is floating around in cyberspace. Never to be seen or heard from again.

    Well like I said, I wanted to add a few things & elaborate on a few others.

    I hope it helps.
    Enjoy.
    Frank in Fla
    'Scuse me while I whip this out...!

  16. #16
    Basic Member
    Join Date
    Mar 2011
    Location
    Sun City, Arizona
    Age
    71
    Posts
    814
    Frank, it's excellent and very informative. makes things alot easier for someone like me to understand(i need pics) and comprehend.

  17. #17
    Basic Member
    Join Date
    Sep 2011
    Location
    Right where I Always Need To Be. Usually...
    Posts
    2,507
    Dog -

    I did this way because I wanted it to be as if it was something I was reading - With illustrations. It wasn't easy since I already knew the procedure.
    Anyway, this is what i came up with. If I had to write it again, it would probably have even more pics & detail. I didn't want it to take longer to read than doing the procedure itself.
    If you're modifying an Axis or Edge & have any questions or input, feel free to drop me a line.
    Stay well.
    Frank in Fla
    'Scuse me while I whip this out...!

  18. #18
    smitty273
    Guest
    Is there any difference in the material between the black and camo stocks?

  19. #19
    Basic Member
    Join Date
    Sep 2011
    Location
    Right where I Always Need To Be. Usually...
    Posts
    2,507
    Not as far as I know....
    In fact, I was looking at a real nice Axis at the range last week. This guy had a camo Axis with one of the Mossy Oak patterns on it. It looked incredible but,

    it was still the same 'ol Flex-o-matic stock.
    Frank in Fla
    'Scuse me while I whip this out...!

  20. #20
    Richard Giguere
    Guest
    Frank you outdid yourself, ever think of going into "narrating" seriously, nice work....
    Dick

  21. #21
    Mathias
    Guest
    in fact, one could possibly add a second swivel stud in the front for a bipod, right? would the epoxy be enough to hold a second stud well enough for a bipod or sling?

  22. #22
    Basic Member
    Join Date
    Sep 2011
    Location
    Right where I Always Need To Be. Usually...
    Posts
    2,507
    Thanks for the compliments, gents...

    Mathias - I wouldn't depend on any adhesive to hold a swivel in place. I would use a good mechanical connection like nut, bolt & washer. The palstic is easy enough to drill thru to mount a 2nd swivel if needed.
    You could always try drilling thru the epoxy & thru bolt right thru the whole kit-n-kaboodle...

    There are epoxies available that can be drilled & tapped much like metal but when it comes to my rifle, I wouldn't take any chances.

    Frank in Fla
    'Scuse me while I whip this out...!

  23. #23
    Mathias
    Guest
    Good to know, if I decide to rebarrel my axis to 308 ill likely do this... But I am also leaning toward buying a Stevens 200 in 308 instead, it'll be cheaper, but it won't have the heavy barrel I'm wanting. Thanks again for the walkthrough.

  24. #24
    Basic Member farmer44mag's Avatar
    Join Date
    Nov 2011
    Posts
    89
    Has anyone actually had one of these stocks break from shooting- or were these broken guns abused in some way- dropped, rolled on, ext.?

    I have not had to modify anything other than the trigger spring on my Axis's to get them to shoot great groups. Both will keep 3 shots under an inch at 100 yds with multiple brands of ammo. I don't plan on modifying my stocks- unless it is really neccesary for durability?

  25. #25
    Basic Member
    Join Date
    Dec 2006
    Location
    Glenwood Arkansas
    Age
    68
    Posts
    407
    Farmer nobody said the stocks were breaking. The mods are to stop all the flexing.
    If yours suits you the way it is you don't need to do anything to it.

Page 1 of 10 12345 ... LastLast

Similar Threads

  1. Article: Axis Stock Reinforcement Made Easy
    By fgw_in_fla in forum Article Discussions
    Replies: 10
    Last Post: 03-11-2019, 06:40 PM
  2. Stock reinforcement
    By Johnendeavour in forum 110-Series Rifles
    Replies: 3
    Last Post: 12-29-2016, 08:38 PM
  3. 6.5x55 from 30-06 made easy
    By mwells72774 in forum Ammunition & Reloading
    Replies: 7
    Last Post: 07-04-2015, 09:40 AM
  4. Axis Stock Reinforcement Made Difficult
    By DrThunder88 in forum Axis Series Rifles
    Replies: 5
    Last Post: 02-11-2015, 03:50 PM
  5. Replies: 0
    Last Post: 11-03-2010, 05:36 PM

Bookmarks

Posting Permissions

  • You may not post new threads
  • You may not post replies
  • You may not post attachments
  • You may not edit your posts
  •