


Well, it seems due to a computer glitch my previous post about modifying the Axis stock is lost in cyber space. So, this affords me the oportunity to retype it with a few additions I'd like to make.
As most of you are aware, the Axis can be quite the little shooter. With a little work anyone with even marginal skill can do, it'll be worthy of a bipod or it can be rested on the forend without the stock touching the barrel. I've modified several of these & it gets easier each time. The procedure I'm going to explain will cost the average Joe about $15 & takes about 2 - hours to complete.
Start with removing the barreled action from the stock by removing the 2 screws in the underside of the stock. Carefully remove the barreled action so as to not let the pin fall out of the trigger assembly. Having a solid gun rest can be real helpful right about now, but not mandatory. Once you have it apart, you'll be looking at something like this:
You'll see a main rib running down the center of the channel with shorter cross ribs. A few of the cross ribs need to be removed. Since it's a soft, flexible plastic they cut very easy with a hacksaw blade. Only cut the ribs between the point where the swivel is attached and the plastic recoil block:
Cut along the inside of the stock & at the edge of the center rib. The hacksaw blade will cut almost down to the bottom. If it doesn't, the ribs can be removed by twisting them out with a pair of long nose pliers:
Once you've cut & removed the ribs, it should look something like this:
You'll need 2 pieces of 3/16th inch or 1/4 inch steel rod. I've tried this with different diameters & I prefer the 3/16" steel. Aluminum works well, too. What ever size you decide on, you'll need to drill 2 holes in the bottom of the plastic recoil block. I've found that by cutting the steel rod with a bolt cutter, the pinched end of the rod makes an excellent drill bit. You only need to drill in about 3/8" in. I find there's someting hard in the plastic block that will only let you drill in about 3/8" to 1/2".
Now, you've already bought some 2 part epoxy when you went to Ace Hardware to get the steel rod. I'm partial to Ace's own brand of quick set epoxy or JB Weld - the quick set kind. If you don't think you can work with a quick setting epoxy, get the regular kind.
Mix up a little epoxy - follow the instructions on the package - and scoop some up on the end of the rod. Before it drips all over, insert the end of the rod into the holes you just drilled. If you used the rod to drill the hole with, it should be a snug fit & you may need to tap it in. The rod will be precut to the length you'll need which will be from the swivel to the plastic recoil block PLUS about 3/8" to go into the block. You can run the rod to the end of the stock if you want to but, I've found it gets in the way if you ever put one of those truck axle sized barrels on & have to open up the barrel channel.
After both rods are in place, it should look like this:
Now, it's time to fill in the barrel channel with epoxy. Keep in mind you don't want to fill it any higher than the tops of the rods and about 1/8" more. Too much & it may interfere with the barrel. Before filling it with epoxy it's a good idea to scuff up the inside of the channel with sandpaper. This will help it adhere to the plastic. I find it's best to do this in 2 batches. Mix up about 1/2 tube of each part of the epoxy in a paper cup & pour it into the channel starting with the recoil block end. Remember to keep the stock level. The epoxy will run while it's setting up. Once you find out how much more you need, mix & pour. An ice cream stick comes in handy right about here...
If you've got to the point where it looks like this, you did well.
SO.....
Now you're just about ready to put it back together. But before you do, it's always a good idea to remove a little material from the sides of the barrel channel. This will help keep the stock from touching the barrel when you're loading the bipod or leaning on a fence or whatever. A battery drill & some sanding / grinding gadgets will do the trick.
Remove a little at a time & check the fit every few passes with the cutter. When you're comfortable that you've removed enough, a little sanding to clean it up & it should be ready to reassemble.
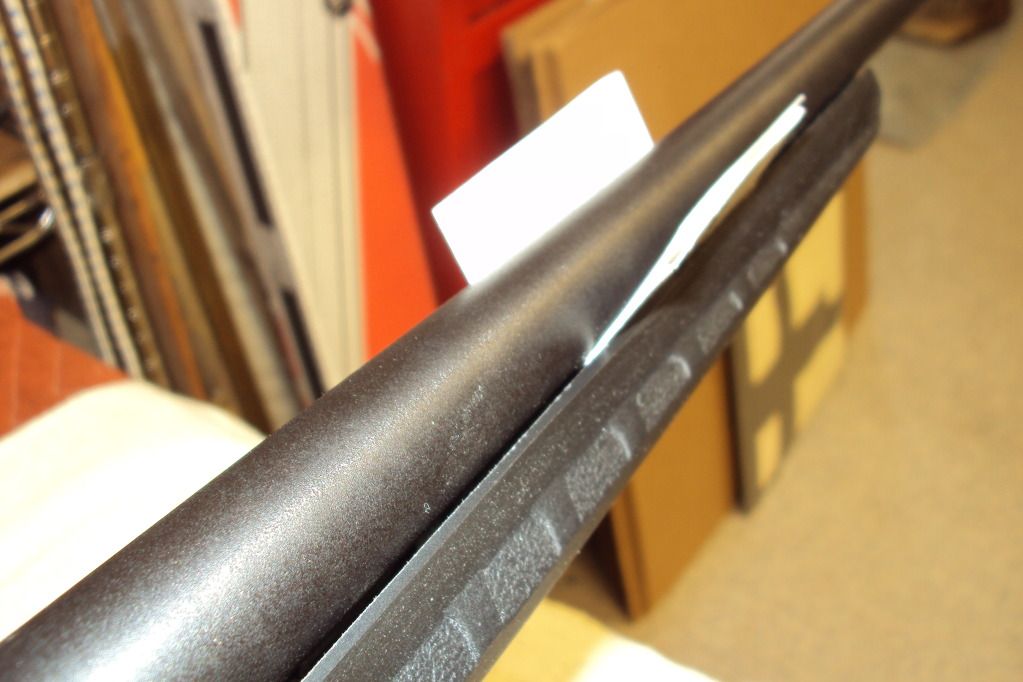
Once you've got it back together, slide a card down the barrel to check the fit.
Well, you're just about done...
One of the weakest points on the Axis stock is in the worst possible place. The grip is thin & very flexible. I've heard a few hunting stories about climbing fences & ending up with a 2 piece stock or coming out of a tree & dropping the rifle only to regret it later. Here's a quick fix that'll stiffen it up a little -
With the stock turned upside down & the trigger guard off, it'll look like this:
You'll need some of this:
Because you'll need to do this:
Fill in all the voids in the stock all the way around the trigger guard. Once you have them filled, epoxy the trigger guard in place. This will stiffen & strengthen the stock quite a bit in this area. Not enough to use it for a pry bar but alot better than it was. By the way, don't ever plan on getting the trigger guard off without a fight. I find the benefits far greater than a $5 trigger guard.
Re-assemble everthing, tightening the action screws evenly, & allow the epoxy time to fully cure. You should notice a considerable change & if you've free floated the barrel, you should have quite a shooter.
Happy Shooting-
Frank in Fla
The guy that used this to do the work on his Axis... Don't laugh. It was cheap & it works if you have enough tie downs.


 Reply With Quote
Bookmarks