


 Reply With Quote
Here's a DIY predator E-Caller and navigation light for my duck hunting boat done up. Planning on doing my entire boat in the same fashion with some larger fronds in the future.


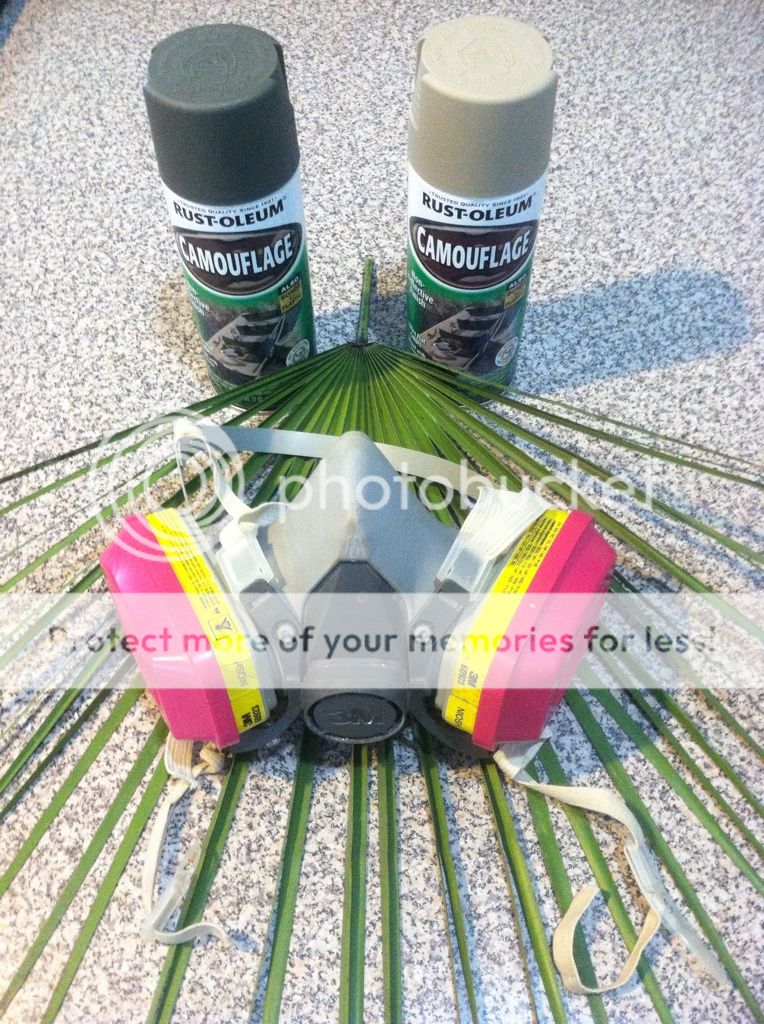
Just finished re doing the paint job on my 270 axis. FYI, this paint job is a grassy style that is kinda like duck hunting camo, i find waterfowling camo to be the most versatile here in Florida and i wear it for just about everything except hunting from tree stands. I first did it with some satin tan paint i had laying around and it came out tacky so i stripped it down w/ lacquer thinner and bought the proper Rustoleum camo paint and redid it. (BTW, I have always had better results w/ Rustoleum over Krylon) Here are the basic supplies.
Krylon Camo in "Khaki"(FDE) & "Deep Forest Green"(OD), a proper respirator (strongly recommended as you will be spraying a A LOT of paint), and foliage to use as stencils, I chose some small, fine palm fronds from the palms in my yard pictured below. I also forgot to include 400 grit sandpaper & rubbing alcohol.
WARNING: Follow manufacturers mixing/shaking directions! I have learned this the hard way.
Alright first, remove swivel studs and recoil pad from stock and lightly sand all surfaces to be painted with ultrafine 400 grit sandpaper. Then wipe down with rubbing alcohol(i recommend doing this step twice to be sure all dust from sanding is gone). Use common sense to mask the inside of your stock and whatever areas you don't want paint in. Then, with your respirator on, do an extremely light base coat of FDE/Khaki, if you can still see the black plastic through this, coat, that means you did it right. Let it dry, which is nice about the camo paints because to make them less glossy, they have less solvent which makes them dry extremely fast. Waiting ten minutes for coats to dry is usually much more than enough time. Then, then repeat this step twice but making these 2 coats slightly thicker than the first coat.This should result in a nice moderately thick base coat that will have less of a tendency to peel in chunks, than one thick one. Now give a good 20 minutes to let these base coats set, this is really just a precaution. Now, put your trigger guard and magazine floorplate into the stock, a dab of hot glue around the rear screw hole will temporarily hold the trigger guard in the stock for painting the pattern. Now take your Palm fronds and kinda bunch them up and hold it in your hand like this.
Now hold it against the stock and spray OD over the area. Don't spray the OD real thick. Slightly vary the angle you hold the fronds and their thickness for a more natural look.
WARNING: do not slide the foliage against the stock while painting and use a new frond after spraying over it twice. Not doing these things will cause you to rub off the OD you just sprayed and glob on wet OD paint that accumulated on the frond. This will cause your new paint job to look severely scratched up and crappy. This also happened to me on my first attempt
Your final product should look something like this.
The Ultra flat camo colors will have an almost rough feel, I like this on my hands but not on my cheek, however i keep an ammo sleeve on my axis so this is not an issue for me. If you want yours to feel just a bit smoother, use a matte clear coat over it, this will be a bit smoother to the touch but may give a more tacky feel(BAD!!!), another option would be duracoat clear over it, which would give the best durability. I'm about to do some more items like this, i'll post pics of them later as well as my axis when i get the bipod, sling and ammo sleeve on it.
Last edited by Kaianuanu; 08-10-2012 at 01:41 PM.
Here's a DIY predator E-Caller and navigation light for my duck hunting boat done up. Planning on doing my entire boat in the same fashion with some larger fronds in the future.


Nice job!
Now that looks great. Especially for here in Florida. Be careful you don't lay it down somewhere & can't find it because of the camo blending in with the palmettos & swamp bushes.
That looks so good i believe you've given me the inspiration to attempt one on my own. All by myself...... with no help at all. Like working without a net, if you get my drift.
All kidding aside, that looks really good for our area. I just might have a go at it. I have several stocks ready to become victims.
All I need is the time to do it. My schedule has been 7 days of 12 to 14 a day. I'm entirely way too old for this kind of abuse.
Nicely done there, young fella. It looks perfect for hunting near the swamps.
Frank on the other side of Fla.
'Scuse me while I whip this out...!
From my 6 year old daughter last night "Daddy that looks way prettier then the stock you painted". LOL. I agree with her, nice job.
Very nice job. People tend to overthink cammo in my opinion. Often times less is more as you have demonstrated. Its a good versatile color and pattern combo.

looks great
Thanks for the encouragement, I did a trolling motor and an old battery powered spotlight that I gutted and replaced the 6v bulb w/ a 12v one from a pair of old truck fog lights I had laying around and I set it up to connect to the trolling motors battery for those dark mornings getting to your duck hunting spot. I've also done this to a different one but I put a cigarette lighter end on it for the truck, didnt camo that one though. I may have forgotten a thing or two that I had camo'd since but I'll post pics of them in about 2 hours when I get home.
PS: post your pics if you give it a try
That looks great.... I am interested in hearing about the durability? How easy is it to scratch?
 Members who have read this thread in the last 1 days: 0
Posting Permissions
Members who have read this thread in the last 1 days: 0
Posting Permissions
Bookmarks