Results 1 to 18 of 18

Thread: Bedding a Savage 12 Benchrest

  1. #1
    justin1098
    Guest

    Bedding a Savage 12 Benchrest


    So I want to do a bedding job on my rifle. I have never done it before but it seems like something I could do. The fact that its a single shot and there is ample room between the rear pillar and sear should make it easier. I like the stock just fine, so its not worth it to me to spend 500 bucks on a new stock when I would rather buy a new barrel from NSS. I am a electronics tech and a good amature machanic.

    Looking at the pillars that are in there, I see that they are very thin and the first 2 contact the action and the rear is really close maybe .010-.030 below. Also the recoil lug contacts one side more than the other. The hole barrel and action points very slightly to the left but has adequate clearance for free floating.

    My questions are, Should I just remove some wood to relieve the action and bed it with devcon or get new pillars and give it the whole nine yards.
    If I re-do the pillars, what pillars should i get? and how much oversized should the holes be?

    I am thinking that the contact points that determine the position of the barreled action are the barrel with tape wrapped around it to match the circumference of the inside of the stock and the rear tang with a couple layers of electrical tape. Is this correct?

    To save your time, I have already read the technical atrical on accurateshooter.

  2. #2
    Basic Member jhelmuth's Avatar
    Join Date
    Jul 2011
    Location
    Clearwater, FL
    Posts
    409

    Re: Bedding a Savage 12 Benchrest

    I am not an expert at this, so give this the appropriate weight....

    Q: Should I just remove some wood to relieve the action and bed it with devcon or get new pillars and give it the whole nine yards?
    A: Skim bedding should be perfect. New pillars should not be necessary.

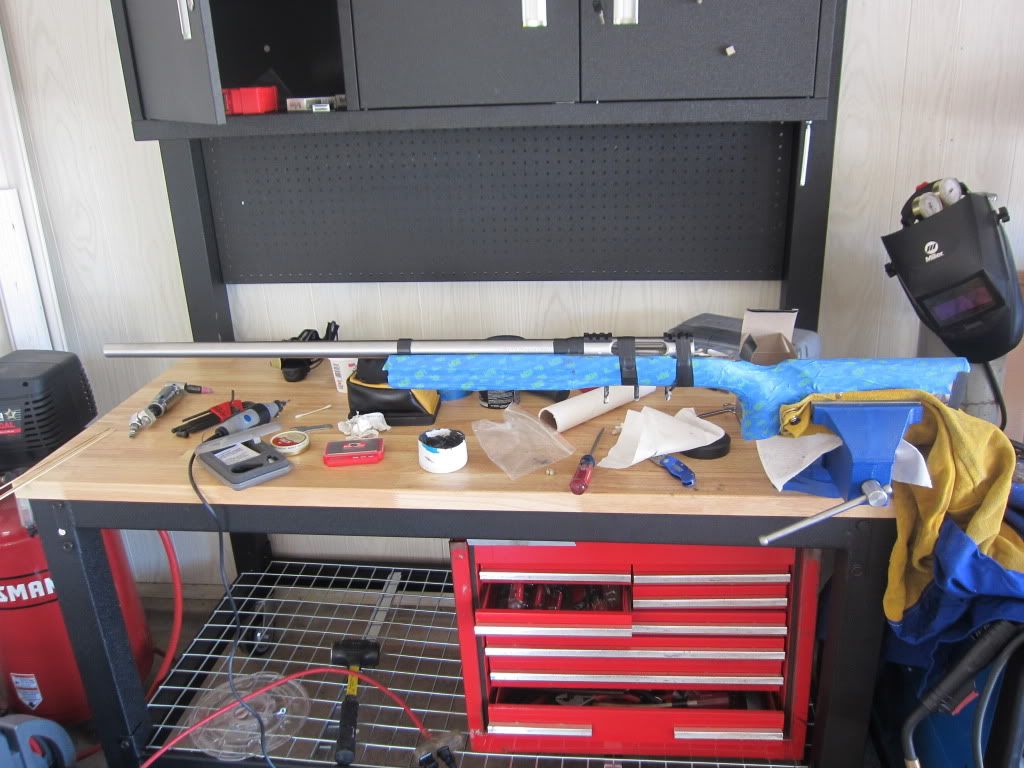
    ...be sure to get the tape wrapping on the barrel correct (thickness) - not too litttle, nor too much. Needs to sit in the barrel channel perfect. I do not believe you need any tape on the rear tang, but I suppose you could use a single layer of PVC electrical tape to ensure proper clearance since the rear pillar you noted does not make contact with the action and once you clearance the action bedding area out for a skim coat then that could cause some alignment issue.

    Sounds like you are right on it to me... (and I'd do it the same way).
    .22LR * 6.5x47 Lapua * .223 Rem * .308 Win * 260 Rem * Large Cojones!
    [I]"I can prove anything by statistics except the truth."[/I]

  3. #3
    justin1098
    Guest

    Re: Bedding a Savage 12 Benchrest

    Thanks for the input. I thinks thats what i will do. I just hope it doesn't end up too messy.

  4. #4
    Team Savage GaCop's Avatar
    Join Date
    Mar 2007
    Location
    Warner Robins, Ga
    Age
    77
    Posts
    5,017

    Re: Bedding a Savage 12 Benchrest

    Quote Originally Posted by justin1098
    Thanks for the input. I thinks thats what i will do. I just hope it doesn't end up too messy.
    Let the Devcon Steel Putty set up a bit so it thickens and won't run in areas you don't want it.
    Vietnam Vet, Jun 66 - Dec 67

  5. #5
    Quickshot
    Guest

    Re: Bedding a Savage 12 Benchrest

    Don't forget the RELEASE AGENT or you will have a mess.

  6. #6
    82boy
    Guest

    Re: Bedding a Savage 12 Benchrest

    Leave the facty pillars in that are PLENTY think enough, the only reason why a pillar is there is to keep from compressing the wood in a stock, and the factory pillars do that well. Do you homework and read as much as you can on bedding.

    A few tips, I drill small holes in the bedding area to creat mechanical locks. I tape the sides and front of the recoil lug with 1 layer of electrical tape, and leave the back open. I open up the recoil lug area in all directions so that there is room for the epoxy. Wrap the barrel nut with a layer of tape. place painters tape on the outsides of the stock, to catch the runover of the epoxy. Use long 1/4 x28 screws with the heads cut off on the action, when setting it down in the epoxy.

  7. #7
    Basic Member barrel-nut's Avatar
    Join Date
    Dec 2010
    Age
    53
    Posts
    1,067

    Re: Bedding a Savage 12 Benchrest

    +1 on all of the above. Also put modeling clay or even Play-dough into any recess in the action which could create a mechanical lock. Kiwi neutral shoe polish works great as a release agent for Devcon. Put a couple of good coats of it on, then remove the excess. You will be able to see very fine details transferred from the metal into the Devcon, and still get a clean release.
    I like to remove the trigger, to reduce the chance of getting bedding material in there. It's easy to do, just pay close attention to how it fits together before you take it apart. Take several pictures from different angles, or ideally you may have another rifle with the same trigger to compare it to when reassembling. Put tape and/or clay in the trigger cutout of the stock too.

    All in all it's not that hard. Just take your time, pay attention to detail, and you won't have any problems.

    GaCop is right about letting the consistency thicken before using the Devcon; However, that applies mostly for people who are very experienced with using the right amounts of putty and hardener to achieve a slower set. The last thing you want is to be still applying this stuff into the stock when it starts to set up. I'd recommend for your first time to mask off everything really well, and thoroughly fill in any places you don't want the Devcon with putty. Make sure you have everything that you need at hand before you start. Mix the components exactly as the labels states, apply it in the stock, and get the barreled action in there as quickly as possible, then be ready to clean up any overflow. Be sure to thoroughly mask your stock with blue painters masking tape beforehand. On your first attempt, you will probably be a little slower and I'd hate to see you end up with hardening Devcon in there before you get the action in place. This stuff can harden quickly if you use too much hardener, so follow the directions. On my first one, I wasn't sure about how much it would take, or how to divide it correctly, so I mixed the whole 1lb. can. Turns out, this is enough to do several rifles, and all the excess was wasted. Experiment with smaller quantities before doing your rifle, and find the consistency and mixture you want beforehand. It doesn't take much to do an average rifle. With that said, make sure that you do mix enough the first time, and mix it thoroughly to avoid any soft spots from forming. You don't want to run out when you're applying it to the stock and have to stop and mix up some more. Lastly, I'd let the rifle sit overnight before attempting to remove it. A few sharp raps on the bottom and sides of the stock with a 1lb rubber mallet should pop it right out.

    All this sounds kinda daunting, I know, but just take your time and pay attention to detail, and use common sense, and all will work out ok.

    Edit:
    Also, as 82 pointed out, do not use your action screws when you bed this rifle. The point of bedding is to remove stresses that can be introduced into the action by tightening it down into an ill-fitting stock. If you use your action screws to tighten your action down into the soft Devcon, you are simply setting a stressed action into stone. You want the Devcon to flow around the action while it is perfectly centered in the stock, positioned with the action holes centered over the pillars, and with plenty of Devcon between the rear face of the recoil lug and the stock recoil abutment, to form a new properly squared abutment for the lug. Wrapping your barrel with electrical tape to the proper thickness to center it in the stock will help with barrel alignment issues, assuming your stock is reasonably straight to begin with. Also be sure to use long 1/4" bolts that do NOT make contact at the head with the pillars, to place throught the pillars into the action screw holes to get the action centered properly. It helps to put a few wraps of electrical tape around the bolts where they go through the pillars to achieve true centering. Also coat these well with release agent, over the tape as well. Put modeling clay into the action screw holes to keep the Devcon out. When you thread them in, the clay will get pushed out of the way. Or, alternately, use studs with the heads cut off as 82 suggested, and thread them in place before you set the action in. Put release agent on EVERYTHING you don't want Devcon stuck to. Be sure to make a practice run with all of this to make sure all will fit correctly. Again, DO NOT TIGHTEN THE ACTION SCREWS. When the action is finally in place, dummy action screws are threaded in, Devcon oozing out around the edges a little, then use surgical tubing or electrical tape wrapped tightly around the action and stock to hold it all together while it sets. Clean up the excess now while it is still soft!

    Good luck and let us know how it turns out!

  8. #8
    justin1098
    Guest

    Re: Bedding a Savage 12 Benchrest

    Wow, thanks for all the info. I feel a lot better about doing this now. You answered questions that I was going to ask.

    I was planning to use kiwi shoe polish and plumbers putty because i already have it. I was thinking of a layer of electrical tape around the barrel nut and putty underneath to keep the devcon from getting underneath.

  9. #9
    justin1098
    Guest

    Re: Bedding a Savage 12 Benchrest

    I finished relieving the wood and bedded the action today. Hopefully the kiwi does its job. According to BHO, the POTUS, religion and guns go hand and hand, so i said a little prayer to help me get it apart tomorrow morning.

  10. #10
    riverat
    Guest

    Re: Bedding a Savage 12 Benchrest


    don,t need to add to the reply here, barrel-nut great job on your post.


    Jeff

  11. #11
    Basic Member barrel-nut's Avatar
    Join Date
    Dec 2010
    Age
    53
    Posts
    1,067

    Re: Bedding a Savage 12 Benchrest

    Quote Originally Posted by justin1098
    so i said a little prayer to help me get it apart tomorrow morning.
    Done that myself. Never hurts! I hope it turns out well for you, and I'm pretty sure it will. Keep us informed!

    Riverat, thanks for the compliment. I know I get a little long winded sometimes, but I remember how scary it was the first time I attempted this, and how easy it could be to make a costly mistake, so I try to help, just as I was helped by others here..

  12. #12
    Basic Member
    Join Date
    Dec 2006
    Posts
    95

    Re: Bedding a Savage 12 Benchrest

    i find one of the most important things is to make sure you wrap the barrel, where the forearm ends, so when bedding, the action only rests on the tang ( which should be wrapped to float ) and the barrel at the end of the forearm and using studs only secure, with electrical tape, at a point in front of the recoil lug. See Richard Franklin's Stress Free Bedding video
    6CM

  13. #13
    Team Savage
    Join Date
    Sep 2008
    Age
    73
    Posts
    597

    Re: Bedding a Savage 12 Benchrest

    [quote=justin1098 ]
    Looking at the pillars that are in there, I see that they are very thin and the first 2 contact the action and the rear is really close maybe .010-.030 below.

    I have never worked with the target action with 3 screws.......however........I would think you would want all the piller to touch the action. It seems to me as if you would put stress on the action if all the pillars did not touch the action. As was said, the pillars are there to keep from compressing the stock material.

    You have some excellent replys from knowledgeable people and nobody mentioned this.........I may be missing something.

    Bill

  14. #14
    Basic Member
    Join Date
    Dec 2006
    Posts
    95

    Re: Bedding a Savage 12 Benchrest

    thin pillars?

    I think not. Since I can not EXACTLY match the action contour I leave them a little short and let the bedding material take up that space.
    This was a three screw target action stock modified for a single shot Model 12 single shot action
    The rear pillar in this is stout enough.
    6CM

  15. #15
    justin1098
    Guest

    Re: Bedding a Savage 12 Benchrest

    I got it apart and everything looks good. I had to machine a litle in the back where it squeezed past the plumbers putty but thats ok because this stuff is easy to work with. it looks like the photo above except with 3 holes.

  16. #16
    justin1098
    Guest

    Re: Bedding a Savage 12 Benchrest


    The first pic is during the clean up phase. I had another band of tape over the front scope mount too.

    [img width=576 height=768]http://i306.photobucket.com/albums/nn243/justinrc51/IMG_1156.jpg[/img]

  17. #17
    Basic Member barrel-nut's Avatar
    Join Date
    Dec 2010
    Age
    53
    Posts
    1,067

    Re: Bedding a Savage 12 Benchrest

    Very nice Justin! Looks like a good job.

  18. #18
    justin1098
    Guest

    Re: Bedding a Savage 12 Benchrest

    I finally got to shoot today and there is a improvement. My groups are still around .3-.5 but WAY more consistant and less flyers. I think I did a good job. At koko head range, there is a 10 inch plate at 450 yards and i could hit it every time. every time!

Similar Threads

  1. Savage 12 Benchrest
    By Pulpit in forum 110-Series Rifles
    Replies: 2
    Last Post: 11-19-2013, 12:43 PM
  2. WHO DOE'S THE BEST BEDDING JOB ON FACTORY 12 BENCHREST?
    By docshu in forum 110-Series Rifles
    Replies: 11
    Last Post: 04-07-2010, 10:50 PM
  3. Savage 6BR Benchrest ?
    By okbob51 in forum 110-Series Rifles
    Replies: 5
    Last Post: 12-09-2009, 02:51 PM
  4. SSS Benchrest Laminate versus Stockade composite benchrest
    By docsleepy in forum 110-Series Rifles
    Replies: 12
    Last Post: 10-13-2009, 09:30 PM

Members who have read this thread in the last 1 days: 0

There are no members to list at the moment.

Bookmarks

Posting Permissions

  • You may not post new threads
  • You may not post replies
  • You may not post attachments
  • You may not edit your posts
  •