

 Reply With Quote
How do you make the angle on the butt ??


Damn, that sucks. That thing was going to be beautiful.
How do you make the angle on the butt ??
I used a 10" table saw set at a 10 degree angle. One side is easy because you can push it along the rip fence, butt first, until you get close to the grip area. Then use a hand saw to finish the cut. The other side is a little tougher because you can't push it through, since you don't want to cut the grip portion of the stock and you no longer have the large flat area to run along the rip fence. I clamped a 4-5" strip of plywood to the rip fence to increase the height of the fence and then clamped the stock to the fence/plywood with the blade all the way down. Then you slowly raise the blade to make the cut. If you have 2 people available you can undo the clamp and pull the stock through to complete the cut. If not just lower the blade and move the stock a few inches at a time and repeat the process. It will take 3 or 4 moves to complete the cut. I recommend the clamping and raising the blade method though. I feel it's safer. I suppose I could try angling the blade to 20 degrees and clamping the angled portion directly to the fence.
Thanks , I really want to try this on some dark walnut
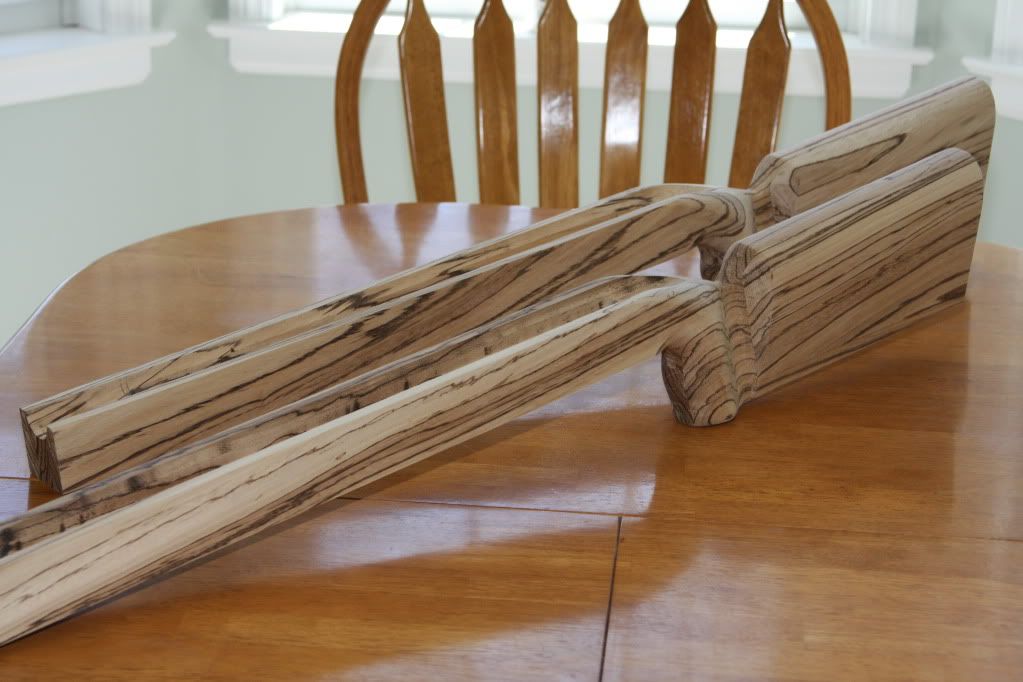
I haven't given up on the zebra wood blanks yet. I might be able to straighten them out when I glue and clamp the additional wood to the forearm. No big deal either way. It won't be the first time I've wasted a couple hundred bucks. Now that I've taken the time to make a few templates and jigs and upgraded a few of my powertools I can produce an exact copy of these stocks pretty qiuckly.
what will the weight be when there done, did the zebra warp from moisture, I have a large drum sander that is great for make wood flat I think better then a planner.
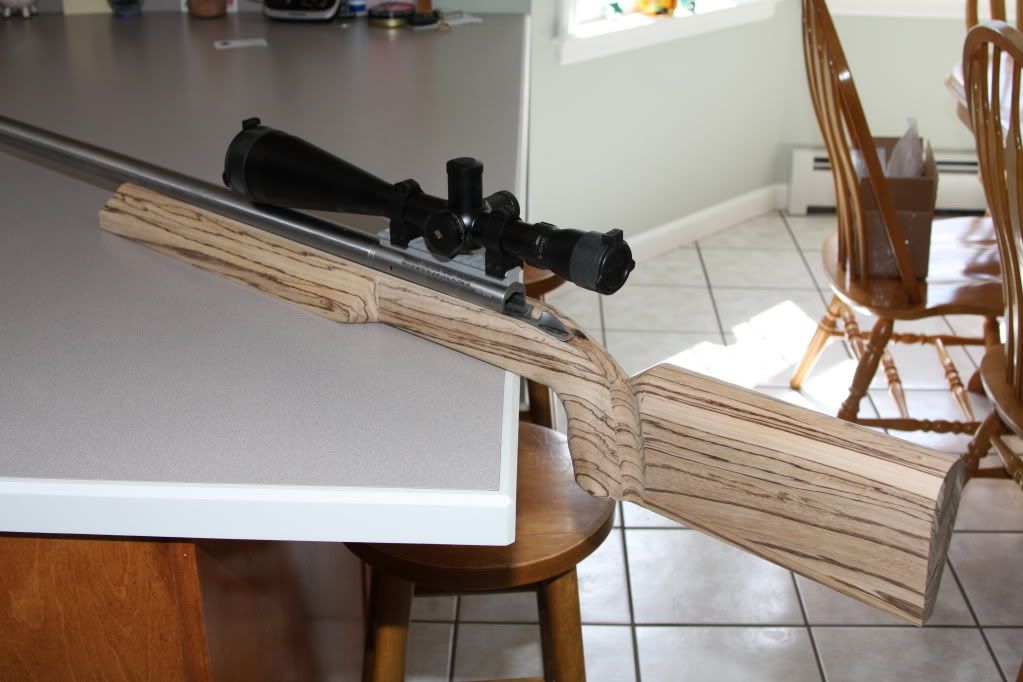
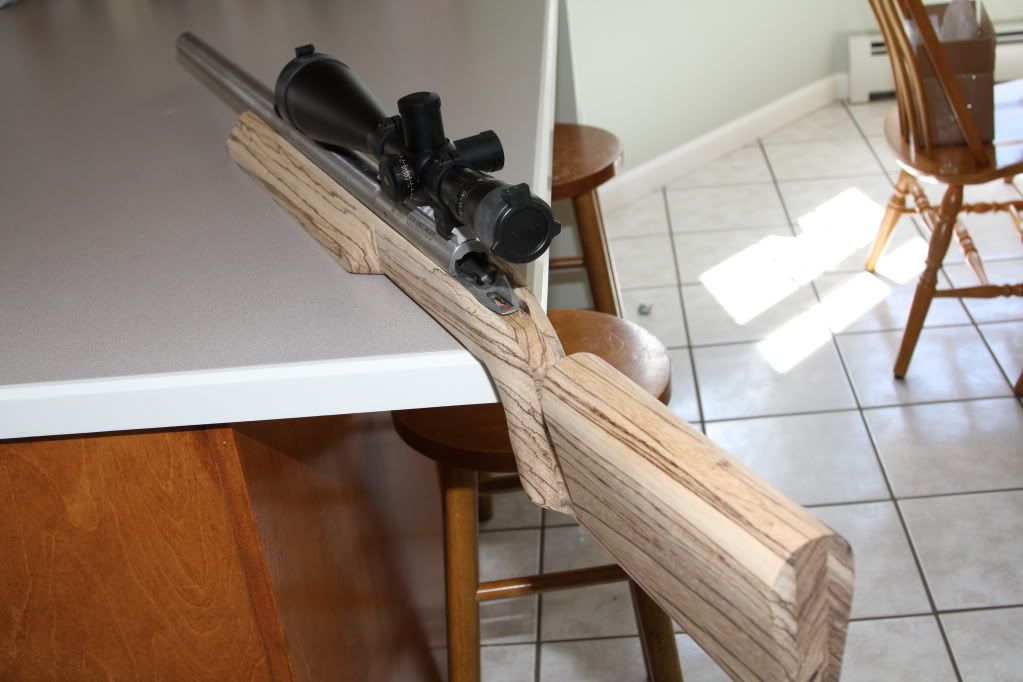
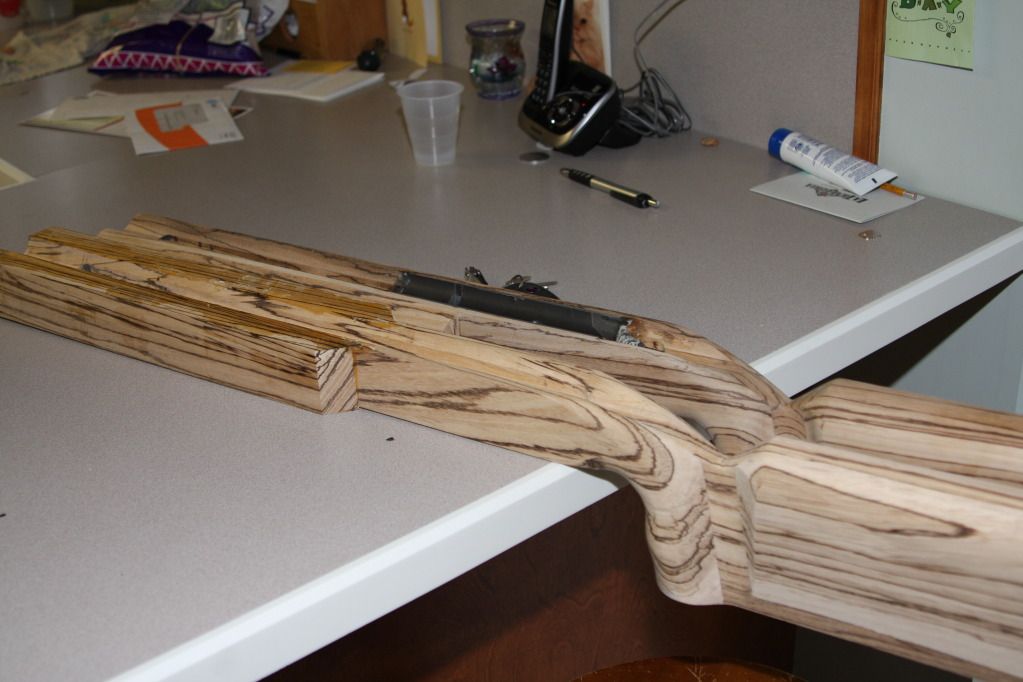
Cut the butt angles on the 2nd zebra wood stock today and finished most of the sanding and shaping. They're ready to have the additional wood for the forearms glued on at this time. I'm hoping to finish that later today.
Those are gonna look great.

+1Originally Posted by Got Diesel
I have a very strict gun control policy: if theres a gun around, I want to be in control of it.
~Clint Eastwood
I hope this really works out for ya. I am not a fan of target style stocks, but your work looks very impressive.
I have thought often of making a stock myself, but wasn't sure how to tackle it. Seeing your post gives me ideas. I like the use of the workmate bench.
I used to use zebra wood to make recurve bows, and, yes it is very hard wood, BUT, in my experience, it was also very brittle, when compared to something like walnut. I am not sure how it will hold up to recoil. Hopefully it will not become an issue.
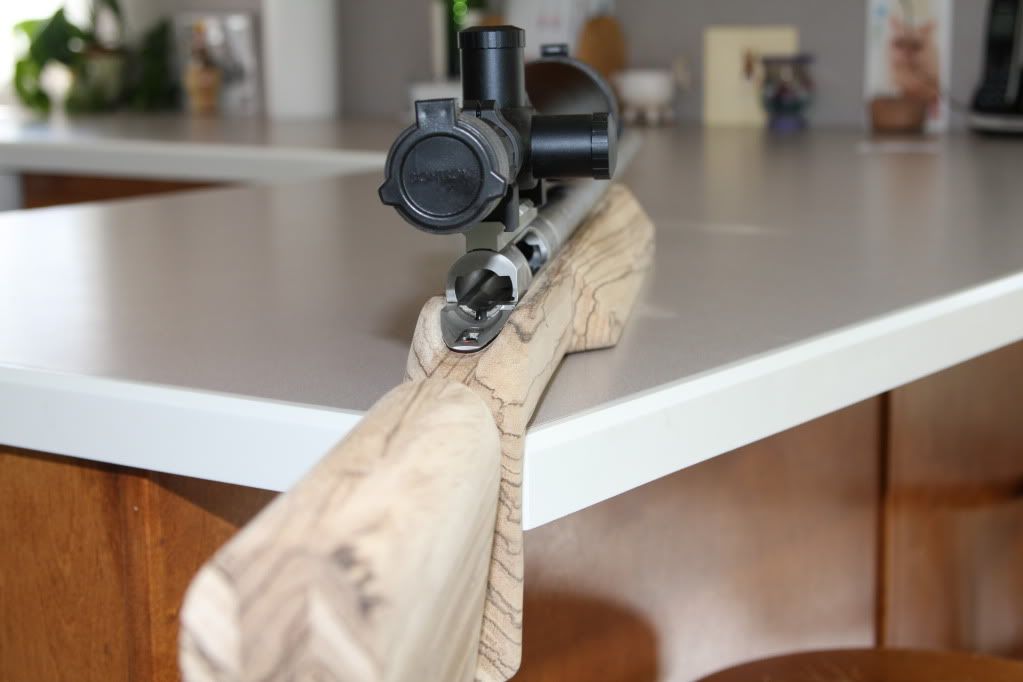
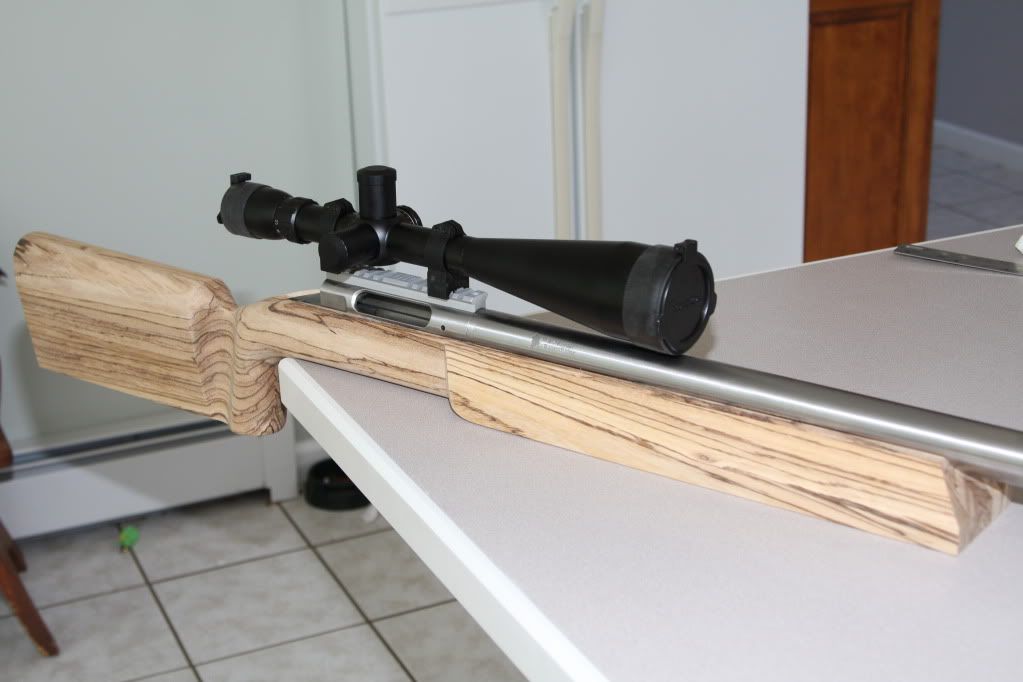
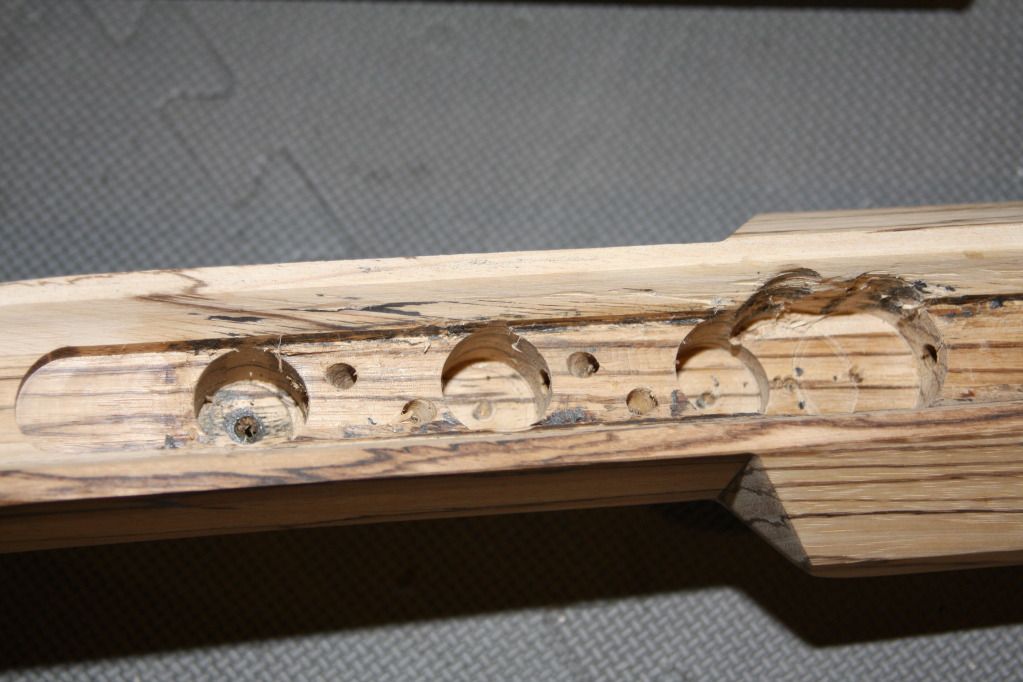
Did a little more work yesterday and this morning. The first zebra wood stock is almost done. I still need to open up the barrel/action channel a little bit more and then do final shaping of the tang area. After that I'll drill the hole for the rear action screw, for proper alignment, and bed the action. Then I'll inlet the trigger guard, trigger area, bolt opening and finish the stock.
All I can say is that zebra wood is some tough, tough, tough wood to work with!
FABULOUS! are you going to sell any of theses?
What bit did you use in your router to make the barrel channel?
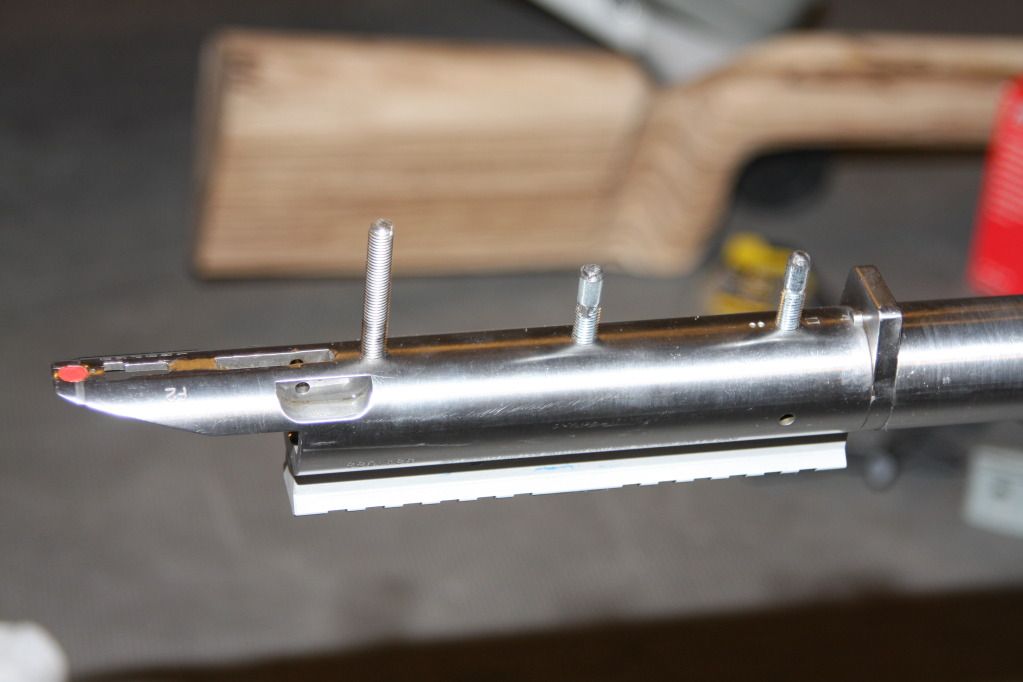
I used a 1 1/4" round and a 1" flat bottom cleanout to take a little extra out down the center. I knew I was going to have to open it up a little more by hand, so using the 1" flat bottom made it much easier. I didn't cut the first or last 2-3" with the flat bottom. I'll try to post a photo later.
Do you need to open it more to suit the target barrel, or the action? Have thought of building my own laminated stock for a hunting rifle, and you have solved a lot of the issues that have entered my mind.
Both barrel and action are just over 1.3" and I used a 1.25" router bit. I needed to open it up a little by hand so the barrel will be free floating and there will be a little extra room for the bedding epoxy under the action. I was going to use a 1.5" bit, but that was a little larger than I wanted to go. I did remove extra wood using a 1" flat bottom bit down the center of the channel, so even with the zebra wood it's not too much work to open it up. I use a piece of pipe wrapped in sandpaper.
Man that stock is sweet I need one for a 110fp how much and I would like one in walnut
You could maybe incorporate another piece of zebra wood laying flat on the bottom of the forearm to stiffen it up
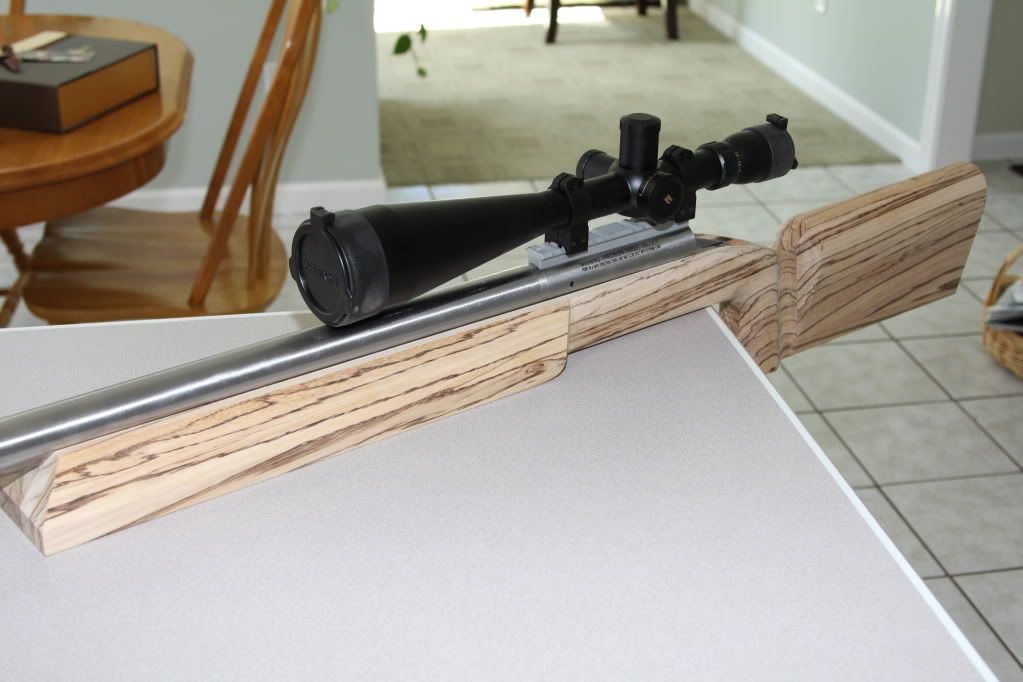
That's a great idea. Luckily, the additional forearm wood seems to have taken care of the problem. I'm going to let it sit and slabilize for a while before applying the finish, but so far so good.

looks really good. :) Are you going to leave the zebra wood natural when finished?
I was leaning towards a natural satin finish, but I haven't decided yet. I'd really like to keep it from ambering, so I might go with a polycrylic. I'll try a few tests on some scrape wood.
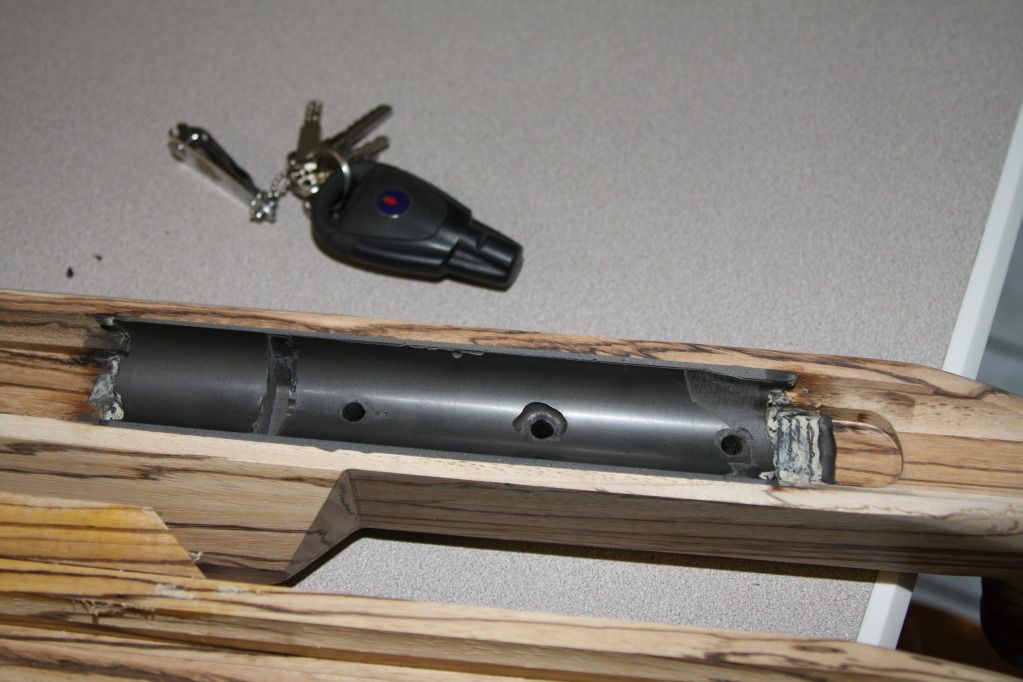
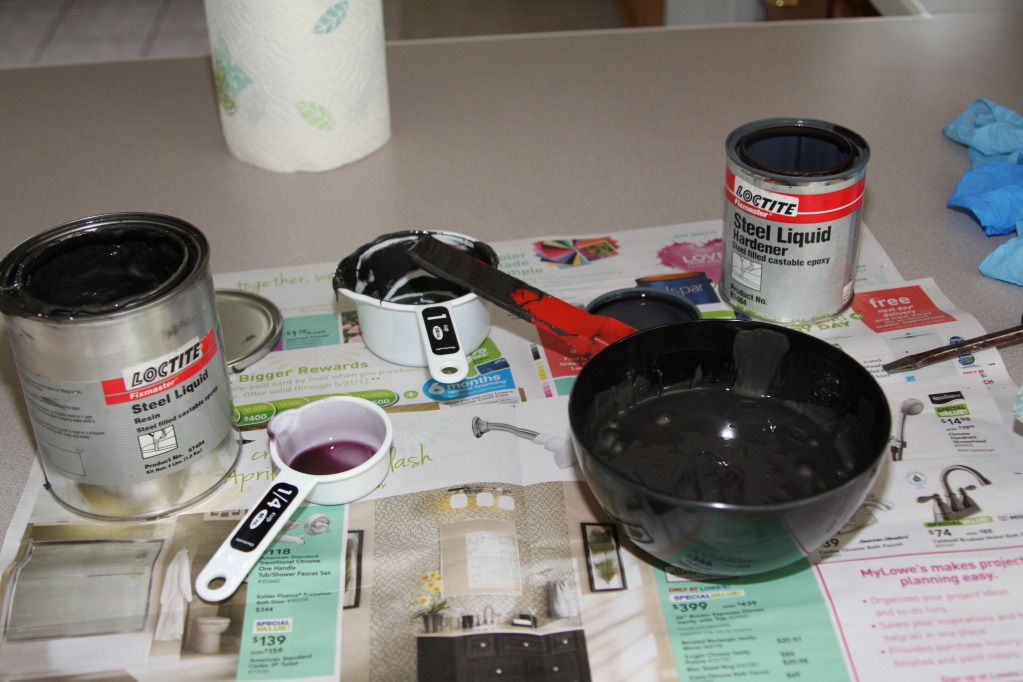
Had a little set back while bedding the action. The steel epoxy didn't setup properly. I might have been off on the ratio or it was a bad batch. I had to dig and drill out the semi hardened epoxy. I'll give it another try in the day or two.
yeah that would really bring out the woodgrain nicely. excellent work :)natural satin finish
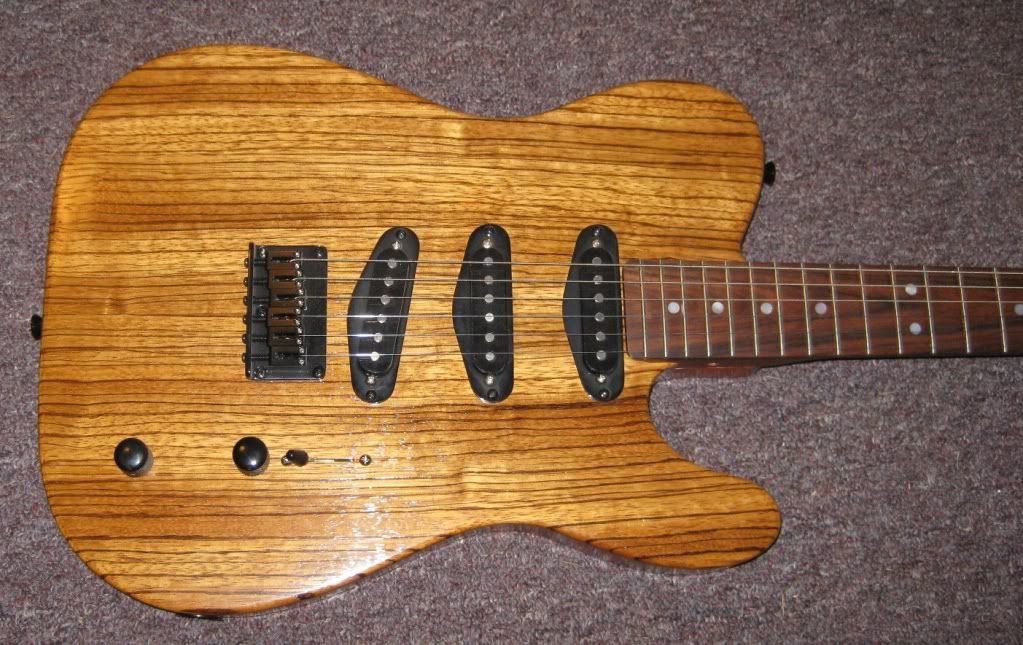
Zebra is tough to work with AND it smells like an outhouse when you work it (my experience anyway). Did a guitar body a while back - turned out nice, but I would worry about it being stable enough for a precision stock even if it is laminated.
That's a great looking Tele too !!
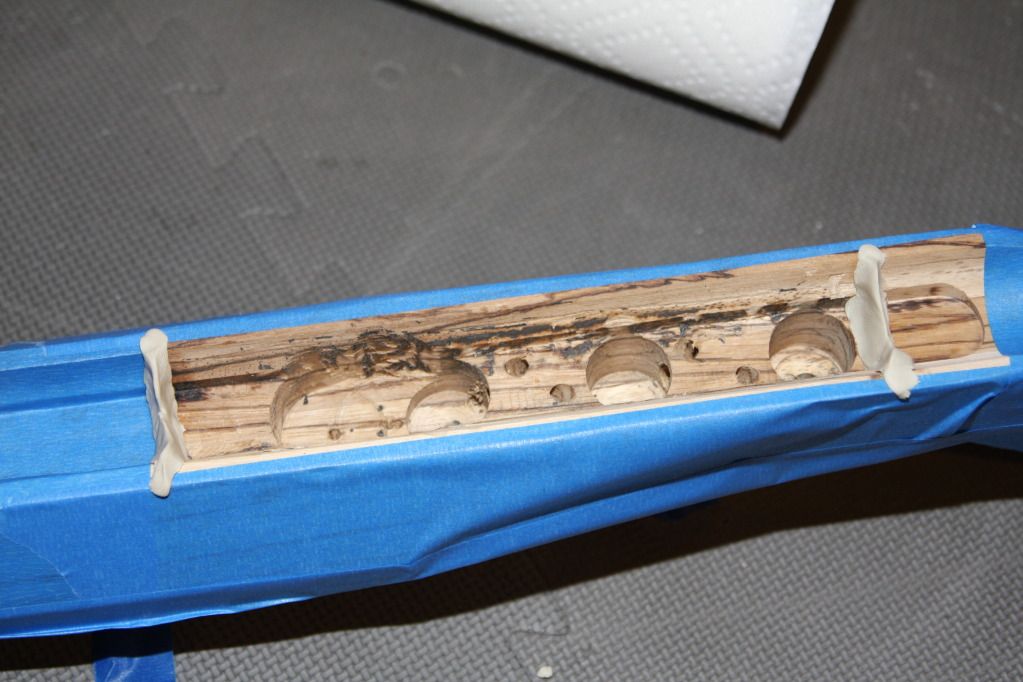
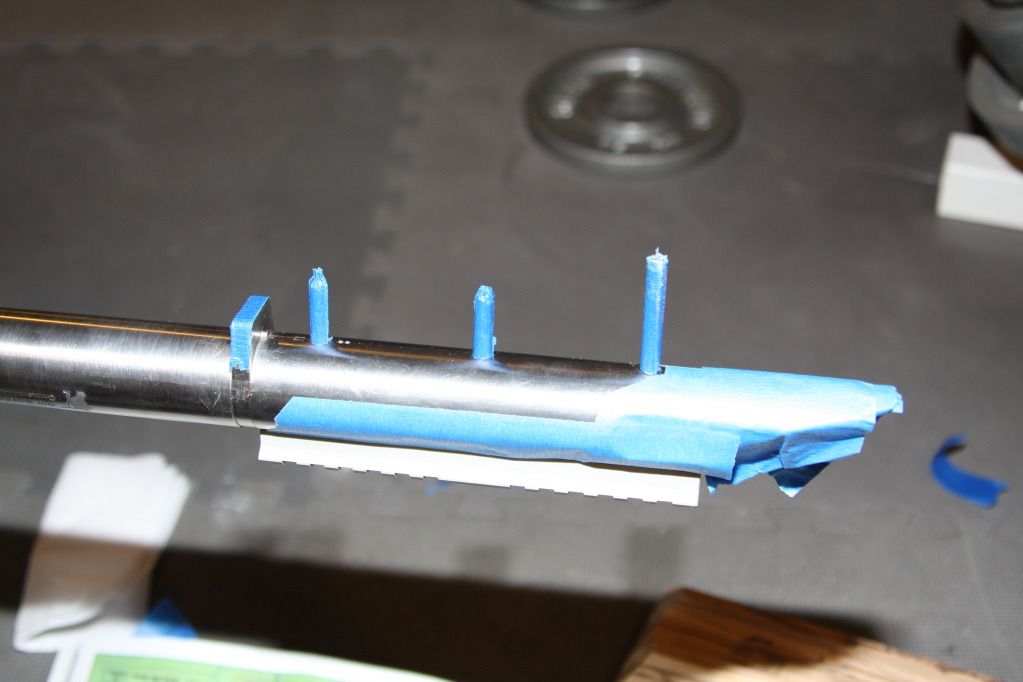
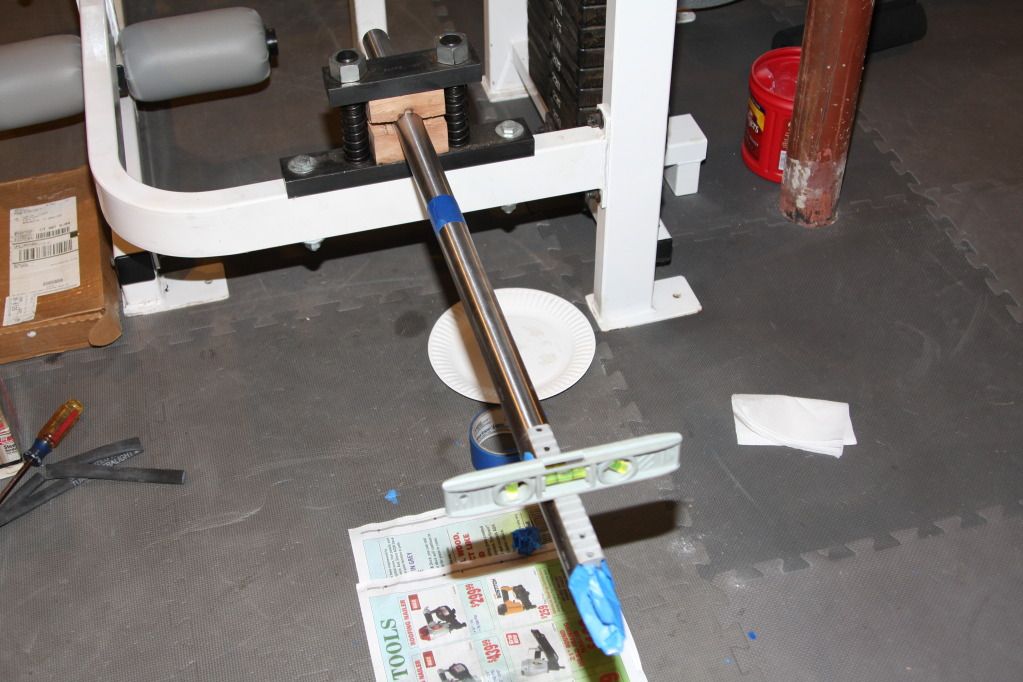
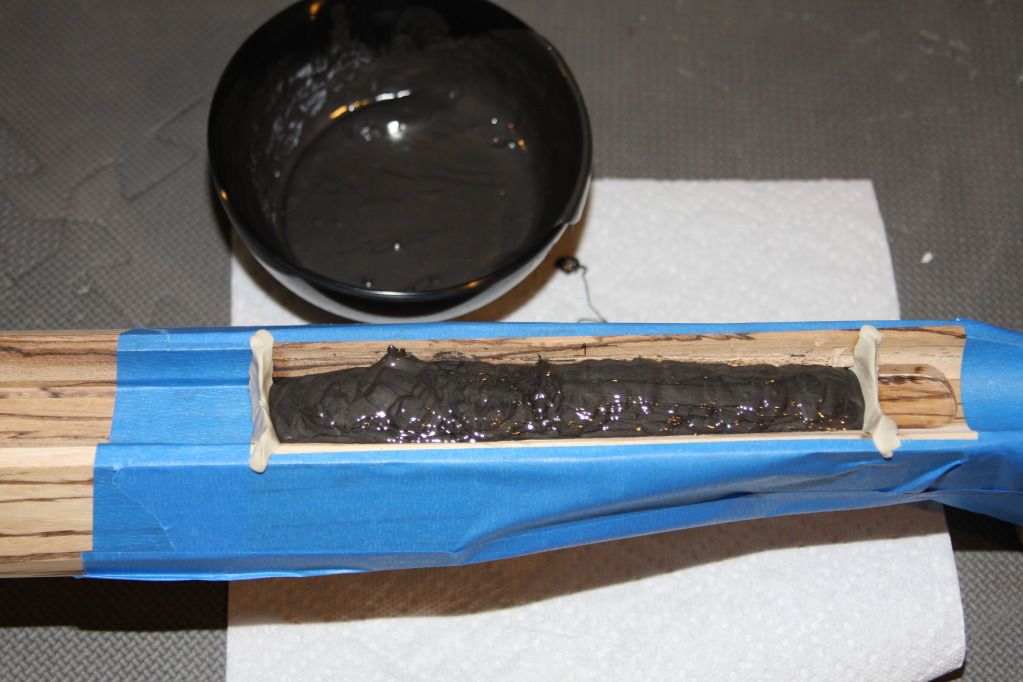
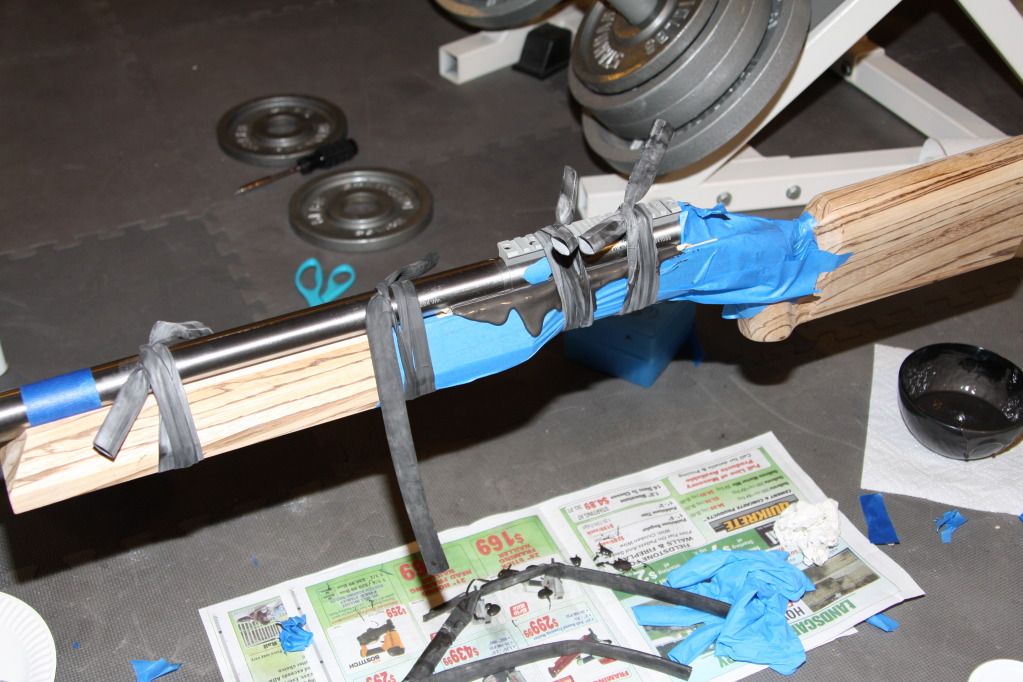
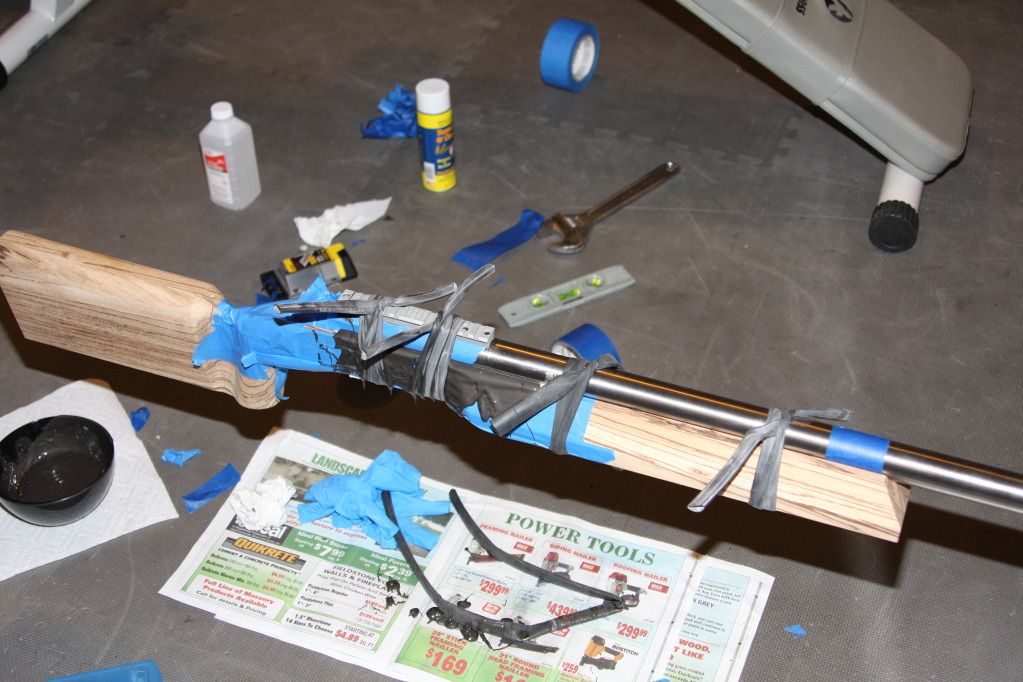
I just finished bedding the action and the first inch or so of the barrel on the first zebra wood stock. This was my second attempt, since the first batch of epoxy didn't setup properly. I did get one small bubble around the center action screw. That was really my fault though, I let the stock slip while wrapping the first inner tube. This pour was a little bigger than I normally do, due to the fact that I had to redrill the pillar holes and around the recoil lug area to dig out the the epoxy that didn't setup properly on my first attempt. I made sure to use measuring cups this time around to make sure my mix ratio was right on the money. I could fill the small void caused by the bubble or skim coat the entire area, but I'll probably leave it as is. The bedding came out great and I hate to mess with it just because of that small void.
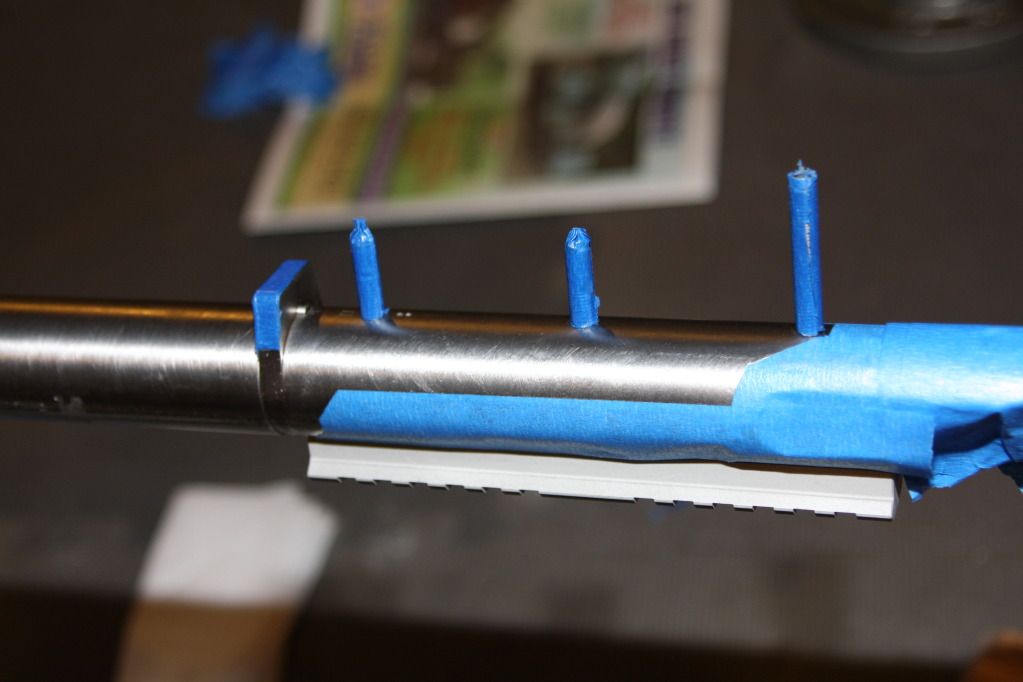
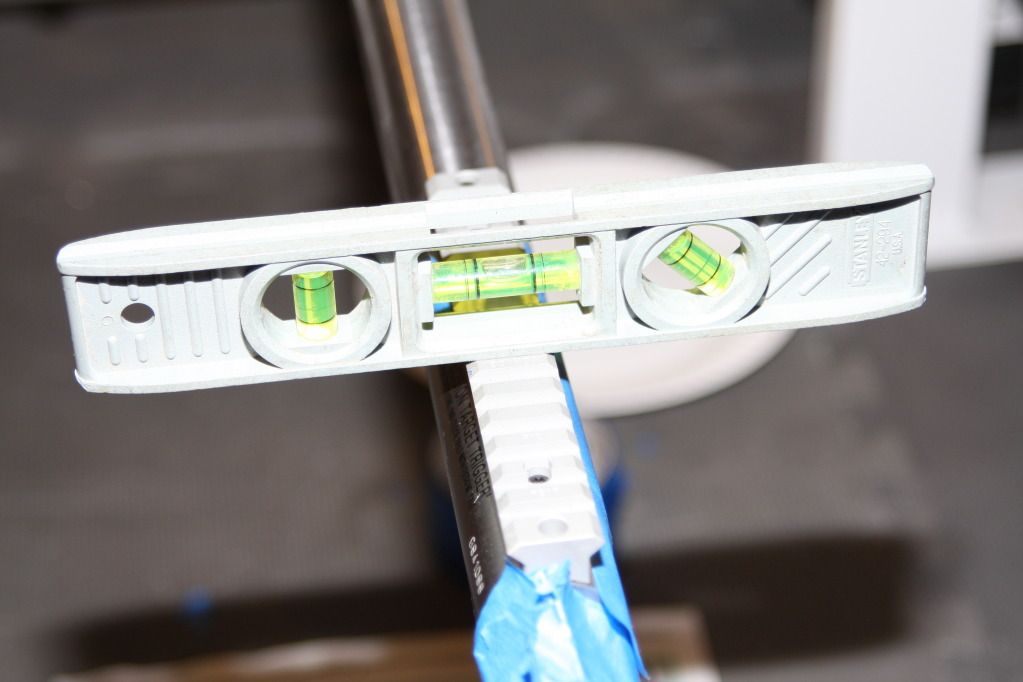
Hopefully the pictures will be enough to show the bedding process I use. I only drill through the rear action hole to help properly align the stock. I drill the holes for the pillars almost all the way through the stock. I will back drill those holes to the epoxy with a Forster bit to ensure my action screws have a flat and solid contact area.
I'm hoping to have my 6" cross slide dill press vise tomorrow, so I can inlet the trigger and trigger guard areas this week. I have not used a drill press vise before for my inlets, but I'm planning to produce a more exact and professional looking inlet this time around. After that I just need to do a final shaping of the tang area, cut the butt to length, install a recoil pad, final sand and the finish the stock.
I can't wait to get this one to the range!!!!!
 Members who have read this thread in the last 1 days: 0
Posting Permissions
Members who have read this thread in the last 1 days: 0
Posting Permissions
The sole purpose of this site is to provide an online community for those who wish to interact with other Savage firearm enthusiasts.
The information and opinions expressed within this site are those of its contributors, and in no way should be viewed as the opinions or recommendations of Savage Arms.
This site utilizes affiliate programs to generate revenue and as such purchasing a product reached by clicking on a link on this site may earn us a small commission on that sale.

Bookmarks